Showing posts with label Siege. Show all posts

Friday, October 18, 2024

TurnipDayX: The Wretched War narrative event

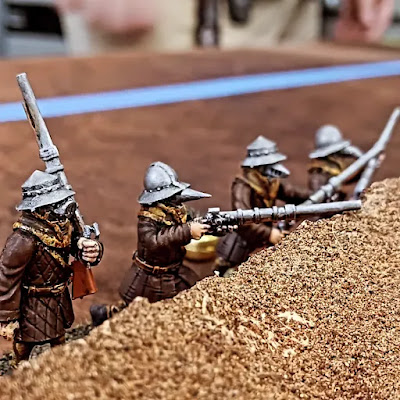
TurnipDayX: The Wretched War was a narrative Turnip28 event depicting the war between the cities of Sallow and Gerpe. There were 10 participants. Before the first round, everyone drew a 'Norbert' coin (3D printed Turnip28 currency) from a cup. If the coin had a yellow crown, that player's regiment was hired by the city of Sallow. If the crown was red, they were hired by Gerpe. 


Each table had a different scenario, and each table corresponded to a location on the campaign map. During the round, every six minutes, one of 2 "Great Captains of the Wretched War" would appear and act as an extra Toff for Sallow or Gerpe. These Captains had mutations from the Taster Campaign book. I created unique models for each of these special characters. 


In the second round, the player's are assigned to new locations ("redeployed"), but the War become stagnant, and both sides have entrenched, so each player got to place an additional 12" of cover on thier side of the board. The Captains continued to tour the frontlines. After 2 rounds, the Gerpe army had won 6 games and Sallow 4, so Gerpe broke through and set siege to Sallow itself.


This final game was five games of the 'Into the Breach' played shoulder to shoulder, with the walls making a continuous line of terrain 15 feet long. In this game, the Gerpe Army overran the walls 4 games to 1 and proclaimed, "Sallow had fallen."


Grand Toff trophy went to player winning most games and siezing most objectives. 


Snob Slayer went to player who removed most enemy Snobs. This was actually a tie, so the two players had to toff off to decide the matter. 


Bravest Snob trophy went to player with lowest Grand Toff score. 


Everyone got 3 figures from a pile of Perry sprues, with Snob Slayer getting 6 and Bravest Toff got 12 (b/c clearly they need new recruits).

Wednesday, May 26, 2021

Siege of Newark (July 8 - August 3,1643) - ECW Lincolnshire Campaign Game #4

At Carlton Scroop, Lord Willoughby had successfully secured southern Lincolnshire for Parliament, making London secure from a thrust by Newcastle's northern Royalist army.  Unfortunately, Lord Willoughby had died at the head of a Lincolnshire trained band at Carlton Scroop, making that his third and final victory.  Sir John Meldrum, a veteran who had served abroad as a colonel for the Swedish king, assumed command of the Parliament forces.

It was Parliament's move on the campaign board, and they easily advanced into a battle square, meaning that they would be the attackers in the next battle.  Because Parliament had now won 3 out of the 3 battles played so far, and narratively I had determined that they had secured all of Kesteven, it was a good fit that they would try something dramatic, like making an attempt to capture the Royalist regional stronghold at Newark.  And if you are going to fight a battle over a town, a siege is the next logical step!

Initial set-up from the night before the game. At this point I was still going to use both battalias and commanded shot. Day-of the game, I switched to commanded shot only.

The randomized set-up for a siege was outlined in the previous post, but because this was the first attempt, I simply allocated six units of commanded shot, two heavy guns, and a light gun to Parliament, and gave the Royalist defenders 3 units of commanded shot, one heavy gun, and one light gun. The SP for each side was totaled up and because the Royalists started with 10 SP less, they received 10 sections of earthworks at the start of the game representing defenses already prepared.

The view from behind the Newark walls as Meldum's Parliament army encircles the town...

Turn sequence is as in The Portable Pike & Shot Wargame, in that each turn initiative is determined randomly, then both sides resolve a simultaneous artillery phase, then the initiative winner moves or initiates attacks with their non-artillery units, and then the subsequent player does the same.  In the siege rules a turn represents a day's activity. I decided to use a deck of cards to determine initiative each turn, because each card drawn represents a day, so the total number of cards drawn was an easy way to determine how long the siege had been carrying on.

First saps, indicted by a single stand from a given unit moving out into an adjacent square.

Because the besieger's back line is deemed out of range of all artillery, this meant that the first turn was essentially uncontested sapping. Parliament had every unit sap forward one square to establish a back line from which to securely move forward. The Royalists extended their earthworks one square to the left and right each, eliminating that last open line of sights to the fragile medieval town walls.

First saps successfully dug! The first entrenchments are built by Parliament, and the Royalists extend their defenses before the town in each direction.

Thereafter followed what was probably the most lively part of the game, with Parliament sapping forward to bring their guns into close range of the defensive earthworks, while the Royalists launched sallies against Parliament sappers, who were also occasionally targets of Royalist artillery fire. 

Day 10 or thereabouts (based on number of cards flipped).

All of this artillery fire and sallies meant that both sides began to accumulate lost SPs.  Parliament could "afford" to lose 12 and the Royalists 6.  As you can see, Parliament rather aggressively sapped quite close to the defensive ring on, and the Royalists attempted to construct a second "bump out" for a gun emplacement.

Parliament commanded shot (with 2 out of 3 SPs already lost) shelter in the trenches.

The accumulated lost SP was bad enough for the Royalists that they began to move infantry out of the outer ring and into the town itself so as to not be subject to artillery fire.  Sallies ceased altogther.

The Royalist heavy gun plugs away at ever-closer Parliament saps.

Parliament finally got its act together and stopped pointless and costly infantry sapping on the flanks, and dug two gun emplacements side-by-side within short range of both the town walls and the earthworks in front of them - a concentrated and devastating barrage of the earthworks began.

In forward right of the Parliament besiegers 'works, you can see the two heavy guns now in place.

At close range (5 grid squares or less), the base to-hit for heavy artillery is 5+.  If fire is accurate, a d6 is rolled for effect: on 1-3, 2 SP are deducted from the earthwork's 30 SP in structural strength, but on 4-6, a 1d6 is rolled and that is deducted instead (technically this creates a weird probability spread with 2 SP being the better than 50% likely result).  Once two heavy guns were targeting the same earthwork section, it took just a few days to completely destroy it.

Sir John Meldrum oversees the bombardment of the earthworks.

With the extra +1 to hit from Parliament commander Sir John Meldrum personally overseeing this bombardment, the outer earthworks were finally breached.


Unfortunately, in the very same artillery phase that the earthworks were breached, Royalist artillery (which had already complete destroyed one of the Parliament heavy guns) scored a final hit on Parliament infantry which pushed total lost to SP to 50%, which meant that Parliament abandoned the siege before bombardment of the inner defenses could begin.  The siege was lifted and the Royalists pick up their first win in the campaign. 

End of game, with the outer ring of defenses breached but bombardment of inner ring never even started.

Also endgame but from behind defenses.

The loss of 50% SP for either side serving for either lifting the siege or surrendering worked well as a simple composite abstraction for the food, ammunition, and morale factors as well as lost casualties. Early aggressive, or even reckless, sapping by the besiegers and multiple sallies and raids by the besieged gave way later on to both sides hunkered down while the heavy guns traded shots.

Royalist light dealing the game winning volley.

Both attacker and defender were therefore probably far too aggressive early on with sapping and raids, with Parliament in particular wasting a lot of manpower resources in sapping forward in two prongs, when the most effective sapping strategy is to create two or three contiguous earthwork sections within short range of both inner and outer defensive rings where all artillery can concentrate fire at same point.

Another view from the walls.

This raises another possible endgame (possibly less interesting to play), where both sides focus first on using artillery to (successfully) destroy the other side's artillery.  After all, if the besiegers can't create a breach, the game is basically over.  And if the defenders cannot harass the besiegers with their own artillery, they will be in desperate stakes as their only remaining option to wait for the storming attempt or to launch risky sallies.

Parliament besiegers waiting for the breach to be created from the safety of trenches at the rear. 

A simple solution might be that a gun can lose 1 SP to artillery fire, but to score the 2nd SP and destroy it, a sally or raid must be launched (to spike the gun), or the emplacement (earthwork or wall) must be completely destroyed while the gun is co-located therein.

Parliament troops, almost in musket range of the town walls.

Victorious defenders.

Exhausted besiegers prepare to withdraw.

On the Lincolnshire campaign board, the unsuccessful 26-day siege of Newark put an end to the Parliament string of victories.  The Royalists roll a 3 and Parliament rolls a 1 and both advance accordingly. 


The Royalists then roll a 6 and move to and stop on the next battle square - they will be on the offensive on the next battle!


Blue: Parliament victories. Red: Royalist victories.

Thursday, May 20, 2021

Siege Rules for English Civil War Using The Portable Pike & Shot Wargame

1. SET UP

Battalia: SP 4. Move 2. Weapon range 2 (-1 to hit at 2 squares, however)
Commanded Shot: SP 3. Move 2. Weapon range 2
Heavy Artillery: SP 2. Move 2. Weapon range 8
Light Artillery: SP 2. Move 2. Weapon range 5

Decide if the town besieged has walls or not. If running a historical-based campaign you can usually figure out with a little research whether there were walls or not.  Next, using your army-size randomizer, roll up the attackers force, but perhaps add an additional +1 to battalias and commanded shot, and ignore cavalry altogether.  The attacker should have a minimum of two heavy artillery pieces, but probably a max of 3 or 4.  The defender's infantry is simply half of the attackers. The defender should have a minimum of one heavy artillery piece and the defender's total artillery pieces should never exceed the attacker's total.  The defenders total SP for infantry should be half of the attackers. The defender receives one grid side's of earthworks for each point of SP it does not have in infantry (so if the attacker has 20 SP in infantry, the defender will have 10 SP in infantry and 10 grid-sides of earthworks).  These earthworks represent defenses the defender prepared prior to the siege, and these may be placed as follows: in the row of grids squares adjacent and parallel to the town wall (or the edge of the town buildings if there is no wall). They may also "bump out" into the next row of squares (such that they will be two grid squares from the town wall) as long as they form a continuous row of earthworks back to the first row closer to the town wall. In other words, "bumping out" the earthworks will bring heavy artillery in closer range of the besiegers but will shorten the overall length of the earthworks.

The defender may then place his infantry and guns anywhere behind his defenses.

The attacker places all his guns and infantry on his closest back line.

It may also be easier to simply give the attacker 2/3rds of your collection's infantry units, and give the defender the remaining 1/3rd. 

2. INITIATIVE

Attacker goes first in the first turn. Thereafter, dice for initiative on each subsequent turn. A turn represents a day's activity, roughly.

3. ARTILLERY PHASE. 

The attacker's back line is always out of range, and artillery may not fire in or out of that line of grid squares.

Heavy artillery has a close range of 5 and a long range of 8. Light artillery has a close range of 5 only, but is less effective against fortifications. A gun may not target a town wall if the line of sight is obstructed by an earthwork - it must reduce the earthwork first. At long range, artillery fire is only effective and counts as a "hit" on a natural roll of 6. At short range, a roll of 5+ is effective. A gun may not fire if was moved the previous turn.  Modifiers to hit are as follows: +1 if gun is shooting at same target as previous turn.  

Unless playing out the storming of a breach (see below) or an especially prolonged Sally (see also below), siege artillery fire is focused on the destruction of earthworks and walls. A town wall section has 10 SP.  An earthwork has 30 SP.

If a fortification is hit by heavy artillery, roll a d6 to determine effect: 1-3: 1 SP damage; 4-6: 1d6 SP damage.

If a fortification is hit by light artillery, roll a d6 to determine effect: 1-3: 1 SP damage; 4-6: 2 SP damage.

When an earthwork or wall is reduced to 0 SP, it is removed or replaced with a breach marker. Defenders may build a barricade in its place (see below), which cannot be destroyed by artillery fire, but only counts as cover for any defending units and takes 2 movement to cross, as per a regular game of The Portable Pike & Shot.

4. MOVEMENT

Infantry units may move 2 squares per turn. Artillery may move 2 square as well, unless a storming of breach or sally action is underway, in which case heavy artillery does not move (although it may be rotated), and light artillery pieces may be moved 2 squares.  If a unit crosses its own earthworks to leave a square, there is no movement penalty.  If a unit must cross enemy earthworks to enter a square, it costs 2 movement instead of 1. The exception to this is if a close combat has occurred, and the enemy defending the earthwork has retreated, the attacker may move across the earthwork at that time.

5. SAPPING

If unit has not moved yet, it may be instructed to dig new earthworks in an adjacent square, so long as this forms a continuous line of adjacent squares with earthworks. The exception to this is if the unit is in the attacker's back line. Move the unit into the square being sapped, and arrange it or add a marker to indicate that it is digging.  Assuming the unit does not retreat as a result of a Sally (see below) or from defensive fire (see below), at the beginning of the next turn, a new earth work can be placed on one side of the grid square. 

If it is desired to have more than one side of a grid fortified with earthworks, then an additional turn of sapping is required for each turn (so making a 'L' corner will take two turns, and making a 'U' shape will take 3). Since the first piece of earthwork presumably faces toward the enemy, this means that a Sally on a unit sapping a second length of earthwork in the same square will be at -1 as the sapping unit is in cover of its already constructed works.

The besieger may also have units construct ladders for escalade for use during a Storming attempt (see below), one ladder for one unit in one turn, using same principle as sapping (i.e., it may not move that turn, and assuming it is not disrupted by a Sally attack - although if it partakes in counter-attacks to a Sally the ladder is not completed).

The besieged may dig new entrenchment extensions of their existing defenses using the same rules. A unit working on new entrenchments is subject to artillery fire. 

Either side may attempt to repair damage to earthworks or town walls.  In doing so the unit is exposed to artillery fire although the artillery is -1 to hit from partial cover from undamaged fortifications, or from working at night.  If the unit is not forced to retreat from artillery fire, the fortification section recovers 2 SP.  Repairs may be effective at first but will probably quickly become a lost cause.

6. ARTILLERY FIRE AT SAPPING UNITS

 A gun may target a unit that is sapping.  However, it is -1 to hit as the sappers use the existing earthworks they are sapping from for cover, and it is also -1 to hit if the sappers are digging from the starting back line. If hit, roll a d6 for effect (same for light and heavy artillery): 1-3: intense fire drives sappers back, and new earthwork is not constructed; 4-6: new earthwork section completed but sapping unit loses 1 SP.

7. SALLIES

The defender may launch Sallies at sappers or entrenched guns during their turn.  A Sallying unit may move 4 square on its first turn, representing the element of surprise.  If attacking a Sapping unit, fight the close combat as if a regular game. Sallies count as "turns-within-turns," so after all Sallying units have resolved their attacks, the besiegers may have a turn to use artillery fire (not against fortifications, but against units or other artillery as per usual field battle game - artillery will retreat if required, which represents the crew withdrawing to other cover), move, counterattack or shoot back as they so wish. The Sallying player then falls back, and is returned to its defenses.   

Attacks against units behind earthworks are -1 as the unit is in cover. Artillery fire during a Sally against units in cover will therefore probably be a 6 to hit only. A Sallying unit may opt to move into musket range and make a shooting attack instead of close combat. Close combats may be continued via moving into empty squares if the other unit has retreated per the regular rules. If a Sapping unit is forced to retreat from a Sally, it moves into an adjacent square that has earthworks, and the new earthwork section is not completed.

The besiegers may also launch sallies (raids) at entrenched gun positions or sapping defenders but not other infantry units.  Sapping by defenders is therefore very risky once in range of sallies.  Infantry units who are not sapping are considered on guard and cannot be taken by surprise. 

8. STORMING A BREACH

Storming a Breach is the endgame of a siege game.  Once started, a regular game can be thought of as starting. A breach in earthworks may only be stormed if there are no town walls.  An attacker's unit, which must start positioned in a straight line from the breach, is designated as the storming party/forlorn hope.  This unit may move 4 squares to initiate the storm but can move only up to the square adjacent to the breach. It may attack any defenders in the breached grid square.  

Other besieger units may support the attack but can only move two grid squares. Such units may carry ladders and attempt to escalade the walls. Escalading is considered an attack against an enemy in cover. If no enemy unit in the defending wall square, on the following turn, the escalading unit may be placed on the wall (similar to crossing an obstacle). This is why creating more than one breach in the outer earthworks of the town is advantageous.

9. ENDING A GAME

There is no separate exhaustion and breaking points as in a regular field battle game. 

The town defenders will surrender if they have lost 60% of their starting infantry SP.

The besieging attackers will give up and leave if they have lost 50% of their starting infantry SP.

An attempt to take the town by Storming a breach will end when:

A. The designated Storming Party/Forlorn Hope unit has successfully moved through the breached square and into the town - the besieger wins the game. If a second attacking unit successfully escalades a wall and moves into the town center before the Forlorn Hope carries the breach, the besieger wins the game. If another attacking unit moves through the breach and into the town center (presumably because the Storming Party has cleared the way), the besieger wins the game. Once an attacker moves into the town squares, the game is instantly over.

B. If at the end of either player's turn, the designated Storming Party/Forlorn Hope unit is completely destroyed, and no attacking unit is adjacent to the breach in the town wall, and a defending unit is occupying the breach square, and no attacking units have successfully escaladed and are on the walls, then the defenders have held the walls, and storm has failed - the besieged have won the game. 

C. If a side reaches 60% or 50% losses as described above during a Storming action, finish the player's current turn in progress to see if the conditions of (A) or (B) are met. If neither are met, the defenders will surrender or the attackers will lose their resolve as described above. If both are met in the same turn, victory defaults to the defender and the siege is lifted.

NOTES:

  • I wrote these up because I felt like the Lincolnshire campaign needed an attempt to take the Royalist stronghold of Newark, and since the siege rules as presented in the The Portable Pike & Shot Wargame felt a little incomplete, I decided to pinch a little from both Portable Pike & Shot and my earlier experiment with siege rules for the Italian Wars, each and came up with the above.
  • As far as the logistical considerations from the Italian Wars rules, such as food and ammunition, are fun, in terms of making a game, I do not want an option for the attacker to simply starve the defender out.  The logistical rules also seemed to have little impact or not add much value to the game. 
  • Hopefully, defender artillery fire and Sallies create pressure on the attacker to bring heavy guns into close range as quickly as possible to create at least one breach and initiate a storm while having lost as few SPs as possible. However, if attacker is too aggressive, an attack on a single breach may create a bottle neck and advantage in superior numbers may be blunted. Defender risks being understrength if Sallies are too aggressive, but cannot afford to let attacker Sap at will. 

This is the 150th post. Thanks for reading!

Tuesday, June 23, 2020

Siege of Novarra (1500)

Initial setup.
In 1500, Ludivico Sforza raised an army of Swiss mercenaries and sought to reclaim the Duchy of Milan from the French.  After taking Milan he moved west and besieged the French garrison at Novarra, which was commanded by Yves d'Allegre (who would die at Ravenna years later).  A year or so ago I started building modular city walls, towers, and a gate, for English Civil War games, maybe (I don't think I had anything in particular in mind)?  I had asked Pete if he wanted to come over for a in-person game and he suggested an Italian Wars game. I started trying to find a suitable battle to re-create and noticed the numerous sieges and figured it was time to give a siege game a try.  I had long been aware of The Perfect Captain's Seige! rules/board game for their Spanish Fury! family of rules, and after perusing those, decided I could make a nice miniature tabletop/board game hybrid with them.

Week 2
The concept here is a game in two parts: (1) a resource management game which includes gridded movement and abstracted  Lion Rampant shooting attacks (artillery bombardments) and melees (sorties by the besieged) that concludes with (2) a final assault on a breach by the besiegers using the regular Lion Rampant rules.  Units suffer casualties throughout the abstracted first part of the game, which impacts the final assault in the second part.   

Week 2
As you can see, I used gravel to mark out a grid in front of the city. There are five wall sections, each of which includes the 8" or so directly in front of the wall.  Then there are three "rings" of five areas each extending out and away from the wall sections: inner, middle, and outer.  The wall sections and outer ring are out of artillery range from each other.  There are two villages in the outer ring. There are also two box lids on a side table, one of which represents the besieger's outrider patrols, and the other represents the besieged relief forces or raiders. Each area is approximately 1' square.  A turn is  one week.

Week 2
Each turn the besieger can have his engineers construct trenches or forts. A trench section cannot be built unless it is adjacent to existing trench area, except in the outer ring (which is out of artillery range).  So on the first turn Sforza (Pete) built trenches in all five areas of the outer ring.  In the second week he began to sap forward into the middle ring.

Week 2
Bombardments had a range of two squares. If two squares (for example, from a city wall section to the middle ring) the gun rolled 9 dice hitting on 5+.  If one square, it was 12 dice at 4+.  Trenches increased stamina by 1, forts and city walls by 2 (to a maximum of 4). Because this was abstracted and represented sustained bombardment over a week, for the expenditure of one precious powder point, the firing gun could resolve a shooting attack against every unit in the target area.

Week 3
Wall sections had 5 "wall points" each. Expending a powder point to bombard a wall section automatically reduced the wall point by 1 in addition to executing a shooting attack against all units in that wall section.
Week 3
The French could sortie out from the town walls to disrupt trench building efforts or to try and cause casualties amongst Sforza's army.  The French would place units in the area they were attacking via a sortie.  Then Sforza could try and send rescue parties from the troops billeted in the villages.  It is easier to come to the rescue if the sortie is in the outer ring than it is in the inner ring, although there are modifiers. The sortie combat was an abtracted form of Lion Rampant - each sortie unit simply chose to execute a melee or shooting attack against a besieger unit of their choice. Then the besieger could choose to counter attack if they wanted.  Then all units returned to their starting areas. Units could not be routed if failing a courage test (this is abstracted and over the course of a week, after all). 

Week 3
There were two sorties during the game. the first was during week 2 and saw the city forces drive off some engineers in the middle ring.

Week 3

Week 3

Week 3
The second sortie was in week 3 and saw almost the entire garrison attack Sforza's forward trenches. Pete rolled exactly what was needed to and large rescue forces arrived to assist with both sorties.  As a result, the French took the worse of it, especially their precious Landsknecht troops who would end up being useless in the defense of the eventual breach.

Week 3: an aggressive, desperate French sortie

Week 4: Wall is breached.
In week 4, Sforza upgraded his forward trenches to forts and breached the wall.

Week 4
Then Sforza emptied the camps and villages and massed his army in the forward forts and trenches for the final assault on the breach.

Week 4: Massing for assault on the breach.
However, the French finally rolled for additional supplies, and because Sforza's troops did not have a complete cordon across the table, two cavalry units from the exterior off table area were able to run an additional powder point into the city!

Massing
Each wall section has an integral "wall gun" that cannot be moved and can only fire into the inner ring. Firing these wall guns costs a powder point just like the "normal" guns (the normal guns can also be moved to different sections of the walls).  With the arrival of the extra powder point, the French were able to unleash 3 bombardments on the massed troops in the forward forts! Keep in mind that as this is abstracted, that meant that each separate gun got to execute an individual shooting action on all four to six units in the fort the gun was targeting.  As a result, none or almost none of Sforza's units at the start of the assault phase were at full stamina points.

Massing
The assault part of the game was played as a "regular" Lion Rampant melee.  Play would continue until either side had lost half of their starting units on table (so units in off table areas did not count).  the arrival of the French cavalry meant the French had to lose 4 and Sforza's army had to lose 6.

Assault underway
Landsknecht doppelsoldners initially attempted to hold the gap, but were easily pushed aside by the Swiss.  French crossbows and archers poured missile fire down from the walls  and towers on each side of the breach.  But with both Landsknecht pike units in poor shape (9 and 6 casualties respectively!), the French gendarmes and "archer" cavalry had to sally out to wreck has much havoc as possible.
Gendarmes sally out.
And havoc they did wreak, as the French were able to destroy 4 Sforza units! However, almost as quickly, the French cavalry was gone and the loss of an additional unit left the French 1 unit away from defeat.

Swiss carrying the breach.
Many of Sforza's units were weakened, so as the French player I felt I had no choice to be aggressive. Units continued to counter attack in the breach, but finally the last unit fell, ending the game with Sforza's carrying the city.

French archers on the walls.

Gascon crossbowmen on the walls.

Endgame or close to it.
In history, Novarra surrendered to Sforza after 21 days. A few weeks later his Swiss refused to fight against a French army that also contained Swiss mercenaries (this is sometimes identified as the Battle of Novarra (1500), not to be confused with another Battle of Novarra in 1513 featuring another Sforza!).  Sforza tried to sneak out disguised as a Swiss soldier but was betrayed to the French for 200 gold coins (about five years wages for a mercenary).  When the traitor returned to Switzerland some years later he was identified and beheaded.

There was quite a lengthy post-game chat as we tried to puzzle out some of the things that did not work. 

  • Although strategic decisions about use of powder were tense (both sides finished the game with no powder left, and the last minute arrival of extra powder for the French made the final assault less of a sure thing), the relationship between remaining food, besieging troops sleeping in the trenches, and resulting attrition was flimsy and inconsistent. The Spanish Fury! rules require the besieged to take Attrition tests (which I translated into a Rally test, teh failure of which caused said unit to lose one stamina point, reflecting loss of men from deserters, disease, starvation, or exposure) on any turn there were 6 or less Victual points remaining (both sides started with 7).  This ended up with the French taking a "Rally" test every turn except the first for every unit in the city!  Per Spanish Fury!, the besieger must take Attrition tests based on the number of units in an area exceeding the billet factor (usually a base of 1, increased to 2 if trenches added, increased to 3 if a fort added).  Seeing as Pete was fine with limiting the number of units to 2 per trench the besiegers thus never took an Attrition test, unless a unit had acquired a disorder marker from a Bombardment or Sortie. This felt unbalanced and needs to be made clearer.
  • Sorties need some clarification.  The besiegers getting an attack and then the besieged getting a counter-attack makes sense but what about the rescue forces for the besiegers? Do they get benefit of entrenchment bonus to stamina?  How does cavalry fit in?
  • The odds for getting reinforcements, whether additional provisions or troops, needs to be increased slightly.  Both sides were slightly counting on getting maybe a unit or two more but none were received at all.
  • If relief forces run supplies into the city, can they return to the exterior areas?
  • The final assault part of the game needs more clarification and possible changes.  I think all the gun models should simply be removed from play when this part begins - they have shot many many more times than they typically do in my usual field battle Lion Rampant games, and in the assault segment they just cluttered already crowded spaces.  Again, the role of cavalry needs to be addressed - French gendarmes and Spanish ginettes fighting over a breach in a city wall during a siege did not feel right.  Some better definitions about set-up for the assault segment might help a lot. I'm thinking that abstracted movement may help as well (Lion Rampant does work well on a grid, after all!)
  • On review, the original Spanish Fury rules contemplate that each ring has 10 areas instead of 5.  But it also only have 5 wall sections.  10 areas per ring is not really possible in my current set up, but I think that this means that the besieger in my game was doing half the work for the same payoff compared what the Spanish Fury rules envisioned (it takes half as many troops to cordon the city, half the engineers/time to trench complete across the board, and troops only have to cover half the territory).  Furthermore, the villages are supposed to separate areas outside the outer ring and not part of the outer ring - this made establishing the cordon even easier.
In the end though, this hybrid of a miniatures game and a board game, was a visual treat and also a great combination of strategic thinking and resource management on top of crunchy combat rules and considerations for troop types. We will certainly be revisiting this!