Put together a play-test on Friday of a English Civil War Lion Rampant variant. Each side had 28 points, giving each two units of muskets (12 figures each), a unit of pike (12 figures), two units of cavalry ("trotters" or "gallopers", 6 figures per unit), and a light gun. Unit profiles used are at the bottom of this post (they themselves draw from the ECW and Elizabethan variants I found on the LR forums). We used endgame criteria and set-up as in Scenario A of the Lion Rampant rulebook.
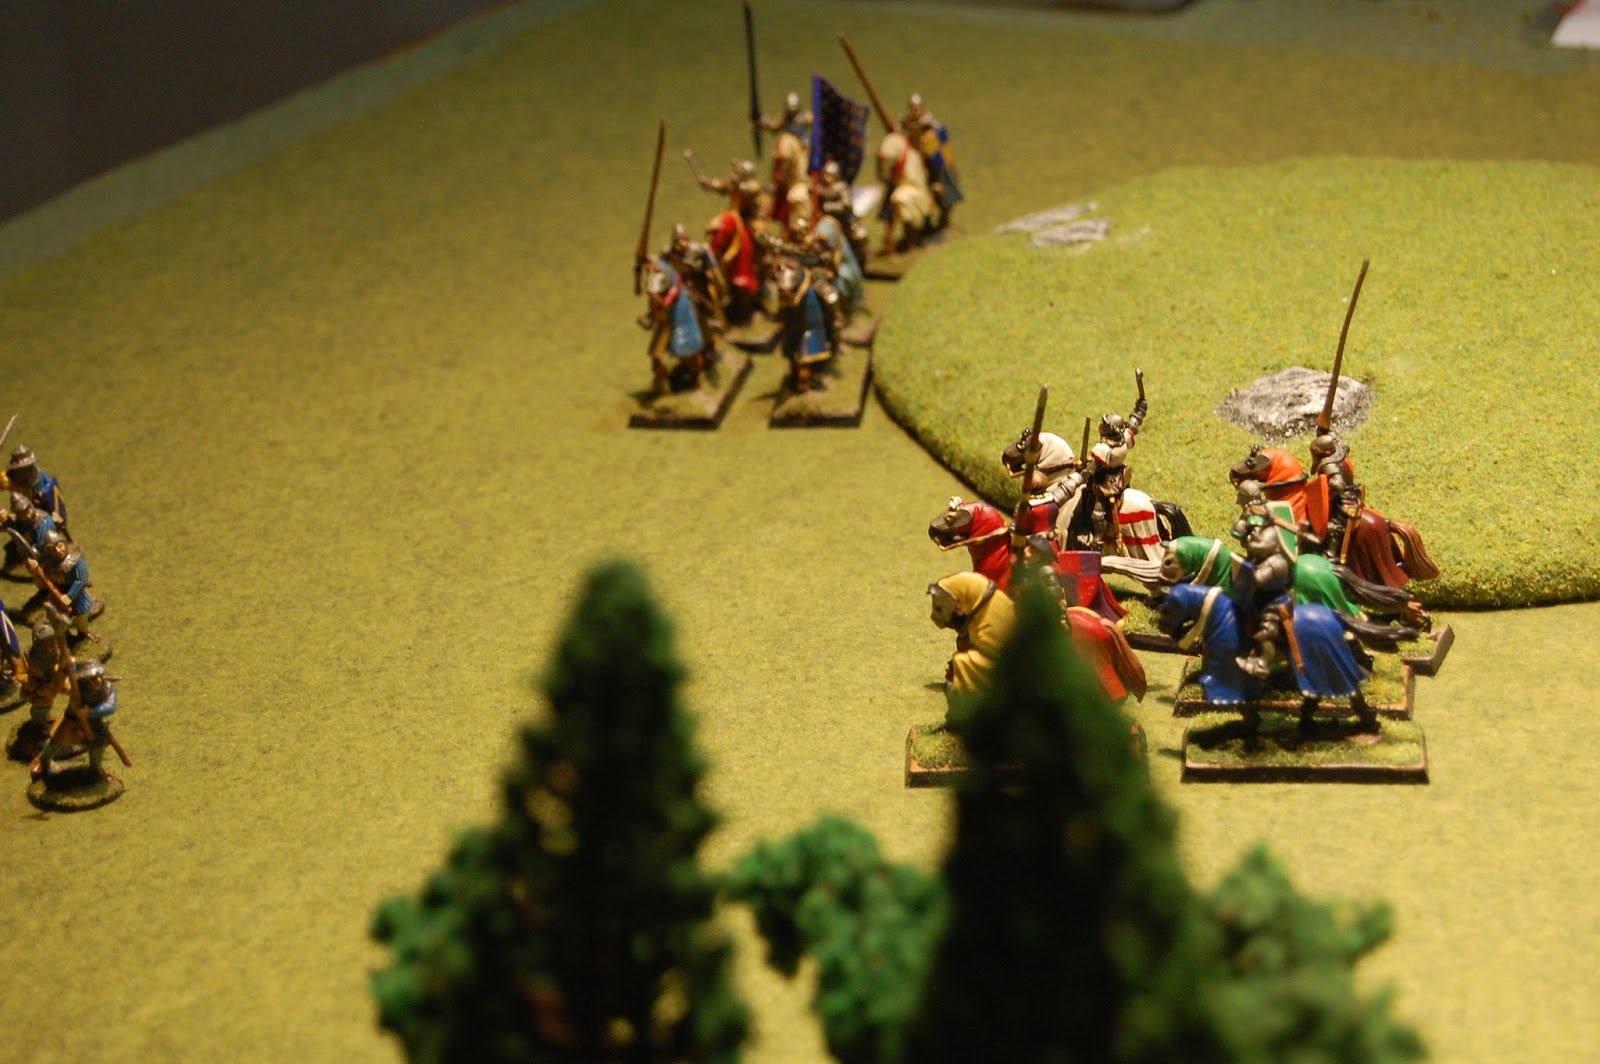
Below is the whole set-up at the start with the Parliament musket unit at the bottom having just moved. We successfully played the entire game start to (a surprisingly decisive) finish in under two hours, including a brief introduction to activating units in Lion Rampant and set-up.
In the above photo you can see the Parliament Trotters advancing.
Above: Royalist foot on the advance. Below: opening shots as both sides come into range.
Above: Royalist light gun crew. Below: Royalist foot advances.
Above: behind Parliament lines. Below: the turning point in the game. At the top you can see Parliament horse threatening the Royalist gun. At the bottom you see the Parliament and Royalist horse units that have both been reduced to 3 of 6 figures per unit.
Now below you can see the outcome. All the Parliament horse has been routed on both left and right at little to no cost to the Royalists. On the Royalist left gallopers (lead by thier fearless leader!) are now preparing to charge the Parliament musketeers...
...whom are also routed. The Royalist horse then whip around and take out the Parliament gun. The Royalist center foot take out the Parliament pike block. The Parliament army has been completely run off the field. With the exception of its light gun, all Royalist units are still intact and on the board.
The "x factor" of this playtest was the performance of the Parliament "trotter" horse. In multiple charges they attempted to use the "stand to receive" rule and let loose a volley of pistol fire at their attackers. Almost always the end result was the charge still hit and the resultant melee was loss or a draw. A whole unit of Parliament muskets also became stalled near the village and perhaps fired one volley the entire game.
For future tinkering: Shotte shooting range of 18" is fine on a small playing space but on a larger one range should probably be increased to 24". A "first fire" rule for shotte might be effective without being unbalanced: very first volley of game for each shotte unit is at shoot value 3+, or just easier to activate the very first time to shoot because the unit has all muskets already loaded and ready to go?
We did not use the 'Bang!' light gun rule as described in its profile and that was a mistake. Both guns connected on hits but both failed to remove a single figure during the course of the game.
The speed of the this game is of note, and I thought it had the an accurate-enough feel to it (outcome of the battle of the horse basically determining the whole game). As always, felt reassured that Royalists stuck to period-tactics and carried the day while Parliament sort of floundered around, with its foot not concentrated very well, and was swept from the field.
All figures are either Old Glory Miniatures or Warlord Games plastic miniatures.
Unit profiles used for this game were as follows:
Unit: SHOTTE
|
|
Points: 4
|
Attack
|
7+
|
Attack Value
|
6
|
Move
|
6+
|
Defense Value
|
5+
|
Shoot
|
6+
|
Shoot Value / Range
|
4+ / 18"
|
Courage
|
4+
|
Max. Move
|
6"
|
Armor
|
2
|
Special Rules
|
None
|
Models Per Unit:
|
12
|
Unit: PIKE
|
|
Points: 4
|
Attack
|
6+
|
Attack Value
|
5+
|
Move
|
5+
|
Defense Value
|
4+
|
Shoot
|
--
|
Shoot Value / Range
|
--
|
Courage
|
4+
|
Max. Move
|
6"
|
Armor
|
3
|
Special Rules
|
|
Pike Hedge: As per Schiltron, but may move 3"
|
Models Per Unit:
|
12
|
Unit: GALLOPER
|
Points: 6
|
Attack
|
5+
|
Attack Value
|
3+
|
Move
|
7+
|
Defense Value
|
5+
|
Shoot
|
--
|
Shoot Value / Range
|
--
|
Courage
|
3+
|
Max. Move
|
10"
|
Armor
|
3
|
Special Rules
|
|
Wild Charge; Counter-charge
|
Models Per Unit:
|
6
|
Unit: TROTTER
|
Points: 6
|
Attack
|
5+
|
Attack Value
|
4+
|
Move
|
5+
|
Defense Value
|
5+
|
Shoot
|
6+
|
Shoot Value / Range
|
5+ / 6"
|
Courage
|
4+
|
Max. Move
|
10"
|
Armor
|
3
|
Special Rules
|
|
Counter-charge or Stand to Receive: If charged unit may fire a volley rather than counter-charging. Test same as counter-charge. Any casualties inflicted are removed and courage test taken by attacker prior to resolving the melee.
|
Models Per Unit:
|
6
|
Unit: LIGHT GUN
|
Points: 4
|
Attack
|
--
|
Attack Value
|
--
|
Move
|
6+
|
Defense Value
|
6+
|
Shoot
|
7+
|
Shoot Value / Range
|
5+ / 24"
|
Courage
|
5+
|
Max. Move
|
6"
|
Armor
|
1
|
Special Rules
|
|
Light Gun: This gun can be moved at cost of not firing in a turn, or retrained in any direction at cost of half its shooting dice.
Bang! All targeted units count as Armor 1 (2 if in cover)
|
Models Per Unit:
|
One gun plus 3 crew. Use six dice for attacks, halved if only 1 crew remaining.
|