Showing posts with label Alammanic Invasion of 366. Show all posts

Wednesday, February 10, 2021

Jovinus at Chalons (366)

Next up in the Alamannic Invasion of 366 was the decisive battle between Jovinus and the Alamanni near Chalons in 366 (not to be confused with another battle in same area in 451).  The Romans were outnumbered here, but Jovinus deployed across the valley in such a way to trick the Alamanni into thinking the forces were more evenly matched. The Alamanni eventually realized the deception and advanced.  After a long day of hard fighting, the Romans emerged victorious.  I used the same force compositions from the previous game but added to the Alamanni the three Gothic cavalry units I had just finished painting a few days before.  

Freshly recruited Gothic cavalry supporting the Alamanni.

This pitched 13 Alamanni units against 10 Roman ones. I meant to class all the Roman heavy infantry as Elite (which in The Portable Wargame only increases likelihood that they will have the option of falling back and not losing a SP) but I completely forgot to implement this, although I don't know if it would have made a difference.  I did use the card-draw method of activation suggested The Portable Wargame.  You divide the number of units in each army by two and round up, then take all the cards in one color equal to that number, plus all the cards one higher and one lower, and put them in a stack. So for the Romans, they had 10 units, so their activation deck had two each of red 4, 5, and 6.  The Alamanni (decisively, perhaps) had two each of 6, 7, and 8.  A joker is also in the deck which will reshuffle the deck. I should have bumped all the Roman cards up at least one (so, 5, 6, and 7) to represent Jovinus' good generalship during the campaign (and perhaps one more so as to be even with the Alamanni, to reflect high morale at the end of a successful campaign).

Late Roman heavy infantry and close-order archers.

Starting positions, Romans at bottom. Bits of rock from paver base are used to mark the grid.

As things played out, the Alamanni had 4 of the first 5 activations (6, 6, 8, 7 respectively) and were able to bring a mass of six heavy infantry (in two lines of three) across the table in quick order.  The front line softened up the Romans with short-range missile fire (throwing axes and javelins and such), and the second line then charged through the first line and engaged in melee.

The Alamanni are able to occupy the middle of the field quickly... while the Roman line has only barely advanced from its starting positions...

Romans brace for the charge...

There is a gap in the Roman center, and lost SP markers accumulating along the rest of the Roman line, while almost the entirety of the Alamanni host advances.

The Alamanni attack along the entirety of the Roman lines.

Laying out casualties across the Roman line and creating a gap in the center, the rest of the Alamanni host advanced, including the cavalry.  As the Alamanni infantry attacked, the Roman heavy cavalry attacked the Alamanni's Gothic cavalry. This cavalry battle went back and forth, but in the end the Romans took the worse of it.  The Romans did not fare much better in the infantry fight, and the Romans suddenly found themselves on the brink of their exhaustion point (I like how this moment creeps up on you in The Portable Wargame).

And most of the Roman lines are pushed back.

Roman lines fall back to their starting positions, with exception of some flank units.

After an army hits its exhaustion point, it cannot take offensive actions anymore, nor move towards the enemy.  Anticipating a defensive battle, the Romans attempt to dress their lines by aligning roughly at their original starting positions. 

Romans have hit their exhaustion point. Roman right flank falls back in line with the rest. Roman left flank is attacked by Alamanni foot and cavalry in turn. In the bottom right is extremely beat up Roman cavalry.

The Alamanni, meanwhile, are just shy of their exhaustion point. They have clearly won control of the field. They exchange short range missile fire, move the rest of their foot up the field, and launch a flank attack on an isolated Roman unit stuck out by itself.

Isolated Roman infantry on the left under attack.

Jovinus holding the Roman line.

Cavalry engaged with isolated Roman infantry on the left.


Isolated Roman infantry on the left under attack. I've recently started snipping off dracos, replacing the pole with steel wire and then drilling out and mounting the metal windsock on that. Much more durable and you can get an extra mm or 2 of height on the pole which looks smart.

In the end, the Romans get a round of decent shooting attacks off from one end of the line to the other, and trip the Alamanni over their exhaustion point. The game is now over. 

Endgame. Both sides have reached exhaustion points. 

I was going to award victory points for control of the field, which the Alamanni easily won in terms of having moved their entire army across the half-way point of the field. However, both sides had only lost a single unit, and the Romans still securely held their original positions.  If the fighting had stopped for the day, one could imagine either or both of the armies slipping away under cover of night. Probably a draw then. 

I don't know if I'll use the card draw system again. The higher number of activations possible for the Alamanni, combined with a strong run of draws at the very beginning of the game, gave them a big head start at the beginning of the game - the Alamanni were able to attack in depth (cool to see that actually work, though) and the Romans were on their heels the whole game.

What is clear is that I need some better defined victory conditions or scenario goals for games using The Portable Wargame, which itself only tells you when a game ends (when both sides have reached their Exhaustion Points, which is 1/3rd of their total SP).  Personally I prefer abstracted VP which reward players for being in control of the field strategically, and less so causing more casualties (although I use that metric as well). Flipping through many of my other rulebooks, winning a game is heavily dependent on removal of units, which does not fit well for The Portable Wargame, where unit removal seems to be rare (in two games played, only one unit per side been actually destroyed each time).  

I am still enjoying the abstraction and speed of play with these rules.  And I think most wargamers would agree that its more fun when almost all units tend to stay on the table for the entire game!  


Tuesday, January 26, 2021

Reddened Hair (366)

Continuing on with General Jovinus' campaign against the invading Alamanni in 366, here is a game based on a second surprise attack by the Romans upon the Alamanni.

...one of his scouting parties report that 'after plundering the neighboring farmhouses a predatory band was resting near the river': unfortunately [chronicler] Ammianus does not name the river.  Advancing with extreme caution, Jovinus managed to bring his troops to the edge of the valley, where: 'Hidden in a valley concealed by a thick growth of trees, he saw that some were bathing, others were reddening their hair after their national custom, and still others were drinking.'  Preparing his troops, Jovinus suddenly gave the signal, and his men rushed the enemy camp. Taken completely by surprise, the majority of the Alamanni were killed, while a few escaped by taking refuge along the 'winding and narrow paths' in the area.

- Hughes, Ian. Imperial Brothers: Valentinian, Valens and the Disaster at Adrianople (2013).

So a similar set-up to Scarponna, but with a river this time.  Since this was yet another remote game and involved a grid, we decided to give ruleset The Portable Wargame (or, more specifically, Developing the Portable Wargame, since that is where the ancient rules are located) a try.

Positions after the first turn: the Alamanni are positioning to defend themselves on the far bank of the river, while Romans advance from left.

We played with 10 units per side at exactly 46 strength points each, for an army exhaustion point of 15.  Because I had laid out a grid of 3" squares on my game mat, each unit straddled two squares, and movement and ranges were doubled. Although this mostly worked fine, the one-unit-on-two-squares element made for some tricky melees, since units could combat with only one square each touching.

Roman right flank advancing.

All of the Alamanni were classed as heavy infantry with pila (representing their franciscas, a heavy throwing axe).  The Roman infantry was also heavy infantry with pila (representing darts and javelins, rocks, and strong language), with two units of "close order archers" (a variant of light infantry), two units regular heavy cavalry, and a single unit of cataphracts.

The Roman general behind the Roman left flank.

As players of The Portable Wargame know, each side will fight until it has lost 1/3 of its total strength points, at which point it cannot move towards or charge the enemy anymore.  These strength points are tallied across the entire army.  So losing 15 strength points does not mean losing 4 units (of 4 SP each).  Instead, five units could lose 3 SP each, which would mean that none of them would be removed from the table, but that the army had still lost its fighting nerve.

Cataphracts attack an Alamanni unit in its flank.

This dynamic means that unlike most games, by the end of the game it is very possible that both sides could still have all their starting units still on the table. Furthermore, shooting and melee can only result in the loss a single SP, with a decent probability that no hit will be scored in the first place, and a decent chance the hit will result in a recoil in place of a lost SP.  This may sound like it would be a slugfest wherein nothing much happens, but the Romans rather quickly found themselves missing 12 SP to the Alamanni's 9. 

The Alamanni chief in combat against Roman heavy cavalry.

This seems to have been the result of the Roman cavalry and cataphracts getting stuck in perhaps a little early and then getting overwhelmed by the Alamanni infantry.  The Roman infantry by contrast was too cautious and took too long to get into javelin/dart range, and also routinely ended up obstructing the LOS of the archers.

Roman infantry finally crossing the river and joining in melee.

When the Roman infantry finally did get close enough, the various cavalry had accumulated too many lost SPs. One attempt was made at a sort of combined attack - one infantry unit retreating a square and throwing javelins, followed by archer fire at the same target, and then a 2nd infantry unit closing for the melee. In theory this could have resulted in 3 SP lost on the target Alamanni unit in quick succession. Instead, it escaped completed unscathed!

Roman cavalry in a messy situation on the Alamannu right flank.

Generals in The Portable Wargame can join a melee and add +1 to the dice score. The Alamanni, sensing victory in reach, had the chief join a melee with a Roman cavalry unit that had already lost 3 SP.  

However, generals also have a notional SP of 6, used solely for the purposes of calculating, and counting towards, the overall exhaustion point. If the unit a general is attached to loses a SP, a dice is rolled. If a '6' results, the general is killed and the unit loses an additional SP.  This is exactly what happened when the Alamanni chieftain joined the melee. 

After the death of the chief.

So in one swoop the Alamanni lost 8 SP which put them well over the exhaustion point.  We finished the Romans' turn and gave the Alamanni another turn to resolve existing melees and some shooting attacks, which caused the Romans to reach their exhaustion point as well.  As both sides had lost one unit but the Alamanni  had also lost their general, we agreed it was a Roman win that they could feel good about.  Next time we will have some victory point criteria in place.


I forgot to mention that there are no activation rolls in these rules.  It is a simple IGOUGO turn mechanic. However, if a unit is attacked and the attacker choses to fall back rather than losing a SP, the defender may follow up and attack.  Between this and the defender frequently having the choice of taking a SP and holding ground, or falling back and not losing the SP (but becoming exposed to a follow-up attack), means that a player will have things to do even when it is not their turn. Besides, with grid movement and no activation rolls, turns go quickly, only slowing towards the end when players become more cautious as their SP losses pile up.  

These rules worked very well in a remote-play setting, with the game concluded in about an hour and a a half, where a similarly sized game (10 units per side) of Lion Rampant or Pikeman's Lament (even on a grid and with no activation rolls) would take 2+ hours.  I am almost done with 3 units of Gothic cavalry, and I look forward to trying these rules with even more units on the table.  I will also switch back to a grid of 6" squares as the one-unit-in-two-squares dynamic made things tricky.

Thursday, January 21, 2021

Scarponna (366)


With my 'Barbarian West' collection getting to a dozen-units-to-a-side standard, it occurred to me I could play Hail Caesar in 28mm.  I have been wanting to delve into Hail Caesar some more of late, because if its comparably less swingy combat system (as opposed to Lion Rampant) and because I quite like the mechanics for units supporting other units in melee, which encourages large blocks of units and maintaining long battle lines.  Flipping through the same source material I used for the basis of the Rutupiae game, I got hooked on the invasion by, and wars with, the Alamanni tribes in 366, specifically the campaign of the Roman general Jovinus.

Gathering their forces, on or shortly after 1 January 366 the Alamanni invaded Gaul in three major 'divisions', plus many smaller groups or semi-independent tribesmen.  Hearing of the invasion, Jovinus moved to meet the intruders.  It is unfortunate that [the chronicler] Ammianus does not give us a complete description of the course of the war. .... It would appear that over the course of several months the defending [Roman] armies of Gaul fought many battles, apart from those fought by the troops under Jovinus. ....

As the Alamannic forces moved into Roman territory, Jovinus was able to identify one of the advancing Alamannic armies.  he advanced to meet them, possibly defeating or dispersing smaller groups of barbarians along the way.  As he neared the enemy Jovinus deployed his troops, 'carefully guarding both wings of his army', and cautiously moved to meet them.  Possibly in early-mid March, in the vicinity of Scarponna (Charpeigne, on the Moselle), Jovinus's tactics of stealth and care paid off handsomely.  He took the Alamannic army completely by surprise.  Before they could take up arms and form to meet the Romans, they were swept away and annihilated.

- Hughes, Ian. Imperial Brothers: Valentinian, Valens and the Disaster at Adrianople (2013).

The description of the attack near Scarponna is vague enough to devise a set-up for a game: the Romans have caught the Alamanni by surprise and are arrayed in line.  Half the Alamanni are loosely arrayed in the middle of the table, and the other half are at the far edge of the table, but start the game with a disorganized marker which must be rallied off before any other actions can be taken.

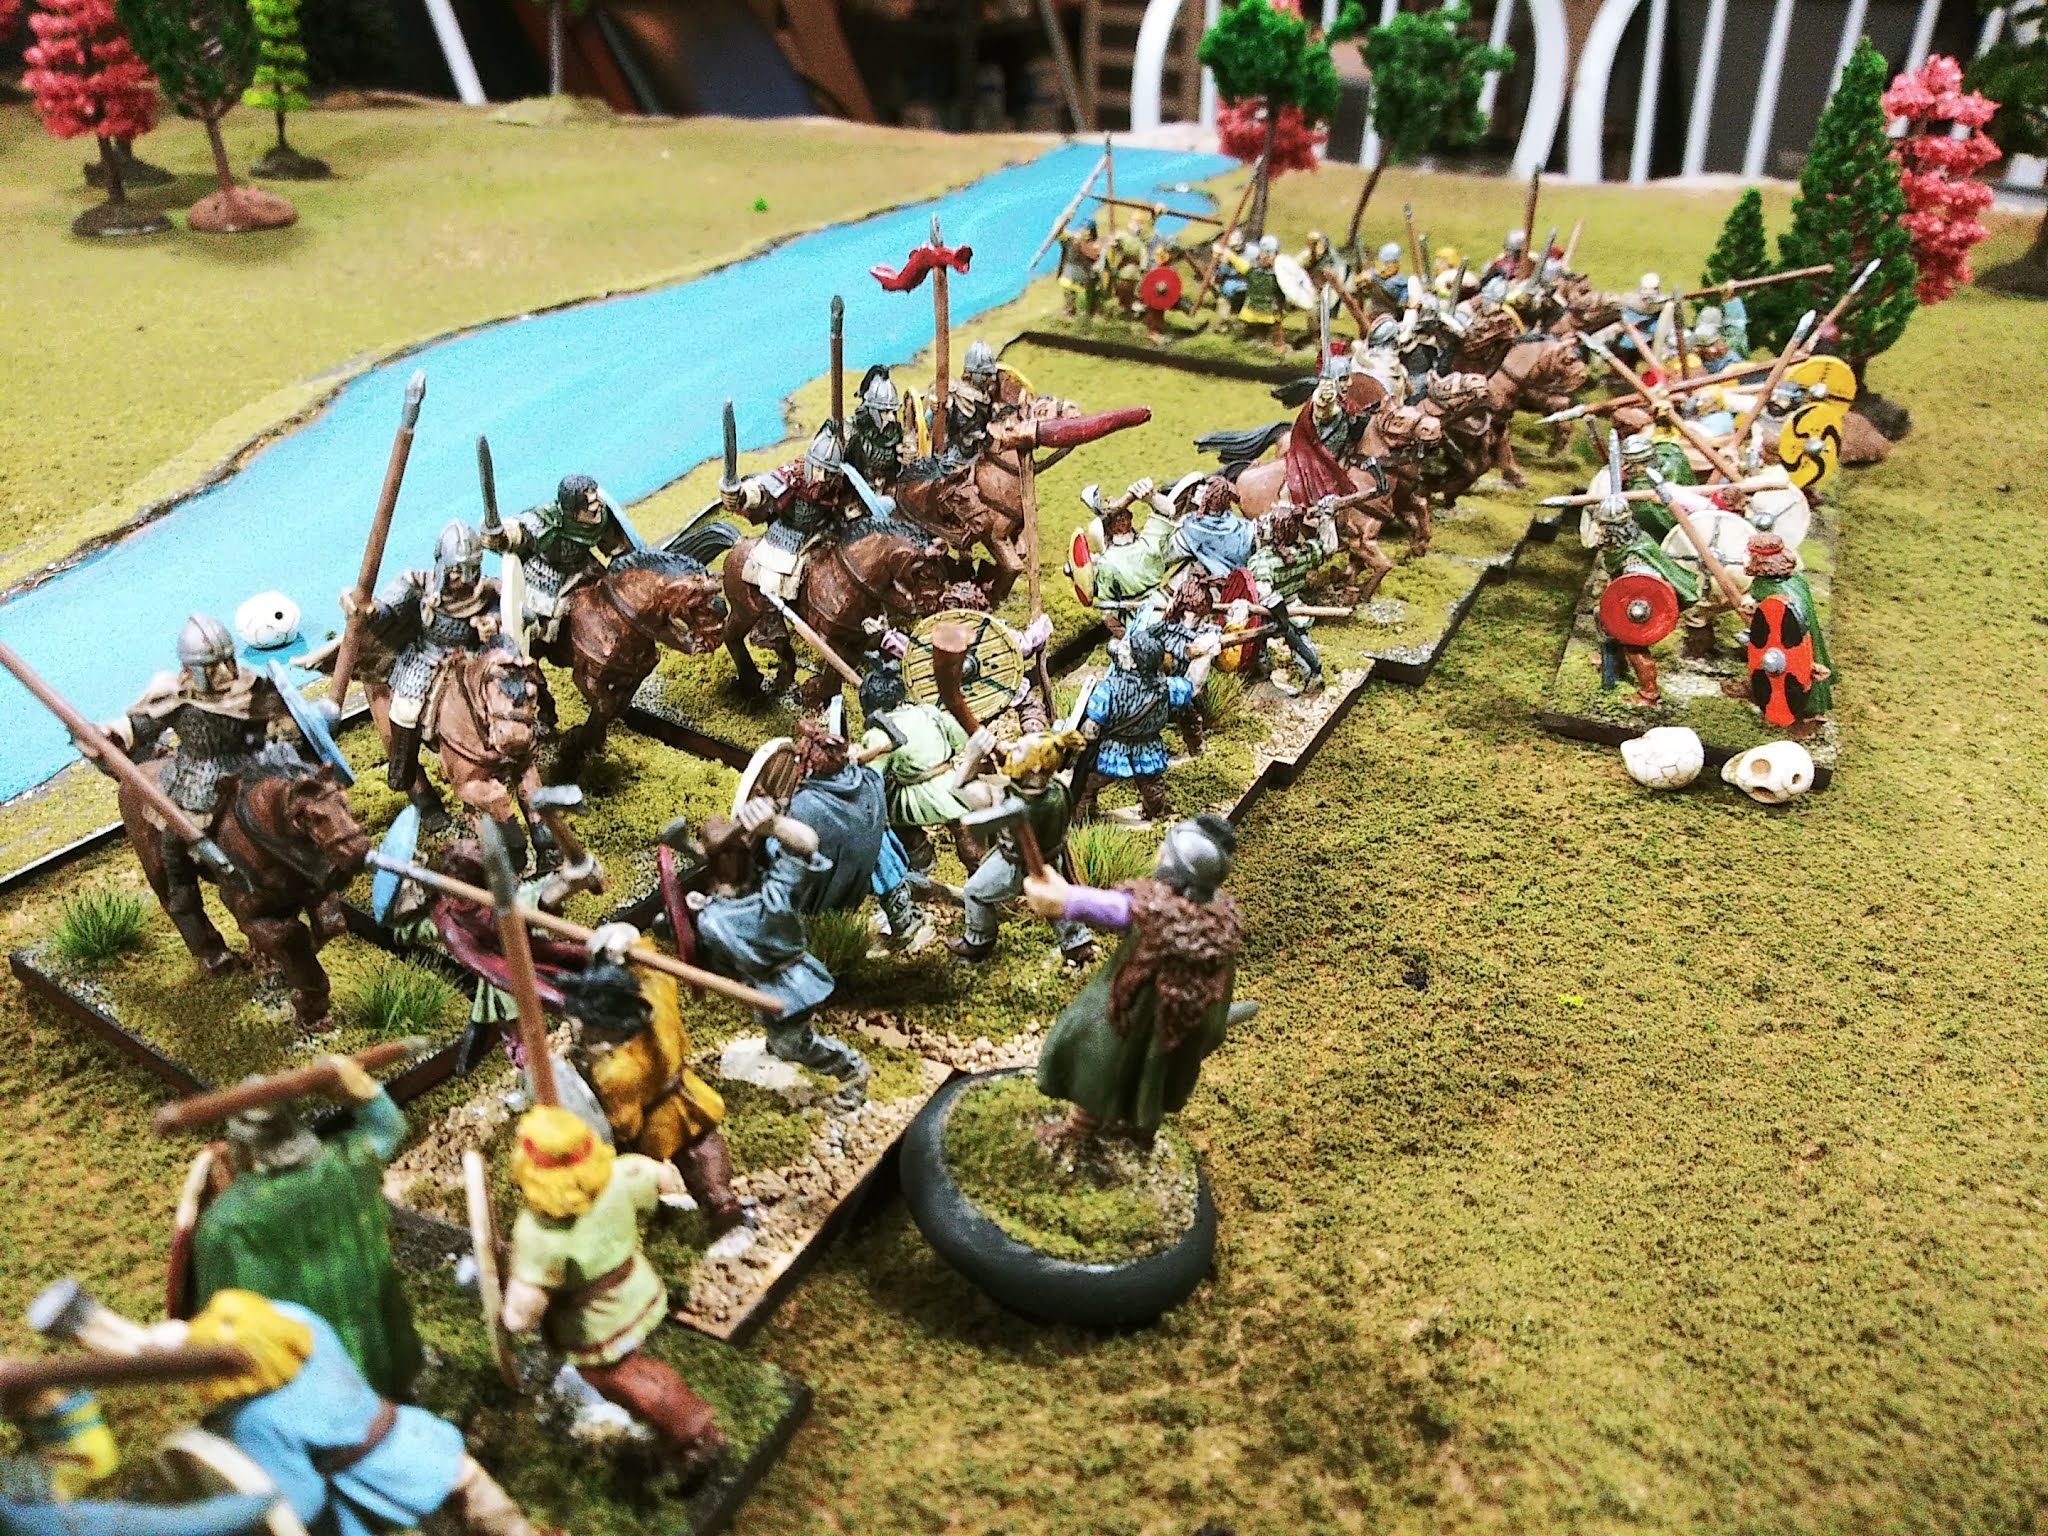
After the first Roman move. Roman infantry mostly moving up to the right. Burgundian allies in the middle, still scattered about.

I decided to try out the Late Imperial Romans and Franks lists from the Army Lists: Late Antiquity to Early Medieval source book for Hail Caesar as the source for the unit stats.  I was a little wary because there is also a 'Barbarian West' scenario in the back of the Hail Caesar rulebook that presents a quite different vision of unit composition - the rulebook having all infantry classed as heavy infantry (so therefore can 'close ranks' and shooting attacks from front are -1 to hit) while the source book has the Romans as medium infantry and the Franks as medium warbands.  Jovinus thus ended up with two divisions of four units each: the first with 3 medium infantry and 1 light infantry archer, and the second with 2 medium infantry, a light infantry archer, and a unit of cataphracts.  The Alamanni had one division of 4 Alamanni medium warbands with the pila rule (representing their throwing axes, etc.) and another division of 4 allied Burgundian warbands (no pila rule).  The Burgundians were in the forward position. 


Two divisions per side is rather on the small side for Hail Caesar, but I set it up as so because this was a remote game played via Google Meets, and I wanted the game to be concluded in two hours or less, so I erred on the small side.  Being remote, I of course converted movement and ranges into a grid-based system.  My new mat has a grid of 3" squares (barely detectable in the photos), with one unit occupying two squares. The modifications for Hail Caesar on a grid were as follows:

Command Radius:  
    Modifier to command rolls as follows: up to 4 squares 0; 5-8 squares -1; 9-12 squares -2 etc.
Movement:
    No diagonals.
    Infantry and Cataphracts: 2 squares per move
    Cavalry: 3 squares/move
    Light cavalry in open order/horse archers: 3 squares
    Commanders: 4 squares/move
Ranges:
    No diagonals for distance.
    Target but be in the square that is within range, not adjacent.
    Line of sight measured from center of originating square to center of target square.
    If line crosses square with another unit or obstructing terrain there is no LOS. 
    If at perfect 45 degree angle the line touches the corner of a square with obstructing terrain or another unit, LOS is not blocked, but cannot shoot “through” the diagonal space between two obstructing squares.
    Javelins, darts, throwing axes, etc: 2 squares.
    Slings: 4 squares
    Bows, crossbows, staff slings: 6 squares.
Hand to Hand:
    Units attack via adjacent squares.
    Victorious unit only moves into loser’s vacated square if clearing a building or defended obstacle such as a wall.


Jamie was playing the Romans via remote, and decided to attempt to land an early punch with a well-supported charge of his infantry against some of the isolated Burgundians.  Although his left flank (with the cataphracts) fell behind (the cataphracts hardly moved at all the entire game), a well supported attack on the Burgundians was executed. 


Unfortunately, the Roman attack dice came up rather poor, and the Burgundians over-performed a little, such that the entire Roman flank was bounced back. Subsequently, on their turn the Burgundians fell back and formed a battle line, and things were back and forth for a while after that. 


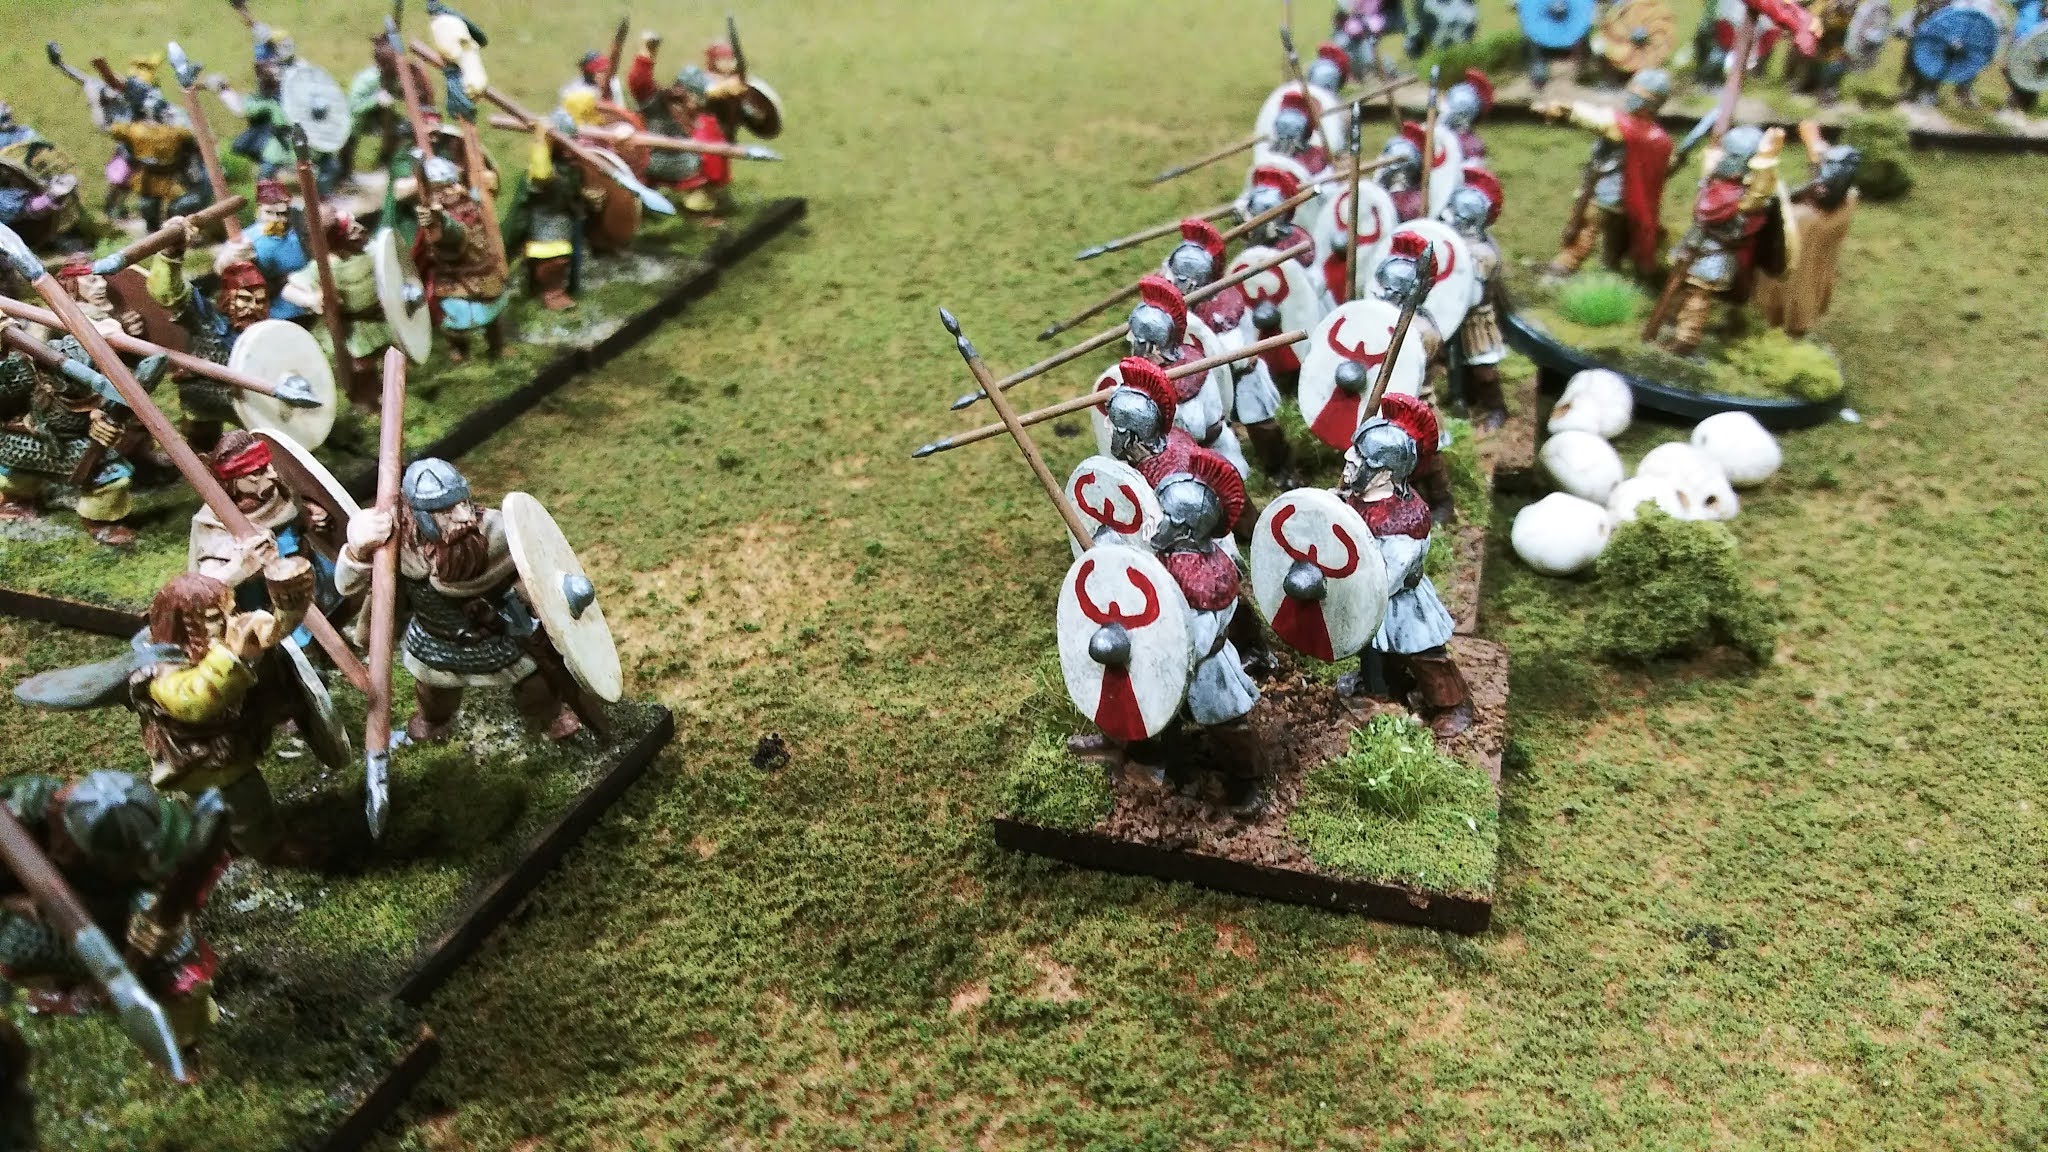
The Alamanni units took almost the entire game to move up into support of the Burgundians, who were exceptional allies as they managed to grind it out with the Roman infantry despite heavy losses.  Even the flight of their chief did not deter the Burgundians.  While the Roman left was able to eventually join their infantry in one last assault, by that time the Alamanni had finally come up in support, and destroyed the archers on the Roman right flank.


The Alamanni who had destroyed the archers were then able to attack the flank of the remnants of the Roman right flank infantry (who were already shaken), and with the routing of that Roman unit, the game ended and victory went to the Alamanni and Burgundians.


The final flank attack on the Romans by the Alamanni.


Roman right breaks and flees, ending the battle.

I had forgotten a lot of the smaller points of the rules since I last played, so there was some wasted time flipping through the rulebook, but otherwise the game went smoothly.  I still like Hail Caesar's propensity to suddenly generate 15 or more dice for an attack when one gets their supports in order and throws a general into the front line. However, the specter of failed activations/orders haunts the table. Both the entire Alamanni division, and most of the Roman division on the left, failed to advance for the majority of the game. 

When you combine this unreliability with the swingy-ness of the combat mechanics I'm left with that "roll some dice, some stuff happens" feeling, despite the fact that I won the game. I contemplated eliminating order rolls altogether (as I did so much with Lion Rampant and its variants last month) but then you lose the double and triple moves which I do like, in the end.  I love the Barbarian West period and am enjoying putting the armies together.  I like the same-same quality of pretty much all and any armies in the period (slight exception for the Huns, but only slightly), and I look forward to gaming in it more.