Thursday, April 30, 2020

Medieval Battle in 54mm II

Ah, much better! I put a grid of 6" squares on a piece of felt, divided my medieval 54mm collection up into two armies of 13 units each (10 figure foot units and 5 figure mounted units), and played a very satisfying game of Lion Rampant (as to be expected). Lion Rampant works very well on a grid! It is also visually pleasing with 54mm figures because units can be smushed next to each other and you can still easily tell one unit from another. This creates a very nice massed effect.

Starting deployments.  Imperial forces on the upper left and Papal forces on the right.

One army had five units of Britains Deetail Saracens in it, and was therefore nominally that of Frederick II, Holy Roman Emperor (r.1220-1250), who was also King of Sicily (r.1198-1250) and enlisted his Muslim subjects in his armies because, as Muslim soldiers, they cared not for the excommunication by Frederick's rival, the Pope.  Accordingly, the opposition could therefore be the Papal army of Gregory IX in 1229.

I kept things very same-same and the units were all mounted sergeants, foot sergeants, and archers. There was also one unit of foot yeomen, being my Robin Hood figures I finally finished painting (I got them and started painting them 4 or 5 years ago!). For the mounted sergeants I gave them the 'Venomous' rule from Dragon Rampant (when attacking, a 6 will count as two hits) which I have found to be a good but balanced mechanic for the shock effect of heavy cavalry.

Starting deployments. Imperial army at bottom, Papal at top.

For movement on a grid, infantry could move one square and cavalry two. A move can have only one diagonal move. Archers had a shooting range of four squares, and again, only one of those squares could be a diagonal move. Three squares was close range (5+ to hit) and four was long (6+). The foot yeomen had mixed weapons, so had a shorter maximum bow range of 3 squares.

A gathered host of Imperial infantry.

Papal knights and infantry.

Opening moves. The Imperial infantry advances on the right. The Papal horse fans out and advances.
The flow of the game was as follows:the Papal foot yeomen are routed by Imperial cavalry on the Papal right.  On the Papal left, all four units of cavalry advance.  They rout one unit of Imperial cavalry, lose one unit themselves, and the remaining three take casualties and pull back. The most intact of these three units fails several rally tests and also flees the field. The Papal left is therefore effectively collapsed.

Imperial Muslim cavalry rights forward.

View from behind Imperial lines.

Papal infantry.

At center left, Papal mounted knights are on the attack.

At upper left, the Papal cavalry has been effectively repulsed.
The two great masses of infantry now move towards each other.  Archery is exchanged and several attacks and counter-attacks take place.  The Papal force get the better of the Imperials this time around.  

Imperial infantry advances.

Papal archers in the face of advancing Imperial infantry.
Papal archers get out in front.

The Imperial and Papal cavalry having fought to a draw on one flank, the infantry masses trundle towards each other in the center and opposite flank.
Endgame or close to it. Papal forces have routed almost the entirety of the Imperial left.
We played until 10 of the starting 26 units had been removed  (regardless of side), and then counted up how many units each side had remaining.  Papal forces eke out a victory, 9 to 7.

Using 10 and 5 dice instead of 12 and 6 worked just fine.  I thought it would really slow figure removal but the whole game was played in about 80 minutes so if it was slowing the results, I could not tell.  We did not have leader figures so the +1 to courage checks that would have conferred was not in effect - I think this might have made a big difference. A few of the DSG foot knights are a perfect pose to be converted to a standard bearer, so I may have to make some big banners for them, and those can be used to designate leader units.

Wednesday, April 8, 2020

H.G. Wells' Little Wars, the Fight to the Finish

Some additional toy soldiers having arrived, and others having been repaired, a full-throated game of Little Wars was played using the "Fight to the Finish" scenario. The troops were laid out on a side table, the houses and trees and fences were arranged, and a coin flip determined who should set up first. Each side had about 30 infantry, 11 or 12 cavalry, and two guns. "Blue" had two 4.7" naval guns and "Red" had one naval gun and also a Royal Artillery piece.


The overall flow of the game was like this: both sides advanced off their starting lines and then artillery fire exchange began. Blue was able to successfully charge Red's 4.7" and seemed poised to capture it, but on the following turn Red coordinated a counter-attack that drove off Blue forces and re-secured the naval gun. Blue reconsolidated its remaining forces at its center. Red made a very risky charge at the center using a mass of troops which had hitherto been sheltered on its forward right flank - they took a heavy toll from artillery fire and then many prisoners were taken in the counter-attack. Blue then reorganized and advanced on the 4.7 again, at which point Red withdrew from the field. Final score was roughly Blue at 147 points and Red at 38 (Red escaping with both guns and about some troops, and also collecting 7 points from prisoners).


The fences, while nice to look at, tripped up artillery fire too much. Both sides worked hard to minimize open shots against their own troops, and the fences served to only make difficult shots almost impossible. Turns were timed, 3 minutes per side, and you had to move or shoot your guns first. This completely removes the need for chairs at your table as there is no time to sit down. The non-moving player can't sit down either, as it is best for them to stand opposite of their opponent's gun, both to watch for whether a hit was scored or not, and also to try and keep ammunition from getting lost amidst the junk in my basement. When troop counts got below 20 we went to 2 and a half minute turns.


The key to melee is that the determination of whether troops are in melee, and whether each side is supported or isolated, is that the measurement is taken from the point of contact (or contacts).  Therefore, both Red and Blue would have a single man contact another soldier, and then move as many allied troops up within 6" of that contacting man as possible. In this way you can almost guarantee that you will outnumber your opponent in the resulting melee, which in turn tends to lead to prisoner-taking and/or surrendering instead of brutal man-for-man casualty removal.


"But what about small arms fire?" you may ask?  Yes, it is a mechanic that is absent.  But first of all, look at the many photos of this game, and notice that infantry still tends to be positioned as if it were offering rifle fire. In the mind's eye, the exchange of rifle-fire is still going on.  From a mechanic-standpoint, the trade-off here is that by not having small arms fire, you also don't have to have formations or units, and also by extension don't have to deal with facing or coherence and such.


I took a lot of photos - many more than typical! In using the auto-correct function on my camera the order got a little screwy, and I'm not going to caption all or even any of these like I usually do.  The next game will be the "Blow to the Rear" scenario and I've already made two more new buildings which should dress up the table nicely.


Monday, April 6, 2020

H.G. Wells' Little Wars Try-Out Game

After a extensive (manic, even) surveying of online markets, I was able to acquire an "Army Red" and "Army Blue" composed entire of Britains' 54mm toy soldiers (some are older hollow-casts and some are newer solid recasts).  I already had acquired some of the firing 4.7" Naval Guns and had used those in a Black Powder game in 2016 using Armies in Plastic 54mm figures. So rather suddenly, here I was with about 30 infantry, 12 cavalry and two guns to a side, all ready to play H.G. Wells' Little Wars as written!

(Above: I forgot to take pics until the game was basically over. Here's Red closing in for the win.  Note the Blue's Hussars being led away as prisoners at the bottom)

Although we are currently quarantined, I am fortunate to have a ready opponent.  However, for this game I solo-gamed it, to get a feel for the rules.  I was moving stuff around in the basement and prepping a wall for painting between shots of the 4.7s.

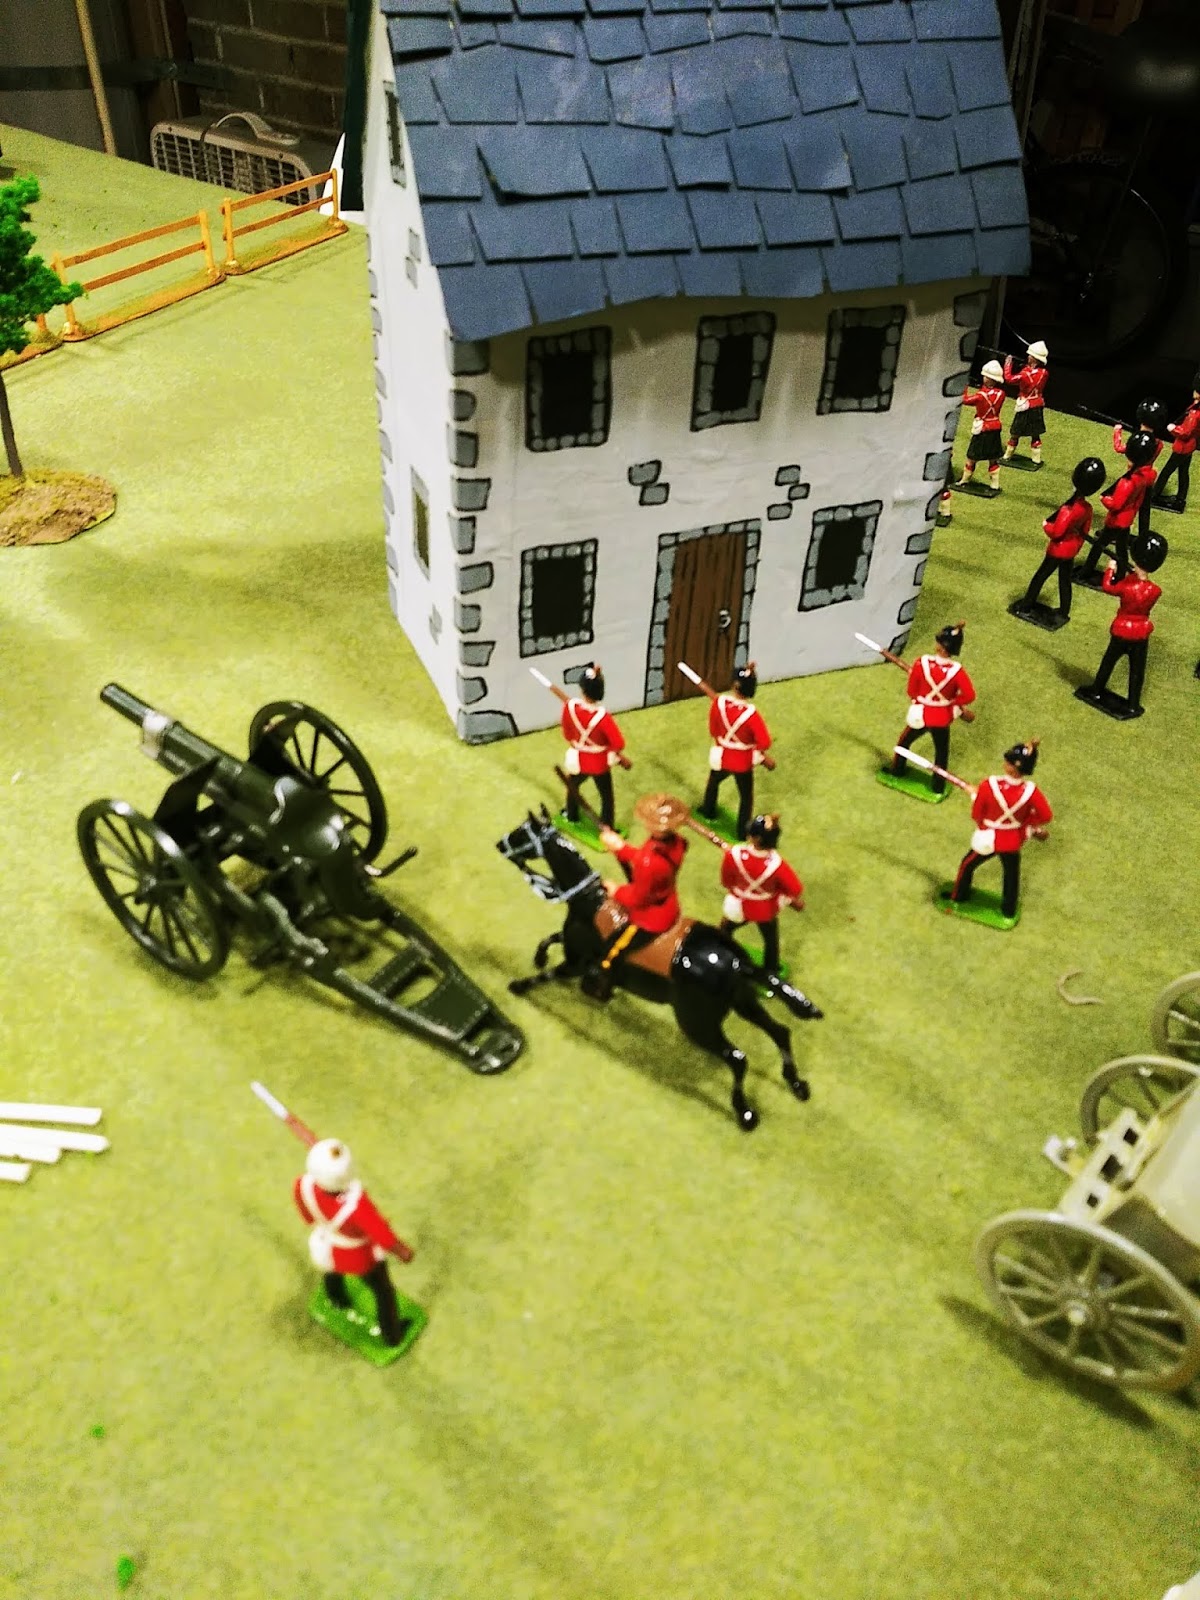
(Above: solid-cast Irish guards on the right, old hollowcast guards on the left. Notice how this particular 4.7" gun had to have its trail propped up to get a more level shot)
I use q-tips with the cotton buds cut off for ammunition for the guns. These become warped from hitting the houses fyiand then begin to fly irregularly! I have to admit it's an almost surreal experience to not use dice, although rather welcome and refreshing.  Wells' melee rules is a sort of decision-tree of whether a force is outnumber and if it is, is it is "supported", in which case you may surrender, or fight and have prisoners taken but still incur a few casualties on the enemy.

(Above: Red's Essex Regiment, supported by old hollowcast guards,
move in on rapidly dwindling Blue forces
)

In every ruleset I have read, this is the only one with a surrender mechanic. Why would a player prefer to surrender a melee than tough it out and inflict a few more losses on his opponent? It turns out that if both sides are reduced to 15 figures or less, and the main victory condition has not yet been met, the 100 points for winning the main victory condition is split 50/50 and you tally points as follows: (1) for each of your troops still on the table, 1 point for each infantry, 1.5 for each cavalry, 10 for each gun; (2) for each prisoner you have captured, half a point; and (3) for each figure of yours who is a prisoner of the enemy, half a point. 

(Above: Army Blue gun is manned by the King's Royal Rifles and Queen's Westminsters.
Some Scots Borderers had to fight on the side of Blue to make the forces equal.)

You receive zero points for enemy models killed. It would be possible, maybe, to be very aggressive, "lose" a bunch of melees but have more men taken prisoner than killed outright, and still win the game? Or at least hedge your bets in the event of a 50/50 split - you could win by half a point! Its definitely different than other rule sets.


There was also some testing of my various firing toy cannons to figure out which ones could depress elevation enough to not just shoot over the heads of the enemy all game. Two guns seem problematic, and require something placed under the trail (a spare 3mm thick MDF base worked well) to lower the barrel.

(Above: End-game, basically.  The white-helmeted Red troops in lower-right will attack the Blue gun and result in death of men on both sides. This put both sides at less than 15 men, so it went to points, and Red won.)

(Above: Blue Hussar and Lancer prisoners being led to the rear.)

Next will be a "full" game with timed moves and two guns per side.