Thursday, May 27, 2021

Broken Toy Recruits

In 2020 I was buying many broken or beaten up Britains figures and repairing those for my 54mm armies (I'm doing a lot more homecasting now).  I went back through my account history and was able to capture these images of lots I have purchased, posted here for posterity and reference.

This was a good lot - all those headless bodies to convert! The batch of zouaves was a nice bonus.


The two generals in this lot were a score. This is where my 3 SA Mounted Rifle figure came from, plus several partial highland units! And the easiest figures to find and buy - mounties!


More mounties. The two lancer bodies in upper left were eventually restored into a complete unit of 5.


Fairly old Egyptian lancers. Great condition - all tails and legs intact! These have been restored/repaired, but I need one more for a unit of 5.

More of the Egyptian lancer lot. The Skinners Horse figures were weird - they were covered in dirt! I rinsed them in vinegar and scrubbed a bit with a toothbrush to clean off.

Lastly, a good sized lot of Royal Marines, which only needed new replacement arms. 

Wednesday, May 26, 2021

Siege of Newark (July 8 - August 3,1643) - ECW Lincolnshire Campaign Game #4

At Carlton Scroop, Lord Willoughby had successfully secured southern Lincolnshire for Parliament, making London secure from a thrust by Newcastle's northern Royalist army.  Unfortunately, Lord Willoughby had died at the head of a Lincolnshire trained band at Carlton Scroop, making that his third and final victory.  Sir John Meldrum, a veteran who had served abroad as a colonel for the Swedish king, assumed command of the Parliament forces.

It was Parliament's move on the campaign board, and they easily advanced into a battle square, meaning that they would be the attackers in the next battle.  Because Parliament had now won 3 out of the 3 battles played so far, and narratively I had determined that they had secured all of Kesteven, it was a good fit that they would try something dramatic, like making an attempt to capture the Royalist regional stronghold at Newark.  And if you are going to fight a battle over a town, a siege is the next logical step!

Initial set-up from the night before the game. At this point I was still going to use both battalias and commanded shot. Day-of the game, I switched to commanded shot only.

The randomized set-up for a siege was outlined in the previous post, but because this was the first attempt, I simply allocated six units of commanded shot, two heavy guns, and a light gun to Parliament, and gave the Royalist defenders 3 units of commanded shot, one heavy gun, and one light gun. The SP for each side was totaled up and because the Royalists started with 10 SP less, they received 10 sections of earthworks at the start of the game representing defenses already prepared.

The view from behind the Newark walls as Meldum's Parliament army encircles the town...

Turn sequence is as in The Portable Pike & Shot Wargame, in that each turn initiative is determined randomly, then both sides resolve a simultaneous artillery phase, then the initiative winner moves or initiates attacks with their non-artillery units, and then the subsequent player does the same.  In the siege rules a turn represents a day's activity. I decided to use a deck of cards to determine initiative each turn, because each card drawn represents a day, so the total number of cards drawn was an easy way to determine how long the siege had been carrying on.

First saps, indicted by a single stand from a given unit moving out into an adjacent square.

Because the besieger's back line is deemed out of range of all artillery, this meant that the first turn was essentially uncontested sapping. Parliament had every unit sap forward one square to establish a back line from which to securely move forward. The Royalists extended their earthworks one square to the left and right each, eliminating that last open line of sights to the fragile medieval town walls.

First saps successfully dug! The first entrenchments are built by Parliament, and the Royalists extend their defenses before the town in each direction.

Thereafter followed what was probably the most lively part of the game, with Parliament sapping forward to bring their guns into close range of the defensive earthworks, while the Royalists launched sallies against Parliament sappers, who were also occasionally targets of Royalist artillery fire. 

Day 10 or thereabouts (based on number of cards flipped).

All of this artillery fire and sallies meant that both sides began to accumulate lost SPs.  Parliament could "afford" to lose 12 and the Royalists 6.  As you can see, Parliament rather aggressively sapped quite close to the defensive ring on, and the Royalists attempted to construct a second "bump out" for a gun emplacement.

Parliament commanded shot (with 2 out of 3 SPs already lost) shelter in the trenches.

The accumulated lost SP was bad enough for the Royalists that they began to move infantry out of the outer ring and into the town itself so as to not be subject to artillery fire.  Sallies ceased altogther.

The Royalist heavy gun plugs away at ever-closer Parliament saps.

Parliament finally got its act together and stopped pointless and costly infantry sapping on the flanks, and dug two gun emplacements side-by-side within short range of both the town walls and the earthworks in front of them - a concentrated and devastating barrage of the earthworks began.

In forward right of the Parliament besiegers 'works, you can see the two heavy guns now in place.

At close range (5 grid squares or less), the base to-hit for heavy artillery is 5+.  If fire is accurate, a d6 is rolled for effect: on 1-3, 2 SP are deducted from the earthwork's 30 SP in structural strength, but on 4-6, a 1d6 is rolled and that is deducted instead (technically this creates a weird probability spread with 2 SP being the better than 50% likely result).  Once two heavy guns were targeting the same earthwork section, it took just a few days to completely destroy it.

Sir John Meldrum oversees the bombardment of the earthworks.

With the extra +1 to hit from Parliament commander Sir John Meldrum personally overseeing this bombardment, the outer earthworks were finally breached.


Unfortunately, in the very same artillery phase that the earthworks were breached, Royalist artillery (which had already complete destroyed one of the Parliament heavy guns) scored a final hit on Parliament infantry which pushed total lost to SP to 50%, which meant that Parliament abandoned the siege before bombardment of the inner defenses could begin.  The siege was lifted and the Royalists pick up their first win in the campaign. 

End of game, with the outer ring of defenses breached but bombardment of inner ring never even started.

Also endgame but from behind defenses.

The loss of 50% SP for either side serving for either lifting the siege or surrendering worked well as a simple composite abstraction for the food, ammunition, and morale factors as well as lost casualties. Early aggressive, or even reckless, sapping by the besiegers and multiple sallies and raids by the besieged gave way later on to both sides hunkered down while the heavy guns traded shots.

Royalist light dealing the game winning volley.

Both attacker and defender were therefore probably far too aggressive early on with sapping and raids, with Parliament in particular wasting a lot of manpower resources in sapping forward in two prongs, when the most effective sapping strategy is to create two or three contiguous earthwork sections within short range of both inner and outer defensive rings where all artillery can concentrate fire at same point.

Another view from the walls.

This raises another possible endgame (possibly less interesting to play), where both sides focus first on using artillery to (successfully) destroy the other side's artillery.  After all, if the besiegers can't create a breach, the game is basically over.  And if the defenders cannot harass the besiegers with their own artillery, they will be in desperate stakes as their only remaining option to wait for the storming attempt or to launch risky sallies.

Parliament besiegers waiting for the breach to be created from the safety of trenches at the rear. 

A simple solution might be that a gun can lose 1 SP to artillery fire, but to score the 2nd SP and destroy it, a sally or raid must be launched (to spike the gun), or the emplacement (earthwork or wall) must be completely destroyed while the gun is co-located therein.

Parliament troops, almost in musket range of the town walls.

Victorious defenders.

Exhausted besiegers prepare to withdraw.

On the Lincolnshire campaign board, the unsuccessful 26-day siege of Newark put an end to the Parliament string of victories.  The Royalists roll a 3 and Parliament rolls a 1 and both advance accordingly. 


The Royalists then roll a 6 and move to and stop on the next battle square - they will be on the offensive on the next battle!


Blue: Parliament victories. Red: Royalist victories.

Thursday, May 20, 2021

Siege Rules for English Civil War Using The Portable Pike & Shot Wargame

1. SET UP

Battalia: SP 4. Move 2. Weapon range 2 (-1 to hit at 2 squares, however)
Commanded Shot: SP 3. Move 2. Weapon range 2
Heavy Artillery: SP 2. Move 2. Weapon range 8
Light Artillery: SP 2. Move 2. Weapon range 5

Decide if the town besieged has walls or not. If running a historical-based campaign you can usually figure out with a little research whether there were walls or not.  Next, using your army-size randomizer, roll up the attackers force, but perhaps add an additional +1 to battalias and commanded shot, and ignore cavalry altogether.  The attacker should have a minimum of two heavy artillery pieces, but probably a max of 3 or 4.  The defender's infantry is simply half of the attackers. The defender should have a minimum of one heavy artillery piece and the defender's total artillery pieces should never exceed the attacker's total.  The defenders total SP for infantry should be half of the attackers. The defender receives one grid side's of earthworks for each point of SP it does not have in infantry (so if the attacker has 20 SP in infantry, the defender will have 10 SP in infantry and 10 grid-sides of earthworks).  These earthworks represent defenses the defender prepared prior to the siege, and these may be placed as follows: in the row of grids squares adjacent and parallel to the town wall (or the edge of the town buildings if there is no wall). They may also "bump out" into the next row of squares (such that they will be two grid squares from the town wall) as long as they form a continuous row of earthworks back to the first row closer to the town wall. In other words, "bumping out" the earthworks will bring heavy artillery in closer range of the besiegers but will shorten the overall length of the earthworks.

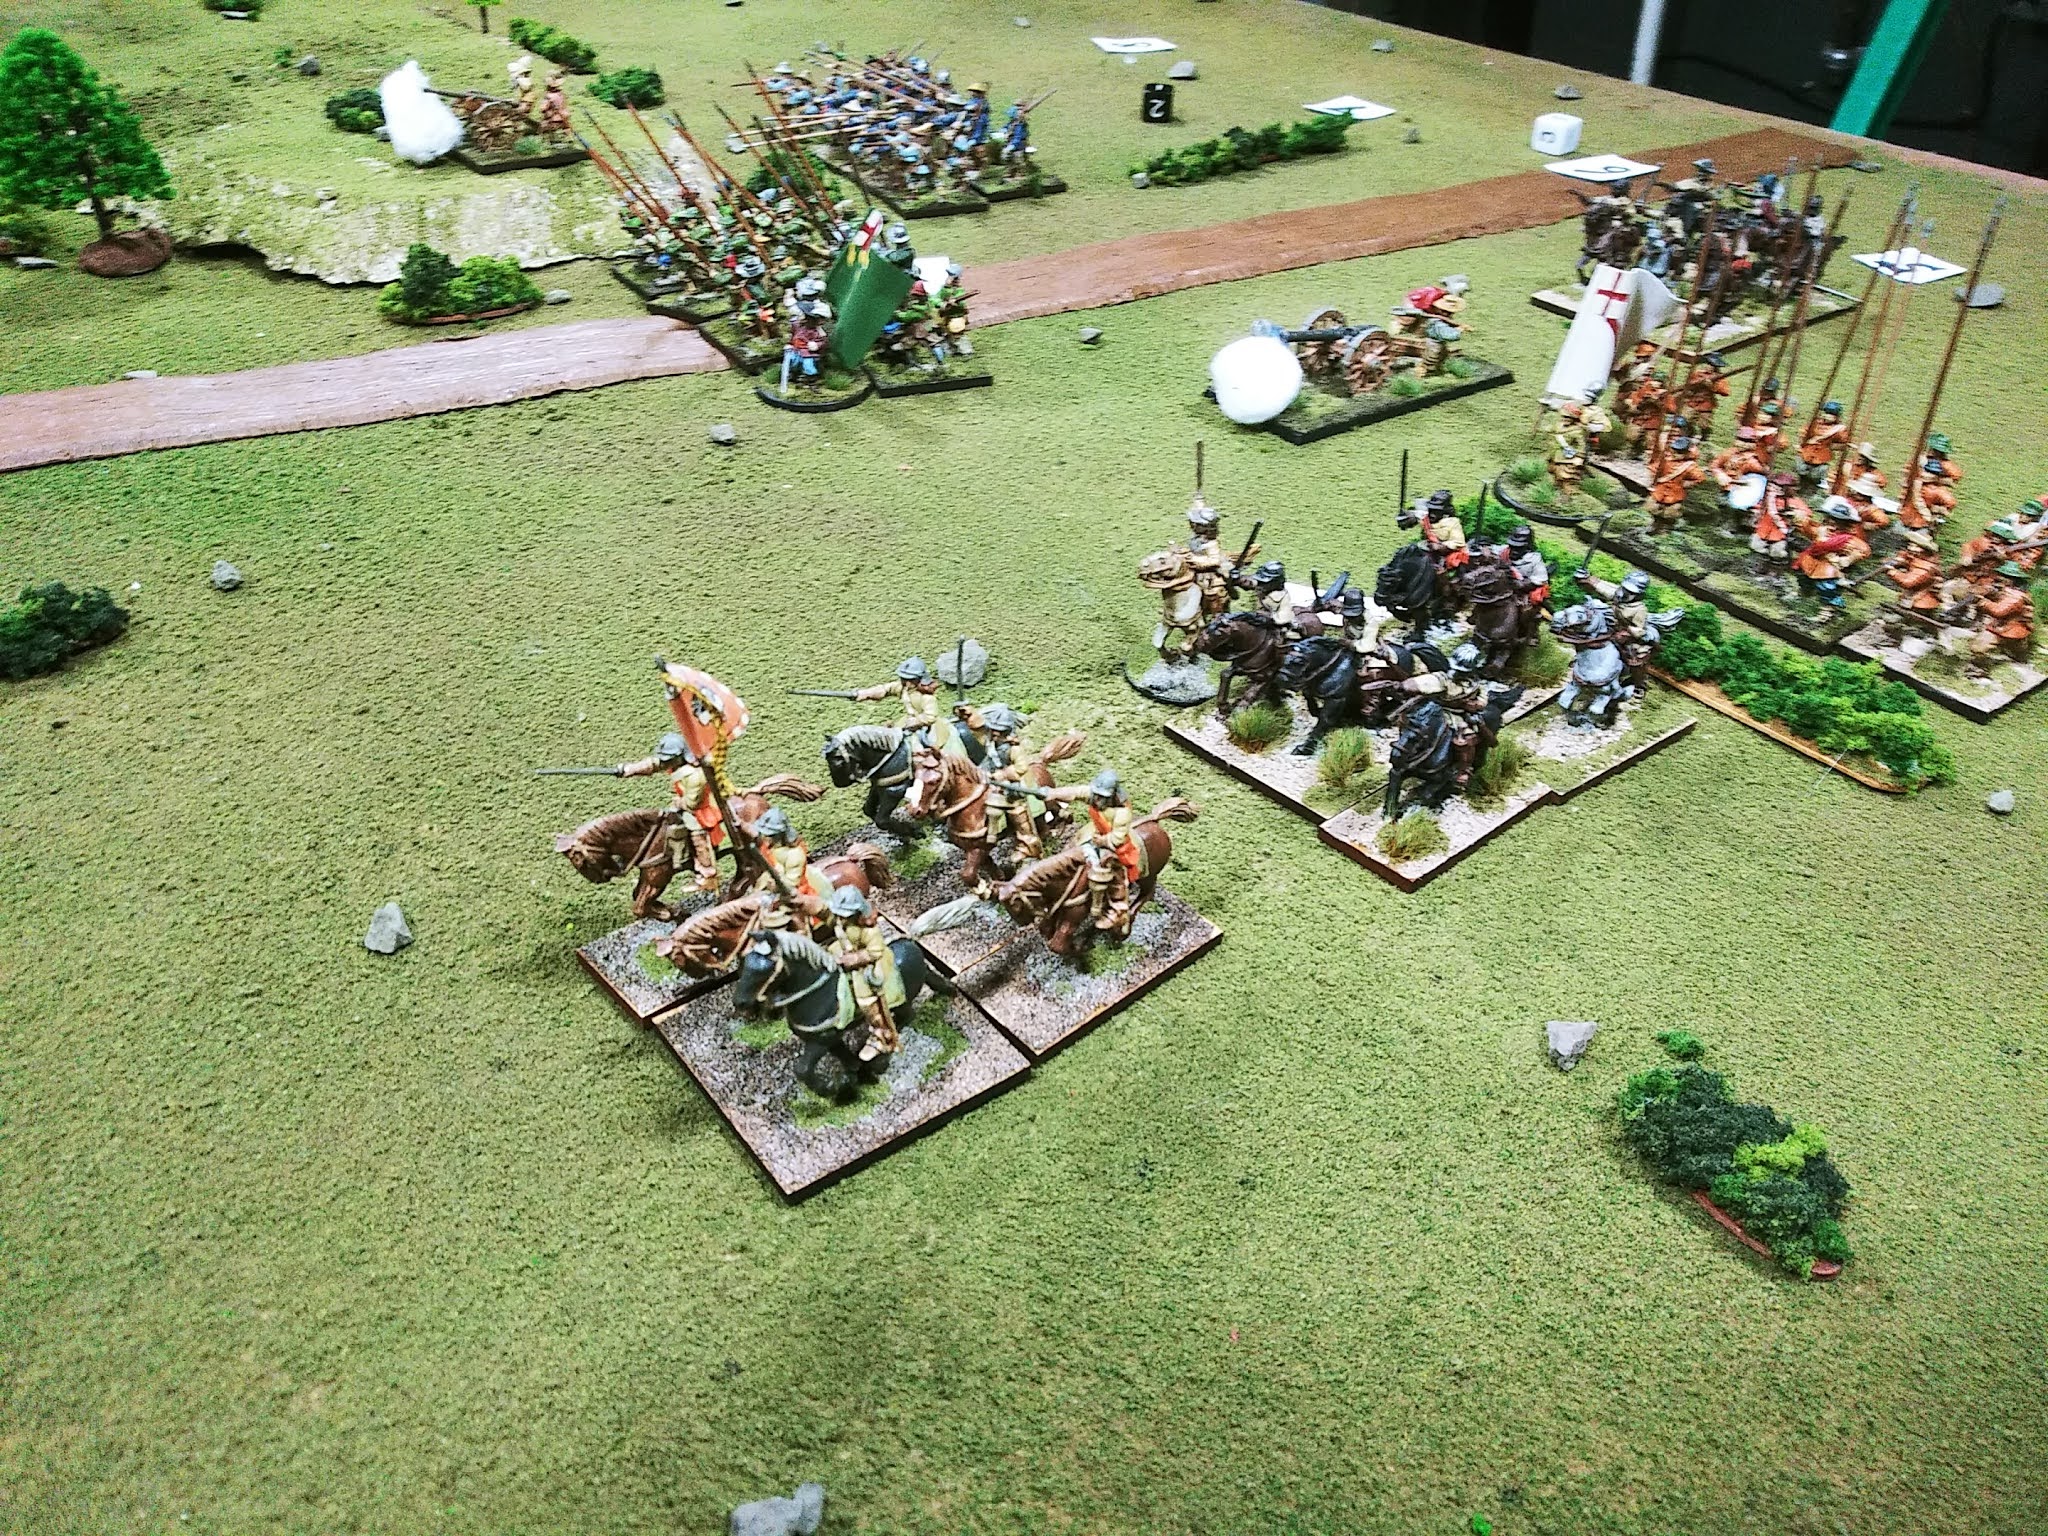
The defender may then place his infantry and guns anywhere behind his defenses.

The attacker places all his guns and infantry on his closest back line.

It may also be easier to simply give the attacker 2/3rds of your collection's infantry units, and give the defender the remaining 1/3rd. 

2. INITIATIVE

Attacker goes first in the first turn. Thereafter, dice for initiative on each subsequent turn. A turn represents a day's activity, roughly.

3. ARTILLERY PHASE. 

The attacker's back line is always out of range, and artillery may not fire in or out of that line of grid squares.

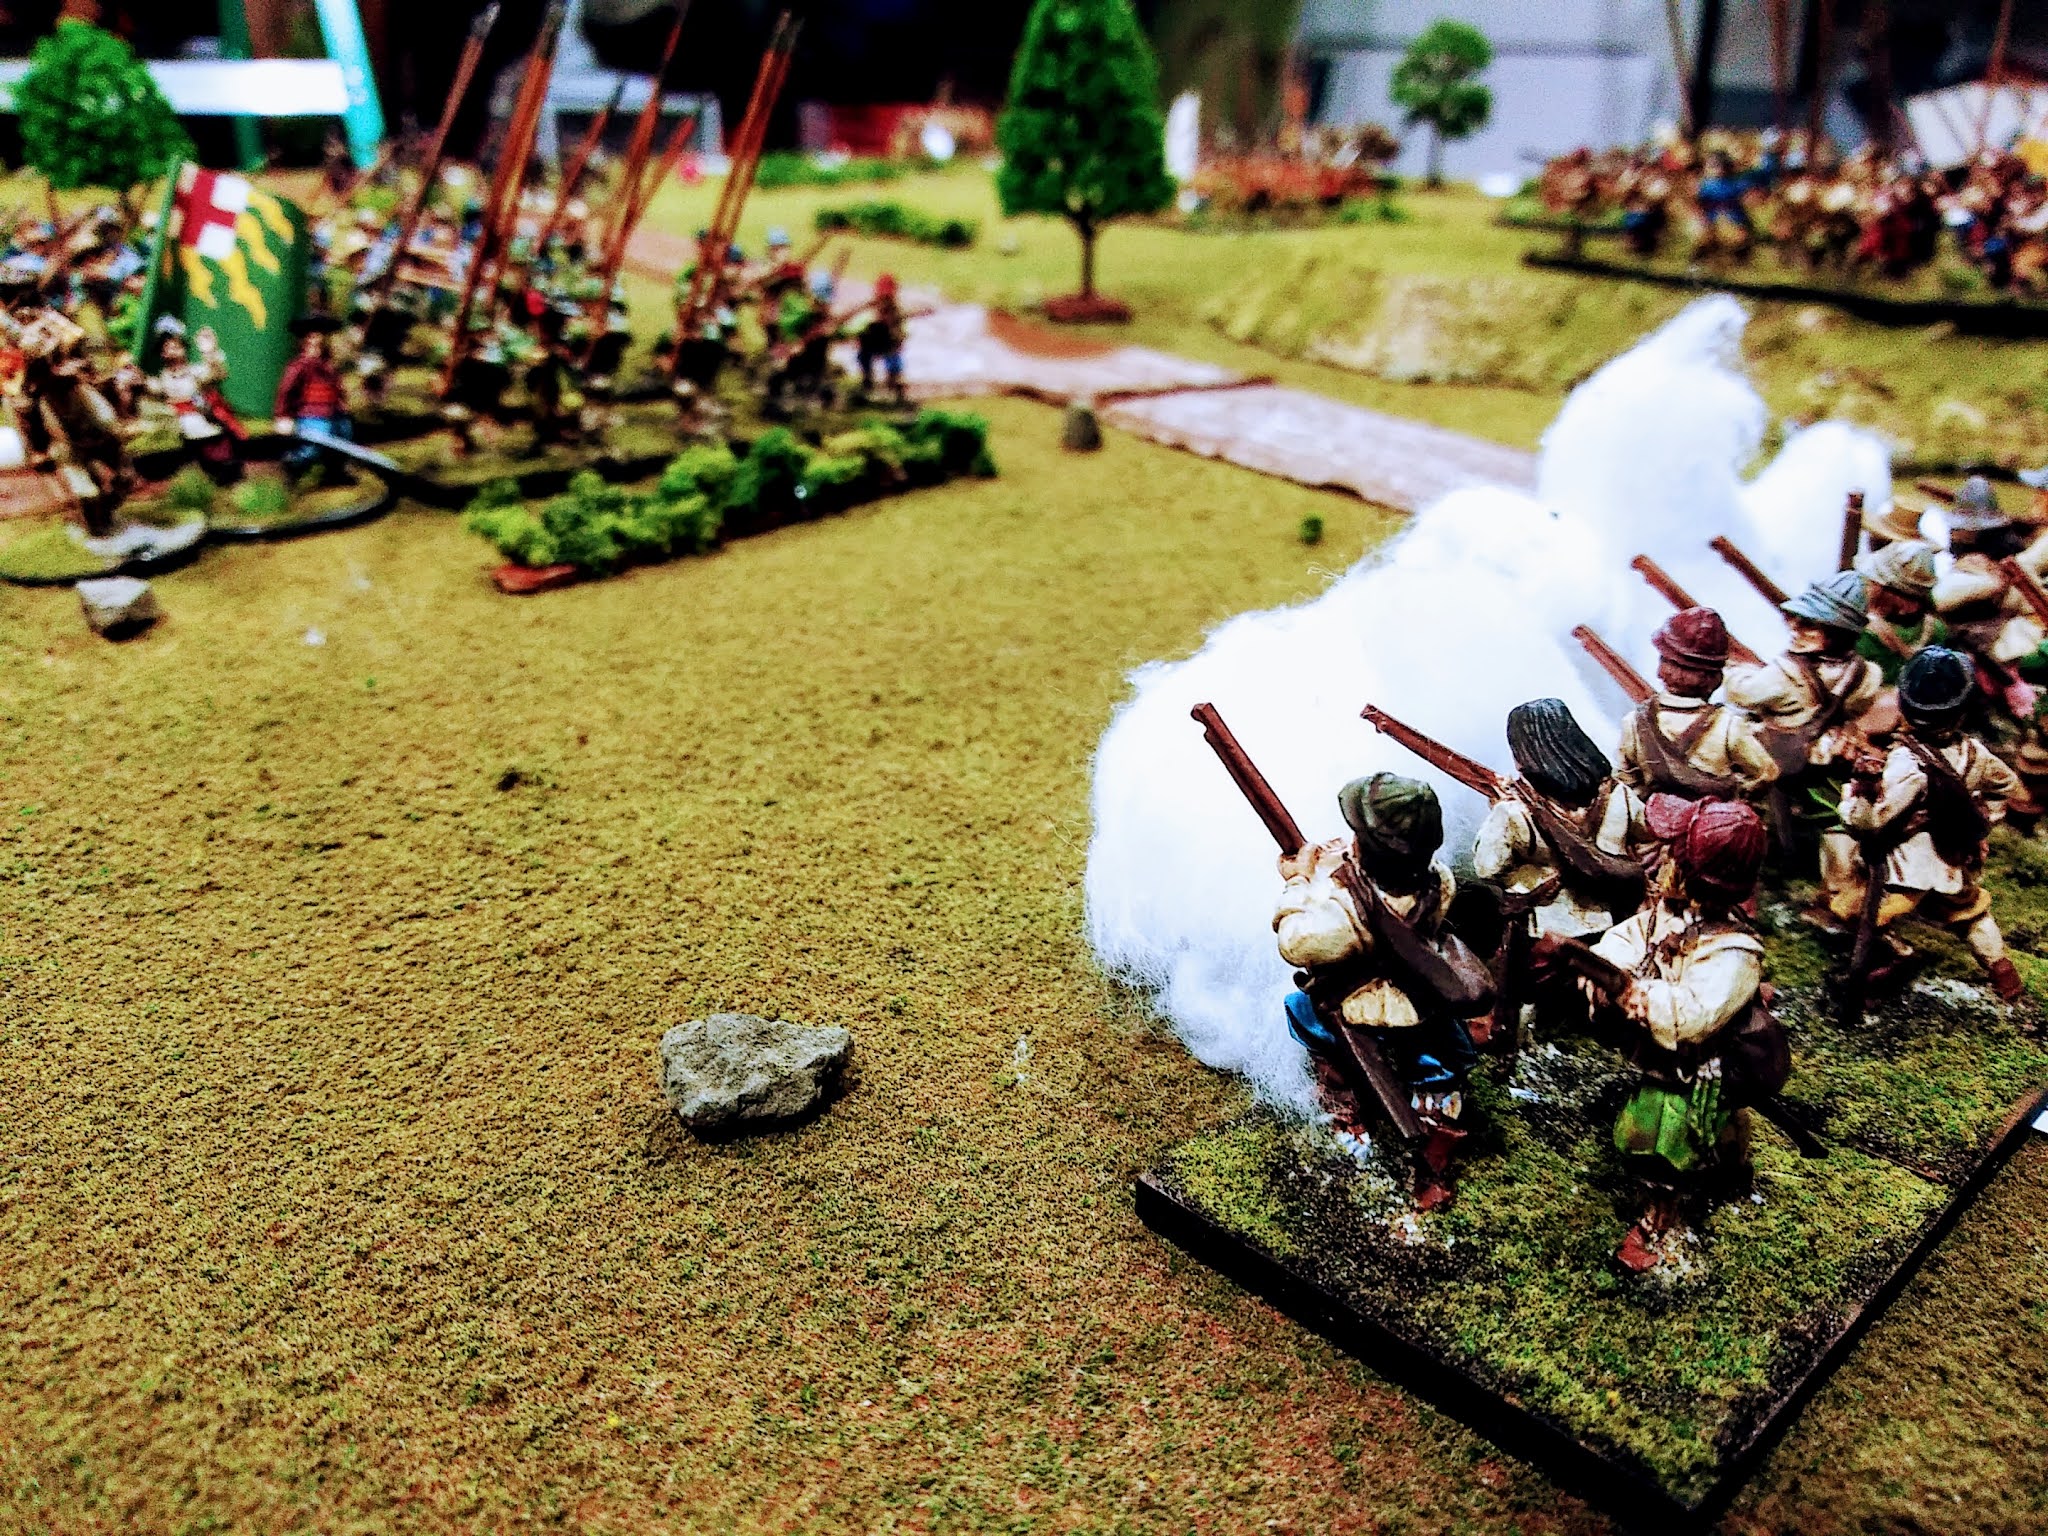
Heavy artillery has a close range of 5 and a long range of 8. Light artillery has a close range of 5 only, but is less effective against fortifications. A gun may not target a town wall if the line of sight is obstructed by an earthwork - it must reduce the earthwork first. At long range, artillery fire is only effective and counts as a "hit" on a natural roll of 6. At short range, a roll of 5+ is effective. A gun may not fire if was moved the previous turn.  Modifiers to hit are as follows: +1 if gun is shooting at same target as previous turn.  

Unless playing out the storming of a breach (see below) or an especially prolonged Sally (see also below), siege artillery fire is focused on the destruction of earthworks and walls. A town wall section has 10 SP.  An earthwork has 30 SP.

If a fortification is hit by heavy artillery, roll a d6 to determine effect: 1-3: 1 SP damage; 4-6: 1d6 SP damage.

If a fortification is hit by light artillery, roll a d6 to determine effect: 1-3: 1 SP damage; 4-6: 2 SP damage.

When an earthwork or wall is reduced to 0 SP, it is removed or replaced with a breach marker. Defenders may build a barricade in its place (see below), which cannot be destroyed by artillery fire, but only counts as cover for any defending units and takes 2 movement to cross, as per a regular game of The Portable Pike & Shot.

4. MOVEMENT

Infantry units may move 2 squares per turn. Artillery may move 2 square as well, unless a storming of breach or sally action is underway, in which case heavy artillery does not move (although it may be rotated), and light artillery pieces may be moved 2 squares.  If a unit crosses its own earthworks to leave a square, there is no movement penalty.  If a unit must cross enemy earthworks to enter a square, it costs 2 movement instead of 1. The exception to this is if a close combat has occurred, and the enemy defending the earthwork has retreated, the attacker may move across the earthwork at that time.

5. SAPPING

If unit has not moved yet, it may be instructed to dig new earthworks in an adjacent square, so long as this forms a continuous line of adjacent squares with earthworks. The exception to this is if the unit is in the attacker's back line. Move the unit into the square being sapped, and arrange it or add a marker to indicate that it is digging.  Assuming the unit does not retreat as a result of a Sally (see below) or from defensive fire (see below), at the beginning of the next turn, a new earth work can be placed on one side of the grid square. 

If it is desired to have more than one side of a grid fortified with earthworks, then an additional turn of sapping is required for each turn (so making a 'L' corner will take two turns, and making a 'U' shape will take 3). Since the first piece of earthwork presumably faces toward the enemy, this means that a Sally on a unit sapping a second length of earthwork in the same square will be at -1 as the sapping unit is in cover of its already constructed works.

The besieger may also have units construct ladders for escalade for use during a Storming attempt (see below), one ladder for one unit in one turn, using same principle as sapping (i.e., it may not move that turn, and assuming it is not disrupted by a Sally attack - although if it partakes in counter-attacks to a Sally the ladder is not completed).

The besieged may dig new entrenchment extensions of their existing defenses using the same rules. A unit working on new entrenchments is subject to artillery fire. 

Either side may attempt to repair damage to earthworks or town walls.  In doing so the unit is exposed to artillery fire although the artillery is -1 to hit from partial cover from undamaged fortifications, or from working at night.  If the unit is not forced to retreat from artillery fire, the fortification section recovers 2 SP.  Repairs may be effective at first but will probably quickly become a lost cause.

6. ARTILLERY FIRE AT SAPPING UNITS

 A gun may target a unit that is sapping.  However, it is -1 to hit as the sappers use the existing earthworks they are sapping from for cover, and it is also -1 to hit if the sappers are digging from the starting back line. If hit, roll a d6 for effect (same for light and heavy artillery): 1-3: intense fire drives sappers back, and new earthwork is not constructed; 4-6: new earthwork section completed but sapping unit loses 1 SP.

7. SALLIES

The defender may launch Sallies at sappers or entrenched guns during their turn.  A Sallying unit may move 4 square on its first turn, representing the element of surprise.  If attacking a Sapping unit, fight the close combat as if a regular game. Sallies count as "turns-within-turns," so after all Sallying units have resolved their attacks, the besiegers may have a turn to use artillery fire (not against fortifications, but against units or other artillery as per usual field battle game - artillery will retreat if required, which represents the crew withdrawing to other cover), move, counterattack or shoot back as they so wish. The Sallying player then falls back, and is returned to its defenses.   

Attacks against units behind earthworks are -1 as the unit is in cover. Artillery fire during a Sally against units in cover will therefore probably be a 6 to hit only. A Sallying unit may opt to move into musket range and make a shooting attack instead of close combat. Close combats may be continued via moving into empty squares if the other unit has retreated per the regular rules. If a Sapping unit is forced to retreat from a Sally, it moves into an adjacent square that has earthworks, and the new earthwork section is not completed.

The besiegers may also launch sallies (raids) at entrenched gun positions or sapping defenders but not other infantry units.  Sapping by defenders is therefore very risky once in range of sallies.  Infantry units who are not sapping are considered on guard and cannot be taken by surprise. 

8. STORMING A BREACH

Storming a Breach is the endgame of a siege game.  Once started, a regular game can be thought of as starting. A breach in earthworks may only be stormed if there are no town walls.  An attacker's unit, which must start positioned in a straight line from the breach, is designated as the storming party/forlorn hope.  This unit may move 4 squares to initiate the storm but can move only up to the square adjacent to the breach. It may attack any defenders in the breached grid square.  

Other besieger units may support the attack but can only move two grid squares. Such units may carry ladders and attempt to escalade the walls. Escalading is considered an attack against an enemy in cover. If no enemy unit in the defending wall square, on the following turn, the escalading unit may be placed on the wall (similar to crossing an obstacle). This is why creating more than one breach in the outer earthworks of the town is advantageous.

9. ENDING A GAME

There is no separate exhaustion and breaking points as in a regular field battle game. 

The town defenders will surrender if they have lost 60% of their starting infantry SP.

The besieging attackers will give up and leave if they have lost 50% of their starting infantry SP.

An attempt to take the town by Storming a breach will end when:

A. The designated Storming Party/Forlorn Hope unit has successfully moved through the breached square and into the town - the besieger wins the game. If a second attacking unit successfully escalades a wall and moves into the town center before the Forlorn Hope carries the breach, the besieger wins the game. If another attacking unit moves through the breach and into the town center (presumably because the Storming Party has cleared the way), the besieger wins the game. Once an attacker moves into the town squares, the game is instantly over.

B. If at the end of either player's turn, the designated Storming Party/Forlorn Hope unit is completely destroyed, and no attacking unit is adjacent to the breach in the town wall, and a defending unit is occupying the breach square, and no attacking units have successfully escaladed and are on the walls, then the defenders have held the walls, and storm has failed - the besieged have won the game. 

C. If a side reaches 60% or 50% losses as described above during a Storming action, finish the player's current turn in progress to see if the conditions of (A) or (B) are met. If neither are met, the defenders will surrender or the attackers will lose their resolve as described above. If both are met in the same turn, victory defaults to the defender and the siege is lifted.

NOTES:

  • I wrote these up because I felt like the Lincolnshire campaign needed an attempt to take the Royalist stronghold of Newark, and since the siege rules as presented in the The Portable Pike & Shot Wargame felt a little incomplete, I decided to pinch a little from both Portable Pike & Shot and my earlier experiment with siege rules for the Italian Wars, each and came up with the above.
  • As far as the logistical considerations from the Italian Wars rules, such as food and ammunition, are fun, in terms of making a game, I do not want an option for the attacker to simply starve the defender out.  The logistical rules also seemed to have little impact or not add much value to the game. 
  • Hopefully, defender artillery fire and Sallies create pressure on the attacker to bring heavy guns into close range as quickly as possible to create at least one breach and initiate a storm while having lost as few SPs as possible. However, if attacker is too aggressive, an attack on a single breach may create a bottle neck and advantage in superior numbers may be blunted. Defender risks being understrength if Sallies are too aggressive, but cannot afford to let attacker Sap at will. 

This is the 150th post. Thanks for reading!

Wednesday, May 12, 2021

Carlton Scroop (June 1643) - ECW Lincolnshire Campaign Game #3

On the campaign board, Parliament slid forward on the victory arrow, and then the Royalists rolled well and easily moved to the third battle square.  Going to the map of Lincolnshire, and considering that the Royalists under Sir Cavendish had lost two battles in a row (with Cavendish himself slain at Lincoln Heath), then the Parliamentarians under Lord Willoughby would probably be moving in June of 1643 to re-secure Grantham in southwest Lincolnshire. Attempting to take Willoughby off-balance, the Royalists, now under command of Sir John Henderson, attack the Parliament forces near Carlton Scroop, six miles north of Grantham.

Sir Henderson's Royalists (Whitecoats and Northern Horse).

Because Henderson was the attacker, and because they ended up with a few less strength points than the Parliament army, they received two dragoon units, which had ridden ahead and deployed facing the Parliament left flank.  This was Sir Henderson's first error (that is, my first error) - I waffled horribly on whether to deploy the dragoons against the Parliamentarian left flank or to deployment next to the small church on the Parliament right flank. Since the attacker gets the first move automatically, one troop of  dragoons would end up in the church and the other in the stone-walled yard by the first turn. This would force Lord Willoughby (played by Pete) to react, while the rest of the Royalist army advanced. 

Starting positions, Parliament on right, Royalists on left. Way to much artillery all around.

However, since Dragoons only have 2 Strength Points, and because they have a -1 penalty in close combat, I was not confident that they could hold the church for very long, if at all, in the fact of an attack by stronger foot battalias (even if they were poorly rated trained bands). Wanting to avoid committing forces to a costly fight for possession of the church, I decided to leave the dragoons on the opposite flank.

Lord Willoughby's roundheads (the now-usual Lincolnshire Trained Bands and Fairfax Horse).

With the Royalist dragoons on his left, Lord Willoughby's strategy was quite simple: with four troops of house to the Royalists' three, he would anchor his right against the church, and then bring his strength in horse down upon the dragoons and the Royalist right.

After one move - both sides have aggressively advanced, but Sir Henderson has committed his error, leaving his dragoons (at bottom of pic) exposed to a flanking charge by the approaching Fairfax horse.

As the battle commenced, an unexpected factor entered the equation - both sides rolled exceptionally well for artillery fire, and units on both sides lost Strength Points (the Royalists taking the worse of it). Henderson had by this point come up with an idea of simply advancing en masse and then having his dragoons swing in and become the right end of his right flank, providing fire support for the Northern Horse.

"That whom they hit, none on their feet might stand, though standing else as rock, but down they fell by thousands."

But I was not paying attention, and neglected to notice that the dragoons were in charging range (and flank attack nonetheless!) of a troop of Fairfax Horse.  By the end of turn 3 both dragoon units had been destroyed, and with one of the Royalist guns also knocked out by Parliament fire, Henderson was down by 7 strength points already, with the exhaustion point at 10!

Whitecoat infantry on the advance.

Sensing that the Royalists were wavering, Lord Willoughby ordered the Lincolnshire Trained Bands (the three battalias of foot) to advance in the center and on the right. Willoughby personally led an attack on the right against the Royalist trained bands (the Whitecoats were arrayed in the center). The result was indecisive, with both battalias retreating, but Lord Willoughby was sadly killed by a crofter's musketball...

Lord Willoughby slain!!

Remembering the knock-down, drag-out crawl to the break-point at Lincoln Heath (where both armies were exhausted but need to fight on where possible to break the other side), the Royalists began to position themselves so that when they became the first to become exhausted (which they did), they would still have multiple units in musketry range or even close combat range.

The Whitecoat battalias in the Royalist center advance.

When the Royalists did finally lose their 10th strength point and became exhausted, the two battalias of elite Whitecoats were situated in musket range of several targets and were in close combat range of a unit of cavalry.  On the Royalist right, the red-jacketed trained band was in range of the Lincolnshire Trained Bands.  Royalist harquebusiers were even able to over run a Parliament demi-culverin!

Royalist Whitecoats in center, attacked from both sides.

Parliament tried to press its advantage (since Royalists were exhausted, they could not "follow up" if Parliament retreated from a close combat), but the Royalists were able to push Parliament past its exhaustion point as well.  

Sir Henderson observes his folly.

Sir John Henderson and the Royalist trained band fell back from Parliament musket fire, and, now out of range, they were effectively out of the game entirely. 

Lincolnshire Trained Bands exchange fire with their Whitecoat rivals.

One of the Lincolnshire Trained Bands now turned and exchanged musket volleys with the Whitecoats.  Both battalias had a friend unit to their back, which meant they could not retreat and would hold steady in the face of increasing lost strength points.

Firefight between Lincolnshire Trained Band and Whitecoats.

In perhaps a key moment, the Royalist harquebusiers tried to over run a second Parliament gun, but were repulsed! Their retreat cut off by another Royalist gun, they instead lost the 15th and final SP to end the game.

Lincolnshire Trained Band. These are all Warlord Games figures - the horizontal and diagonal pikemen sculpts have very brittle pikes. I've replaced six broken ones with wire pikes (all the horizonal 'attacking' poses), and since then another two of the original plastic pikes have broken. When I fix those I will probably covert all remaining plastics to wire pikes...

After the game the chat focused on how over-important artillery had been, with a back-and-forth that felt more like Napoleonic counter-battery fire rather than non-standardized and mismatched mid-17th century cannon crewed by civilians.  Because many wargaming rules are genealogically connected to Napoleonic wargame rules, this is a particular gremlin I have wrestled with a lot (pike blocks, whether Macedonian, Swiss, Landsknecht, or New Model Army, tend to have rules versus cavalry that resemble Napoleonic infantry squares, for example, with the relations of artillery, cavalry, and missile troops all mirroring those of their Napoleonic counterparts).  A simple solution struck upon was to roll a 1d3+1 for the number of shots each heavy gun could take, after which they would essentially become invisible (they would remain on the table but could share the grid square with other units, was not a viable target anymore, etc.).  Light guns in the game behaved in a reasonable manner.

End game. The Whitecoat battalias in the center were able to deduct several SPs from Parliament despite being past exhaustion point, but in the end were too far behind to pull a victory from defeat.

Later, re-reading the rules in The Portable Pike & Shot Wargame, although not a explicit rule, I noticed that at the end there are some sample army lists.  These armies are twice as large as the ones being used in this current campaign (15 units as opposed to 6-8 being fielded), but its notable that three out of the four army lists have only one artillery unit in the entire army (the Thirty Years War French list has two artillery).  I read this to mean that the author did not intend for there to be three artillery pieces accompany an army of 6 to 8 non-artillery units! Accordingly, I will adjust my army randomizer to 0-1 artillery pieces per side (probably even 1d3-2, so artillery pieces are simply not present most of the time).

Situation by end of June, 1643 - three Parliament victories and all of Kesteven the prize.

On the campaign board, the Royalists once again did not slide forward on the victory path. Parliament rolled and landed on a battle square making them the attacker for the next battle. Carlton Scroop seems like it would be an important victory for Parliament in the context of the campaign. With Sir John Henderson's army broken, Parliament is able to retake Grantham and secured the entirety of the Kesteven region of Lincolnshire, being roughly south of the Witham and east of the Trent.  Parliament could strike north and try to take Glanford Bridge, opening a secure line to Hull, but the more tempting prize was Newark...  

The Portable Pike & Shot Wargame has a siege rules section, which confusingly refer to using the Portable Napoleonic Wargame rules.  Having played a siege game before, I have the necessary town walls, sconces, and trench/earthwork terrain pieces, and have been wanting to try a siege again.  So, of course, the Parliament forces, now under command of Sir John Meldrum, must decide to attempt to take Newark by siege! This will require a few new rules (a different army generator and terrain set up) and I need to touch up some the terrain.

Friday, May 7, 2021

Lincoln Heath (May 1643) - ECW Lincolnshire Campaign Game #2

After the battle at Dimbleby, I rolled on the campaign board, and Lord Willoughby and his Parliament forces landed on the second battle square, indicating that he had caught up with Sir Thomas Cavendish's Royalists somewhere.  I figured that Cavendish fell back to Grantham, then headed north by road to Lincoln.  Willoughby, still at Sleaford, ran north on the Sleaford road towards Lincoln, then popped around and in front of, Cavendish's army at Lincoln Heath, about six mile south of the town of Lincoln itself.

For Parliament: Lord Willoughby's Lincolnshire Trained Bands.


Lord Willoughby had with him:
3 Horse (2 Fairfax horse, 1 harquebusier) (9 SP)
3 battalia (all Lincolnshire trained bands) (12 SP)
1 heavy gun, 1 light. (4 SP)
Total: 25 SP
Attacker upgrade: 1 Dragoons (2 SP)
Updated Total: 27 SP (exhaustion point: 10 SP. Break point: 15 SP)

Sir Cavendish had:
3 horse (2 Northern, 1 harquebusier) (9 SP)
2 battalia (both White Coats) (8 SP)
2 commanded shot (1 white coat, the other seasoned foot) (6 SP)
1 heavy gun, 1 light. (4 SP)
Total: 27 SP (exhaustion point: 10 SP. Break point: 15 SP)

Initial positions: Parliament at bottom, Royalists at top.

Lord Willoughby's (played by Nick) plan was for the dragoons to directly harass the Royalist right at dangerously close range, which would force Cavendish (played by me) to disrupt his own plans to dispose of the dragoons.  The Royalist plan was to form a strong line of the better quality infantry and keep the cavalry in reserve to take advantage of any opportunity that should arise.

Sir Thomas Cavendish's Whitecoats and Northern Horse.

Willoughby's ruse with the dragoons worked the charm, as even though they were easily dispatched, Cavendish had to send a troop of harquebusiers to do so.  Willoughby then sent two troops of horse to quickly attack the Royalist harquebusiers, driving them off the board (a loss of 3 SP!). 

Willoughby sends his harquebusiers and Fairfax Horse on the attack.

Cavendish had little choice but to move his remaining two troops of Northern Horse to counter the cavalry threat to his right flank.  Meanwhile, the Lincolnshire trained bands remained mostly stationary in the center, (and out of range of musketry) although Parliament's falconet light gun did wheel atop the long ridge and started peppering the Whitecoat commanded shot at a distance.

I don't like chits and markers on my table but because the poor-average-elite rankings add good ECW-flavor to these games, and because I would forget otherwise, I had to litter the table with notes about unit levels of training. Here, elite "Newcastle Whitecoats" hold the crest of a small hill.

Whitecoat commanded shot and small gun on Royalist left push forward a bit.

Being closer to his exhaustion point than Willoughby, Cavendish had to creep his own falconet and commanded shot forward on his left to get them into range of some targets. 

Willoughby's Lincolnshire trained bands (rated poor). These were smartly kept out of musket range until the very end of the battle.

Around this time, playing as Cavendish, I pondered if I should advance my infantry in the center and right forward a full two spaces - this would put some of the Parliament trained bands and horse in musket range.  Experience with The Portable Wargame has taught me that you typically get one good attack during a game, in terms of your army being fresh enough to capitalize on an attack (i.e. not too close to your exhaustion point). If you wait too long, however, you will so close to your exhaustion point as to not be able to make a strong attack.  Because I was feeling pretty secure in current position, and thought I could handle the attacking Parliament cavalry on my right, I decided to sit tight and not advance.

Retrospectively, this it about the high-water mark for Royalists (to the right side) in the game. Although they have just lost a unit of harquebusiers, they have also dispatched Parliament dragoons and have a slight lead in Strength Points. The Royalist left has crept forward a little, and perhaps the center and right should have advanced en masse at this point to press advantage of better quality Whitecoats against Lincolnshire trained bands...

As it turned out, the Parliament cavalry did better than the Northern Horse.  In fact, trying to rally the right flank, Sir Thomas Cavendish himself was slain, some say by an musketeers bullet, by the blade of a Parliament trooper by others (see Note).   The Royalists lost a few more SP here and there, and Cavendish's army was suddenly past its exhaustion point and could not advance towards the enemy any more, at which point the Lincolnshire Trained Bands began their advance on the Royalist left and center.

Lincolnshire trained bands on the attack.

On the Royalist right the Northern Horse and Whitecoats fought fiercely and were able to rack up some quick lost strength points on the Parliament forces, which also became exhausted!

Cavendish's Northern Horse tries to fight off Willoughby's cavalry from two sides.

Then followed a quick series of turns as both sides tried to use ranged attacks as they were still available (if a unit retreated out of range, one could not advance to stay in range any longer!) or completed close combats with units still adjacent (but could not follow up!).

Outnumbered Whitecoat commanded shot tries to hold against the Lincolnshire trained bands.

Despite a strong rally, in the end it was Willoughby who won out, with the Royalists first to lose 15 SP (Parliament lost 12, I recall), and the Royalists fled the field.

Victorious Lord Willoughby at the head of his trained bands.

This was a quick (1 hour and 45 minutes) game played remotely.  As discussed above, both players devised battle plans.  As the Royalist player, I probably stuck to my plan too long, and should have pressed an attack with my better trained foot when I had the chance.  Still, even past the exhaustion point, the better quality Royalist Whitecoat infantry and Northern Horse were able to push the Parliament forces past their own exhaustion point and even got in striking distance of breaking the Parliament army altogether. Dramatic stuff, and (to me at least), credible insofar as it resembles accounts of how smaller English Civil War battles could unfold.

Note: The real Sir Thomas Cavendish went into exile with his brother after the Royalist defeat. He eventually returned to England after the Restoration and died in 1654 at the age of 59.