Showing posts with label Middle Ages. Show all posts

Thursday, April 30, 2020

Medieval Battle in 54mm II

Ah, much better! I put a grid of 6" squares on a piece of felt, divided my medieval 54mm collection up into two armies of 13 units each (10 figure foot units and 5 figure mounted units), and played a very satisfying game of Lion Rampant (as to be expected). Lion Rampant works very well on a grid! It is also visually pleasing with 54mm figures because units can be smushed next to each other and you can still easily tell one unit from another. This creates a very nice massed effect.

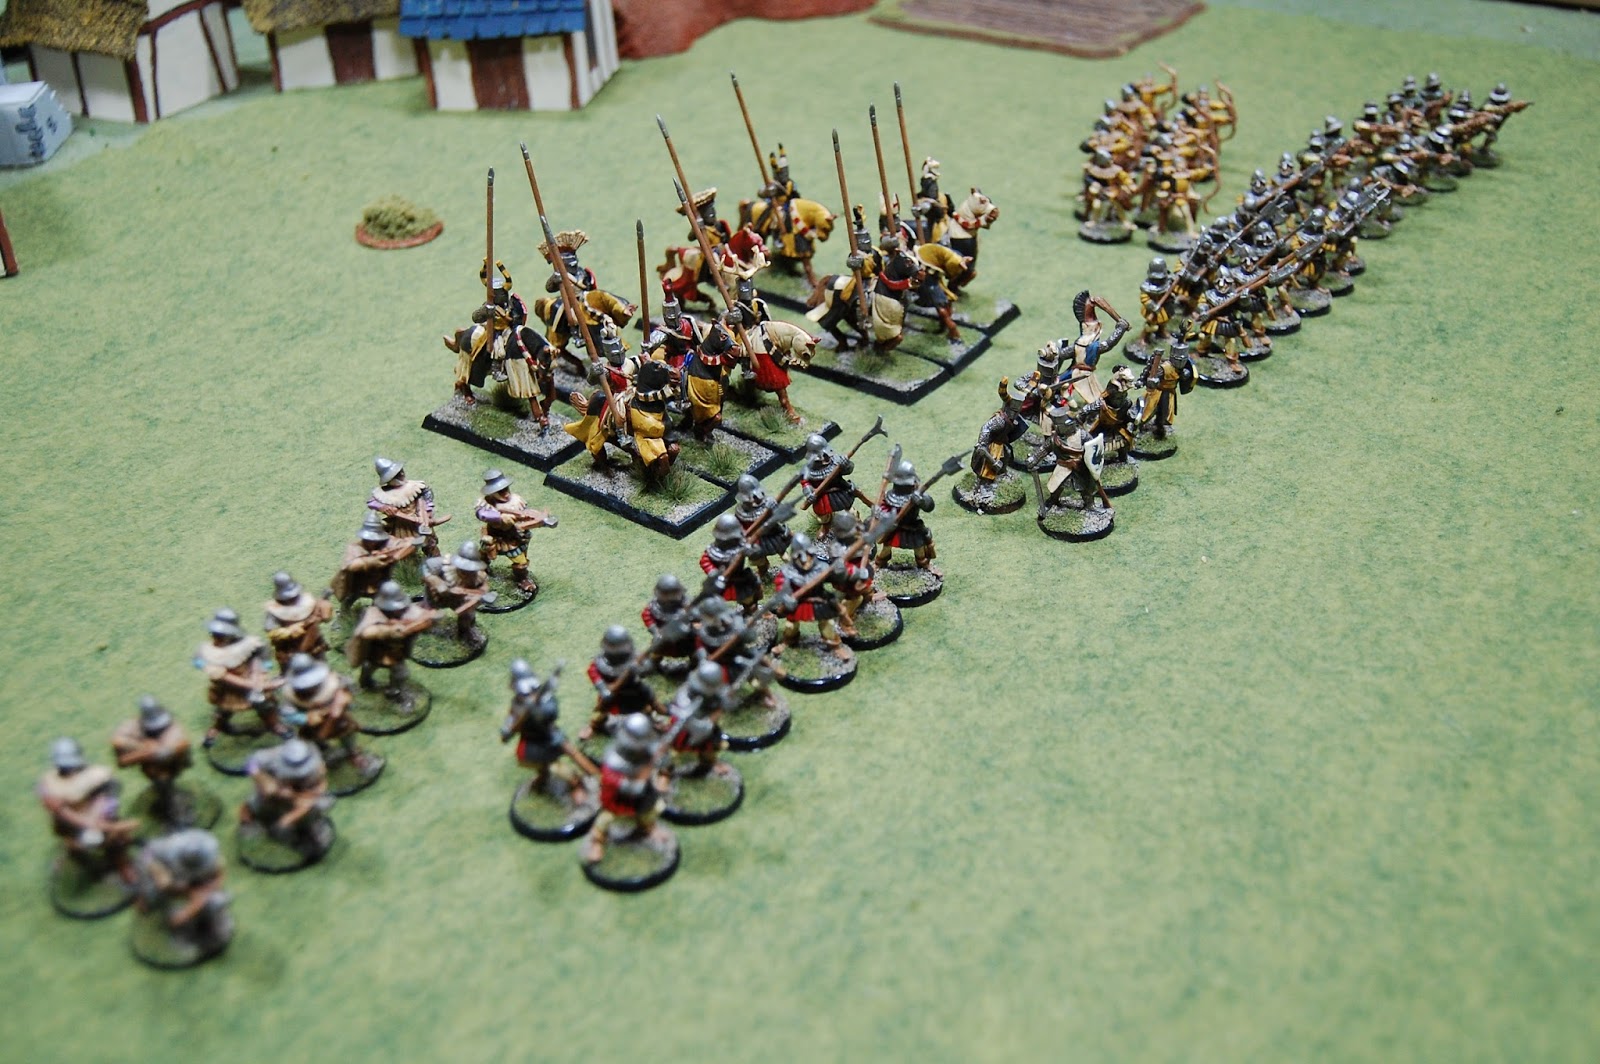
Starting deployments.  Imperial forces on the upper left and Papal forces on the right.

One army had five units of Britains Deetail Saracens in it, and was therefore nominally that of Frederick II, Holy Roman Emperor (r.1220-1250), who was also King of Sicily (r.1198-1250) and enlisted his Muslim subjects in his armies because, as Muslim soldiers, they cared not for the excommunication by Frederick's rival, the Pope.  Accordingly, the opposition could therefore be the Papal army of Gregory IX in 1229.

I kept things very same-same and the units were all mounted sergeants, foot sergeants, and archers. There was also one unit of foot yeomen, being my Robin Hood figures I finally finished painting (I got them and started painting them 4 or 5 years ago!). For the mounted sergeants I gave them the 'Venomous' rule from Dragon Rampant (when attacking, a 6 will count as two hits) which I have found to be a good but balanced mechanic for the shock effect of heavy cavalry.

Starting deployments. Imperial army at bottom, Papal at top.

For movement on a grid, infantry could move one square and cavalry two. A move can have only one diagonal move. Archers had a shooting range of four squares, and again, only one of those squares could be a diagonal move. Three squares was close range (5+ to hit) and four was long (6+). The foot yeomen had mixed weapons, so had a shorter maximum bow range of 3 squares.

A gathered host of Imperial infantry.

Papal knights and infantry.

Opening moves. The Imperial infantry advances on the right. The Papal horse fans out and advances.
The flow of the game was as follows:the Papal foot yeomen are routed by Imperial cavalry on the Papal right.  On the Papal left, all four units of cavalry advance.  They rout one unit of Imperial cavalry, lose one unit themselves, and the remaining three take casualties and pull back. The most intact of these three units fails several rally tests and also flees the field. The Papal left is therefore effectively collapsed.

Imperial Muslim cavalry rights forward.

View from behind Imperial lines.

Papal infantry.

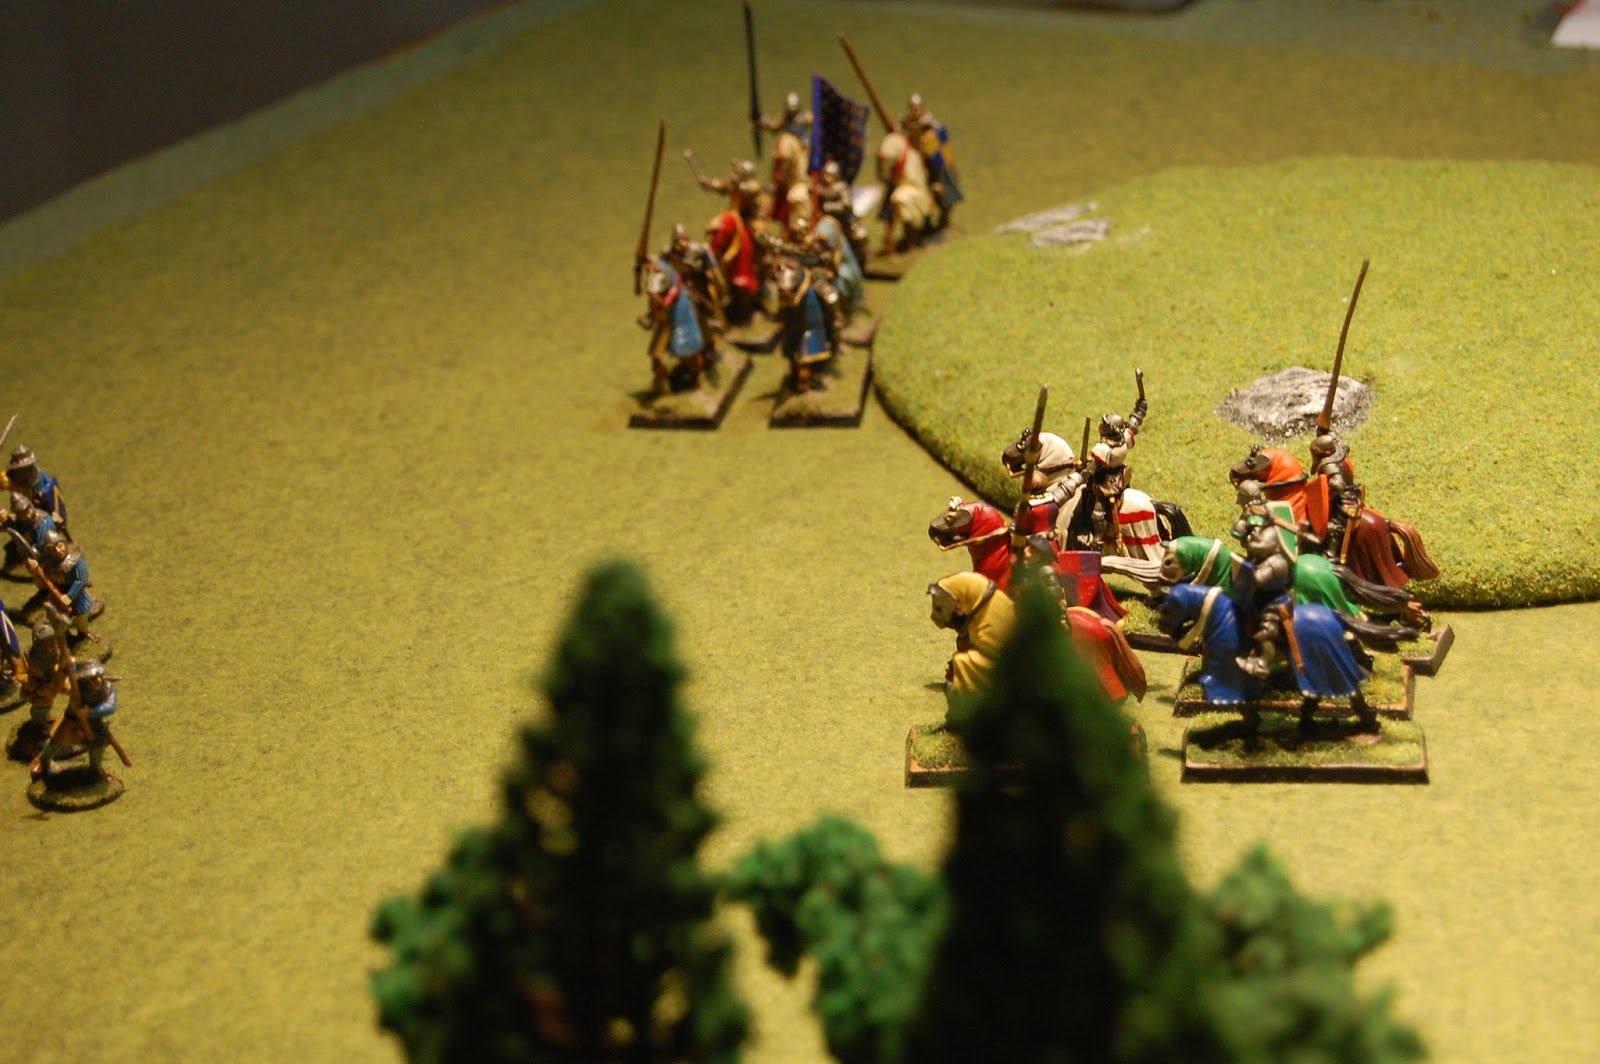
At center left, Papal mounted knights are on the attack.

At upper left, the Papal cavalry has been effectively repulsed.
The two great masses of infantry now move towards each other.  Archery is exchanged and several attacks and counter-attacks take place.  The Papal force get the better of the Imperials this time around.  

Imperial infantry advances.

Papal archers in the face of advancing Imperial infantry.
Papal archers get out in front.

The Imperial and Papal cavalry having fought to a draw on one flank, the infantry masses trundle towards each other in the center and opposite flank.
Endgame or close to it. Papal forces have routed almost the entirety of the Imperial left.
We played until 10 of the starting 26 units had been removed  (regardless of side), and then counted up how many units each side had remaining.  Papal forces eke out a victory, 9 to 7.

Using 10 and 5 dice instead of 12 and 6 worked just fine.  I thought it would really slow figure removal but the whole game was played in about 80 minutes so if it was slowing the results, I could not tell.  We did not have leader figures so the +1 to courage checks that would have conferred was not in effect - I think this might have made a big difference. A few of the DSG foot knights are a perfect pose to be converted to a standard bearer, so I may have to make some big banners for them, and those can be used to designate leader units.

Thursday, April 2, 2020

Medieval Battle in 54mm

I have been collecting 54mm medieval figures sporadically for several years, but recently I had some rather good look with some bulk purchases from a seller of "DSG" figures in Argentina, and accumulated a rather lot of archers, spearmen, and foot knights for a reasonable price (I thought). DSG figures are prepainted and similar to Britains Deetail plastic figures but are a little bulkier and unfortunately have plastic rather than metal bases. This is problematic as some are not balanced particularly well and have trouble remaining standing. One solution might be to cut the tabs off the feet and then superglue the figures to the bases but this is rather time-consuming endeavor. In the short term, I used a little hot glue to temporarily multi-base them to cardboard movement trays.

(Above: Halfway through the first turn. The right side (me) has not moved yet.
Left side (Sebastian) is shifting his deployments
)

So after years in the making I finally put together a little game. Because I had a copy laying around, and had never tried them, I decided the old Warhammer Fantasy Battle (4th ed.?) rules might be a good fit.While it was refreshing to not make activation rolls for a change, I found the combat system clunky and disappointing. It did make for a quick game, however, which for rules somewhat primarily intended for tournament-style gaming I guess means it does what it says on the box?


(Above: Deetail knights on the right, supported by DSG spearmen on the left)

It was a pretty short and not terribly interesting game, with my knightly retinues getting fairly trounced.  But they are fun to push around.  Quite a few pictures...


(Above: I do like these DSG archers, though.)


(Above: the big melee in the center gets underway)


(Above: In upper left here you notice that Sebastian's Saracen mercenary horse has pushed through well behind my lines)

(Above: And here in the center you will see that his spearmen have also now broken through... Meanwhile, in the upper right corner my knights remain inexplicably tied down in melee with his archers...)


Perhaps I will try some temporary individual cardboard bases, for use with Song of Arthur & Merlin  or a modified Lion Rampant

Monday, January 8, 2018

Somewhere in Italy, c.1040s

On Sunday we tried out a sort of 'big battle' or 'convention' variant of Lion Rampant.  Something Gabe and I have been chatting a lot about lately is trying to escape the 'Anglo-centric' orbit of a lot of wargaming – in this case it meant playing a dark ages type of game set in continental Europe and not in the British Isles.  This was pretty easy to do, since Gabe has managed to end up with a rather large collection Normans and Bretons, and the particular look of these models (nasal-helms, kite shields) is essentially universal to the European continent in the 10th and 11th centuries. 

The purpose of this "try-out" game was for Gabe to get a good inventory of all his continental figures, as well as to try out some add-ons to the Lion Rampant rules which we felt would add more continental flavor, as well represent "big battles".  For my part, I am interested in (eventually) getting into some 13th century feudal armies (Frederick II, the Guelphs and Ghibellines and all that), and this game presented opportunity to get a feel for that kind of game.
 
After an inventory of all the available figures, the initial set-up involves 38 points per side, consisting of the following: 
  • 2 units of mounted men at arms, each with Drilled upgrade ('Milites')
  • 3 units of mounted sergeants
  • 1 unit foot sergeants
  • 1 unit crossbowmen
  • 1 unit archers
I contributed/substituted some dark ages Scots cavalry and some time-traveling Hussite crossbowmen to bring some units up to strength.
 
I deployed my army (which I declared to be that of the Count of Naples) in a historical manner, with a first line of all the infantry, a second line of the mounted sergeants, and a third line of my Milites. 


Gabe (playing the Norman Hautevilles) deployed his infantry to one flank his milites and sergeants to the other.


Our rule-modifications were as follows (mainly porting over select rules from Pikeman's Lament): 
  • No figure removal.
  • Zone of control for friendly units reduced from 3" to 1" (as in Pikeman's Lament)
  • Each side had two leaders instead of one. 
  • Leaders confer a +1 to activation roles to units under their command within 12" of their unit, in addition to their regular +1 to courage checks (as in Pikeman's Lament)
  • Lion Rampant limits on number of types of units you can have are disregarded.
Scenario was loser would be first side to lose half its points worth of units.  38 points per side so magic number for both sides was 16.  The rub here was that the Milites, which are mounted men at arms with the Drilled rule (so no wild charge), are the most powerful units on the table, but also the most expensive (7 points vs. 4 of everything else) – losing even one Milites would bring your army almost half way to the breaking point!


(Above: look at those neat three lines advancing!)

With the +1 to activation rolls conferred by the leaders, both sides easily maneuvered forward.  I brought all three of my lines up neat and orderly.  Gabe incurred a few casualties on the first line with shooting and then attacked my crossbowmen with some Hautevilles mounted sergeants.  The crossbowmen lost the combat (3 casualties), but when they retreated back the sergeants in the second line were too close, and the crossbow lost 3 more as a result of not being to fall back in good order.  Then the foot sergeants in the center of the first line took some shooting damage (as a recall) and totally boffed the resulting courage check.  They fled the field (this a common occurrence for me!), and since the leader of the foot was in said unit, courage checks were incurred up and down the first line, and the Crossbows, being at -6 on such a check, also fled. The archers fell back in a Battered status.


(Above: hey, where'd that first line of infantry go?)

So just like that the entire first line completely cratered on me.  I tried to make lemonade from lemons and made it a bit interesting (mainly my Milites were able to get in and bloody up a few Hautevilles) but the archer unit repeatedly failed rally tests eventually it fled as well, which put me at 12 out of 16 points lost.  My final gambit was to have my leader's Milites attack the Hautevilles' leader's Milites and hope for a miracle. I did not get one.
 

(Above: End-game.)

Overall this was an entertaining and engaging game. The tactical decisions were interesting and fun, given that both sides were so cavalry-heavy, one had to constantly consider the long "reach" of those mounted units, which could easily cut horizontally across the field 10" and shift the emphasis of the game.  Some more foot sergeants would definitely enhance future games, to create a sort of anchor for each side.  As noted elsewhere, the use of a small dry-erase scoreboard, to keep track of how close exactly each side was to its breaking point, really clarifies and focuses the game (you can use the same thing for Hail Caesar, Black Powder etc.), and I highly recommend trying one out the next time you play Pikeman's Lament or Lion Rampant.

Monday, October 3, 2016

Early Imperialists/German Medieval Army

Lighting array in the basement being much more photo-friendly, I decided to document some completed armies that had not been photographed yet.  First up is these 'Early Imperialist' themed German medieval troops: mounted knights, some townsmen infantry, Bohemian archers, and some Hussite crossbowmen.  


The shield motifs are just itty bitty designed printed in color on paper which I cut out and glued on. Then I did my best to use paint to blend the paper to the rest of the shield.  With a "two-foot rule" they look good. If you stare at them you can see the cut line sometimes...


The Old Glory set IDs are ME-24 (German Knights with lances), ME-36 (Dismounted German Knights), DIF-20 (Hussite Crossbowmen), DIF-25 (Bohemian Infantry Archers) and DIF-26 (Bohemian Town Militia).


The German knights do not come with lances. I drilled out the hands and made my own lances from brass rod.


Now that its done I realize the personal appeal was the crests on the knights helmets.  These Germans line up roughly with the early-mid 1200s.  The Hussite crossbowmen are lets say 1420-1435. Neither of these are the best match for my medieval Battle of Crecy-era French which is square in between at the 1340s.  This is all fine from a Lion Rampant mash-up medieval game standpoint, but makes envisioning something larger and grander like a Hail Caesar! game a little harder to wrap one's brain around.  If I could do it again I would have built a Hundred Years War-era Flanders army instead...


Monday, March 7, 2016

A Gentle Stroll

We played the "A Gentle Stroll" scenario from Lion Rampant last night using Hundred Years War figures by Old Glory.  The English (Gabe) had to move half of their units from the upper left hand corner of the below picture to the lower right.  The French (me) were deployed in the other two corners and needed to prevent at least half of the English from escaping.


To help move things along, we "house-ruled" that both sides' leaders had the "Commanding" skill, which allows a unit to re-roll one failed activation per turn if within 12" of the leader model.  As units were spread out this was sometimes useful and sometimes not.


Both leader units clashed early on in a knight vs knight melee.  The French got the worse of it.


But by the late stages of the game both leaders were out of the game and the large French force which had trouble moving early started to roll into action.


Things got a little touch-and-go for the English for a second but in the end the billmen and a unit of archers slipped away.  We're not really sure who actually one because half of English units escaped but half were also destroyed.