Showing posts with label Developing The Portable Wargame. Show all posts

Saturday, January 21, 2023

Carthage vs Epirus - The Portable Ancient Wargame

With the holidays over, I finally played this last of my round-robin ancient games, this time between Epirus and Carthage.  The rules again were the Ancient Portable Wargame, as published in Developing the Portable Wargame.  I used a rough draft, more-linear, randomized deployment chart and terrain tiles to complete the set-up.  The army compositions were again based off DBA 1e army lists.  This confrontation was of course fictional, as it features a later-period Carthaginian army facing off against the Epirotes, but how could I resist elephants versus elephants?

Epirote war elephants melee with Libyan heavy cavalry.

The randomized deployment landed all the heavy infantry in the centers, with the bulk of cavalry not across from each other.  The Epirote elephants were on the Epirote left, while Carthage's elephants were in the center.

After first moves, Epirus on left and Carthage on right. At the top, Epirote elephants rolled for extra move distance and went ahead and engaged Carthage cavalry.

In the Ancient Portable Wargame, elephants (along with light cavalry and light infantry) can test each turn for extra movement.  The Epirote elephants passed this test on their first turn, so went right at the Libyan heavy cavalry.

View from the Epirote left flank.

The Carthaginians, having four cavalry units to the Epirotes three, sent one of their Numidian light cavalry units galloping along the back of the Carthaginian infantry line to lend support to the Carthage left, where Epirote heavy cavalry had already routed the Baeleric slingers and was starting to flank the end of the Carthaginian battle line.

Balaeric slingers are routed, Epirote heavy cavalry is behind Carthage right flank.

Wanting to strike while Strength Points were still fresh, the Epirote heavy infantry commenced its attack on the Carthaginians, despite the Carthaginians being in better position with part of its line atop a hill.

Epirote heavy infantry engages the Carthaginian center.

While the Carthaginian elephants in the center held the hill, the infantry on the Carthaginian left gave some ground.  On the Carthaginian right, the Libyan heavy cavalry, assisted by Iberian heavy infantry, routed the Epirote elephants, giving the Carthaginians an advantage over the single remaining Greek light cavalry unit.

At lower right, the Epirote war elephants are routed by Iberian infantry.

Said Greek light cavalry unit eluded destruction, however, and the Carthaginian massed cavalry did not make easy headway in attempting to flank the Epirote left. Worse yet, the Carthaginian chance cards had burned off a rally card early one before even losing any Strength Points, so the Epirotes were attacking from a position of confidence that they could rally some losses.


Epirote light cavalry and a phalanx of heavy infantry are working to turn the right flank of the Carthaginian infantry.

The Epirote infantry continued to make headway against the center and the Celts and Iberians at the flank ends of the Carthaginian battle line were taking a beating, while the victorious Carthaginian cavalry on the Carthage right had to abandon efforts to turn the Epirote flank in order to deal with the persistent Epirote light cavalry.

Epirote light cavalry brings Iberians to brink of routing
Epirote hoplites trying to flank the Carthage line.
Things looking shaky for Carthage, with both flanks curving back...

BUT THEN, a good turn of luck on the chance cards! Epirus draws "Loss of Nerve" which confers a -2 on all melee rolls. Although Carthage draws a "Confusion" card (no movement), many of their units are already adjacent to Epirote units, so no movement is needed to engage in close combat.

 Carthage's attacks go well enough bring Epirus roughly equally close to its exhaustion point.

Celtic mercenaries attack Epirote hoplites in flank.

Epriote line thrown back, but the Celts route, at top.

Although the entire Epirote battle line is pushed back, the Celts do route, having already taken too many lost SPs.

Celts on Carthaginian left are routed.

Carthaginian war elephants.

Fortune then seems to swing back to Epirus, with the Iberians on the Carthaginian left routing...

Iberians on Carthaginian right are routed.

But then Epirus draws its second Loss of Nerve card! Heavy Epirote cavalry is routed on its right flank.

Epirote heavy cavalry are routed.

And the pesky Epirote light cavalry is routed on its right flank.

Epirote light cavalry are routed.

And the Carthage come-back victory is sealed when a phalangite block is routed in the center!

Epirote phlangites are routed.

Defeated Epirote commander.

Victorious Carthaginian elephants!

The chance cards really delivered the goods for this game, making what was starting to look like a bog-standard Carthaginian defeat (wherein they basically just get pummeled by a more heavy infantry-focused opponent) into a narrow victory.

Overall, this round robin sampling of battles lays some good foundations for potential solo campaigns. the DBA 1e army lists created competitive armies and gave each their own character.  More importantly, with the 12-units-per-army system in place, the simple campaign system at the back of the 1e rulebook can be used.

Monday, December 19, 2022

Rome vs Syracuse - The Portable Ancient Wargame

Having played the first round-robin ancients game (Syracuse beating Carthage), now it was Rome's turn to have a go against Syracuse's hoplites and catapult artillery.  I again used the DBA 1e army list for Camillan Rome to determine the make up a Roman Republic army for the Portable Ancient Wargame (the rules to which are found in Developing the Portable Wargame).

Roman heavy infantry - the team to beat, for sure.

The Romans had seven heavy infantry units, two heavy cavalry, and two light infantry with javelins (the velites).  The Syracusans had five heavy infantry hoplite units, two heavy cavalry, one light cavalry, an artillery detachment, and two light infantry units: one with slings (2SP) an one with javelins (3SP).  Terrain was again randomized and I continued to toy around with the random deployment in three lines, with all heavy infantry in the center. 

Starting positions, Syracuse on right, Rome on left.

The heavy cavalry contingents for both armies ended up on opposite flanks, with the two Roman heavy cavalry squadrons opposed by the Syracusan light cavalry, while the Syracuse heavy cavalry was unopposed.

Roman light infantry and Syracuse light infantry and cavalry skirmish on Syracusan left.

The Syracusan artillery was ineffective this time, and the Roman velites performed very well and made a mess of things on the Syracusan left.  You would think this would clear the way for the Roman heavy cavalry to do something spectacular but they were rather ineffective instead.

Syracusan hoplites looking towards the light units skirmishing in the middle ground.

Roman Velites and Syracusans skirmishers in close combat.

The Romans were then able to start moving their heavies into sweep aside Syracusan light infantry. The Greek heavy cavalry, even unopposed by Roman cavalry, was not able to make effective attacks against the Roman right flank.

The Syracusan infantry line looks in better formation, but the Romans are making short work of the Syracusan lights, and the Syracusan cavalry to the left is not making headway.

Syracusan lights against Roman hastati and principes.

At last, the heavy infantry lines make contact...

Hastati flank the Syracusan left.

The hoplites of Syracuse are underwhelming.  The more numerous Romans start overlapping the ends of the Syracuse line and attacking hoplites in the flanks...

A big scrum.

Loses pile up for both sides, but Syracuse takes the worse of it, and the Roman's Italian allies anchoring the Roman left route a unit of hoplites to push Syracuse past 50% losses and give the Romans' the victory.

End of game. Syracuse right is quite disarrayed. Italian allies on left side have just dispatched a unit of hoplites.

Romans are tough to beat, the sheer number of heavy infantry tending to be resilient enough to make advantages in enemy light infantry or cavalry numbers moot.

A victorious Roman general surveys the field.

If I wanted to adhere more closely to the DBA 1e lists, the Syracusans could actually take another unit of hoplites and forget about the artillery. Unfortunately I do not have another unit of Greek-ish hoplites, so no such luck.  I do have a box of Mithridatic Heavy Infantry which should do the trick. Maybe the rematch would play out a bit different.  

Next up is Epirus vs. Rome. My Epirote army uses a lot of the same units as Syracuse, just phalangites and elephants added in place of some of the hoplites and artillery.


Saturday, December 17, 2022

Syracuse vs Carthage - The Portable Ancient Wargame

After feeling pretty put off from several days playing a totally inconclusive game of Three Ages of Rome, I reset the table and deployed a Syracusan army against a Carthaginian one for a more reliable game of The Portable Ancient Wargame, as set forth in Developing the Portable Wargame

Syracusans!  Almost this entire army has been painted for over a year, but never been moved in anger before!

For some time I have toyed with the idea of an ancients campaign set in Sicily, where Carthage, Syracuse, Epirus, and the Roman Republic all clashed at various times.  I recently finished painting some more Greek Hoplite types as well as some Greek light cavalry which at last made putting a decent non-phalangite Greek army on the table possible. 

Initial deployment, with Carthage on left and Syracuse on right.  Using the Grid-Based Wargaming ancients deployment system a bit, all heavy infantry is deployed in the center initially three squares deep (i.e., 3 lines).  This seems okay but the first thing both sides invariably do is fan out into basically a single line of infantry.

Using the old DBA 1e army lists, I assembled a Syracusan army whose main features were a lot of heavy infantry hoplites, supported by decent cavalry (heavy and light), light troops, and even some longer range artillery. Carthage was a usual mix of heavy infantry (Libyan, Iberian, and Gallic) with a little more light cavalry (Numidians) but no elephants at this time.


Both sides line up and advance.  The Numidian cavalry decides to tangle with the Greek cavalry, while the Syracusan artillery throws back the Iberian infantry and disrupts the Carthage line.

I calculated the Exhaustion Point for both sides at 1/3 of their total starting SP, and a Breaking Point (as borrowed from the Portable Pike & Shotte Wargame) at 1/2 lost SP.  This means that both sides can become exhausted, but one side loosing half its Strength Points causes it to route and hands victory to the other side.

Syracusan hoplites.

Plays of any variant of The Portable Wargame go quite quickly, less than an hour and sometimes done in 30 minutes.Victory tends to hinge on very small things you usually wouldn't expect. A common decisive moment, I've found, is whether one side can bring its heavy infantry to attack without suffering too many losses by its skirmishers or flank cavalry before making contact with the enemy heavies.  If a side can get its heavies in contact with the enemy while still at close to starting SP strength overall, they will have the necessary SP fortitude to take some losses but also to press advantages or exploit gaps as they become available. 

Syracusan catapult artillery. This is actually one unit, I just used to two models so as to fill up the 6" square more.

In this game, the Syracusan catapults seemed to perform well, dropping an early lost SP on one Carthaginian heavy infantry unit and causing another to fall back, disrupting the Carthaginian battle line. The Carthaginians had cavalry superiority on their right flank, consisting of two Numidian light horse units and one heavy Libyan cavalry.  Although opposed by a single Syracusan light cavalry unit, both Numidian units were routed.

Numidian light horse and Syrcusan light horse skirmishing on the flank.

Carthaginian battle line advancing.

This is after a few rounds of close combat between the heavy infantry lines. Some of the Syracusan hoplites have taken a beating but are still standing. However, the Syracusan heavy cavalry has hooked around the Carthaginian left flank and are attacking Gallic infantry from behind, while another cavalry is poised to attack from the flank after having finished off the Carthaginian heavy cavalry contingent.

These lowly Syrcausan staff slingers were key to destroying the Libyan heavy cavalry on the Carthaginian left.

The game was over but these Gallic warriors were very poorly situated at game end, with Syracusans on three sides.

Syracusan hoplites (Macedonian Hypasists by HAT).

Libyan and Syracusan heavy infantry in close combat.

Syracusans and Iberians in close combat.

End of game.

With Syracuse the victor, I set aside the Carthaginians and got out the Romans. Now a plan was hatched: a quick round robin series of games: Carthage vs. Syracuse, Syracuse vs. Rome, Rome vs. Epirus, Epirus vs. Carthage.  No Rome vs. Carthage game, they've played before already.

Monday, November 14, 2022

St. James Road

With Hook's Farm and Green Ridge played and resolved, it was time to try the third and final map from Featherstone's War Games (Trimsos River having been played back in 2020(!)).  The third map in question is the "Tank and Infantry Action on the St. James. Road" map/action report that accompanies the modern warfare chapter in War Games.

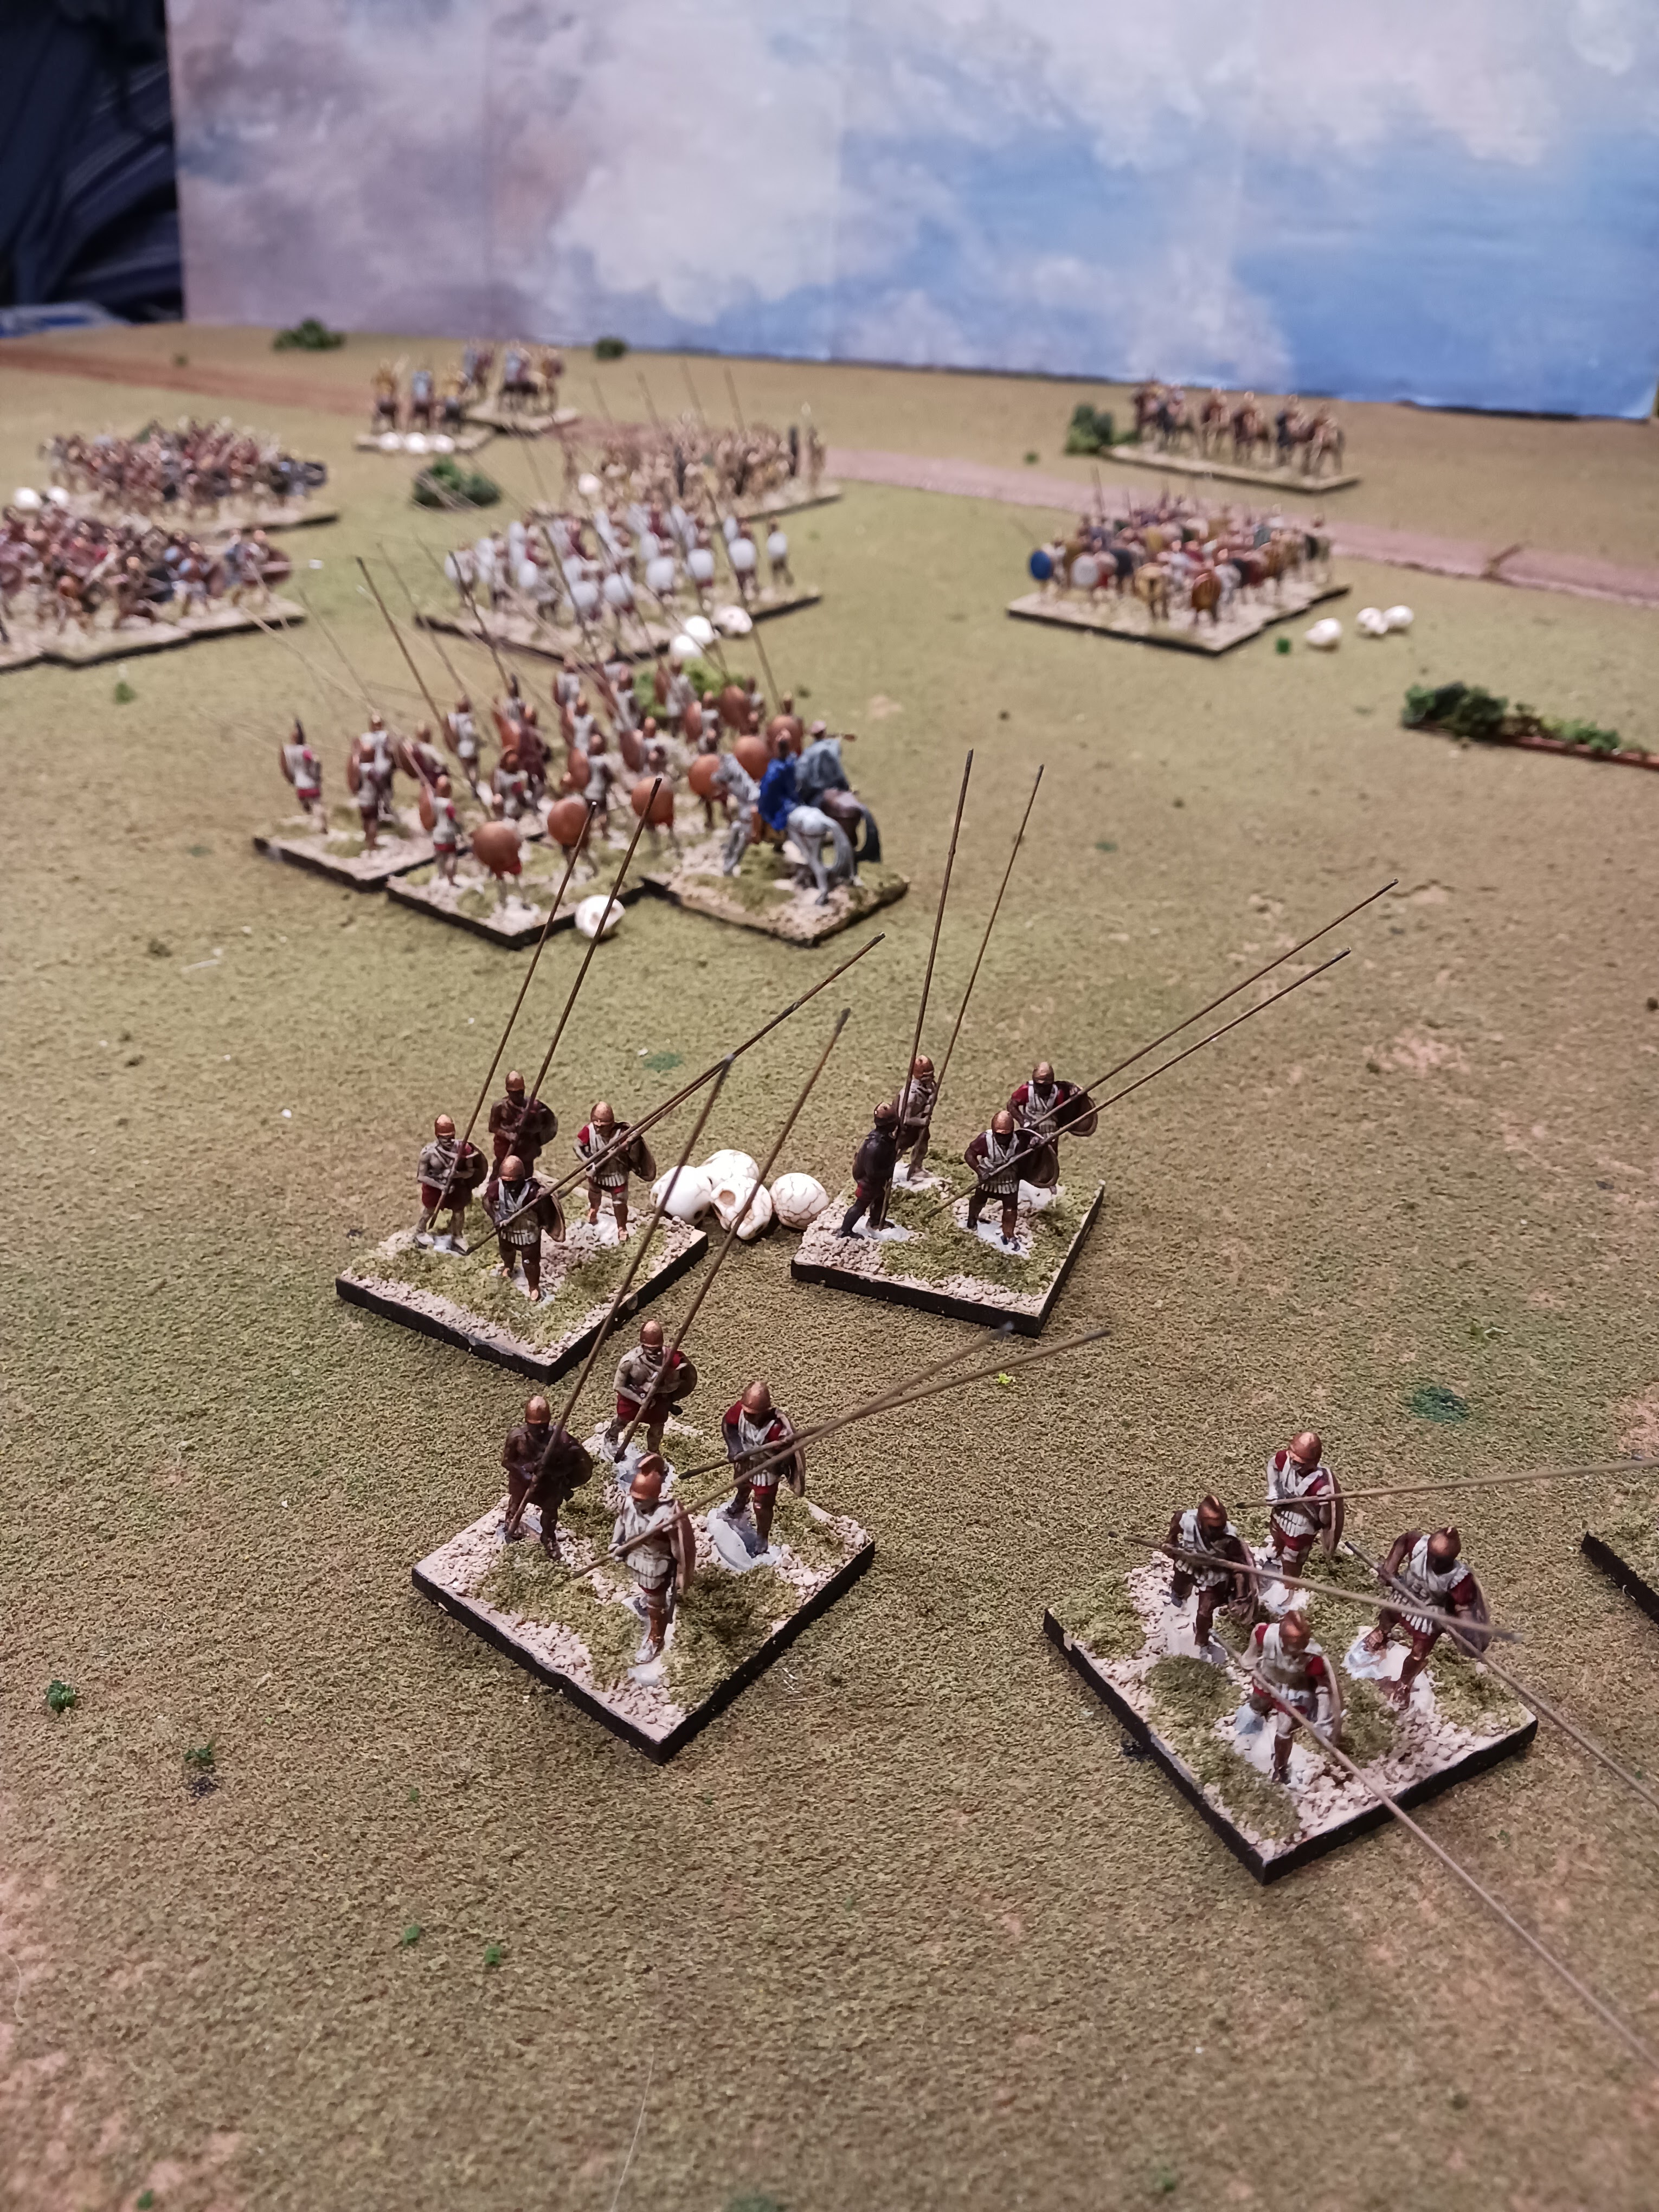
French starting positions.

There are of course no tanks in my Belle Epoque games, but, once again, the map from War Games is interesting to set up and play for any period. I even broke out and refreshed the foam hill pieces previously used in my Marston Moor game forever ago. Once the board was set up I diced to see which side each army was approaching from, and then used my randomized deployment table again.

British starting positions behind the embankment.

The British forces started entirely behind the embankment running their length of the table, while the French artillery was ideally situated on the French left but perhaps too much infantry was behind the thick woods atop the ridgeline.

French starting positions, mostly behind the woods.

The key positions were of course Copse Hill near the center of the board, which could both shelter troops within and and behind from enemy fire, and Red Farm, which was the sole "built-up area" on the board.

Looking towards French from behind the embankment.

Sides were exactly equal again (can't resist having more figures on the board), although I traded several British regular units out for Rifle Volunteers (King's Royal Rifle and Queen's Westminsters) and a company of Gurkas. In my head this reflected British bringing up reserve units due to heavy losses in prior two games.  I again used the same chance cards used in prior two games.

French infantry moves up into the woods.

Things got underway and the French moved infantry into the woods to defend the top of the ridge, and positioned their artillery neatly in a battery on the lower part of the ridge, facing Red Farm.

French artillery deploys at the edge of the hill.

The British mostly stayed behind the embankment (which was out of range of artillery completely), except for moving some regulars in to the Orchard.

British infantry moves through the orchard.

The Royal Foot Artillery attempted to deploy atop of the Embankment, while Maxim machine gun teams sprinted out to set up on Copse Hill.

British artillery deploys on embankment, while the infantry remains in cover behind.

As artillery unlimbers, British HQ surveys unfolding situation.

Early  ong-range French artillery fire is accurate however and pushes a British gun back behind the embankment, losing a limber in the process.  It took a turn for me to realize the British could simply use the second limber team to move both guns as necessary, and both guns were up and shooting from the Embankment in good time.

As the remaining limber repositions the other British field piece, the Westminster volunteer rifles move into support by the British regulars in the orchard.

Meanwhile the French had moved a Hotchkiss machine gun into Red Farm and were peppering the British regulars in the Orchard with fire.  The British field guns accordingly concentrated fire on Red Farm.

"Keep firing at that Hotchkiss in Red Farm."

First one hit and a lost SP, then another and the second lost SP, and the Hotchkiss gun was gone!

British artillery drops a casualty marker on the French Hotchkiss MG in Red Farm.

With the majority (4 of 6 companies) of the French infantry sitting in the woods atop the hill, the British sensed an opportunity, and so two companies of regulars and the Westminsters advanced to take Red Farm.  From behind the Embankment, the Gurkas started a march to over and up the road to Red Farm to act as an extra push.

French HQ observed the British taking of Red Farm...

When the French Hotchkiss was lost, the French moved one of the two companies on their left flank to try and hold or retake Red Farm (perhaps their field artillery, in each range and direct line of sight of the Farm, could offset British numerical superiority?).  However, the French drew a "Loss of Nerve" chance card (-2 on close combat rolls), so the British came at them hard, routing one French company and pushing the other before them to the base of the ridge.

A company of British infantry can now be observed at the base of the ridge itself while two more companies push forward from Red Farm.

Around the same time the Gurkas began shifting towards Red Farm the French had pulled a company of infantry out of the high-ground woods and had them move to reinforce the French left, which was now under a fairly sustained and concentrated assault.

The British kept lucking out, with the French artillery proving ineffective and a Rally card keeping the attack going as SPs started to mount up.

The British attack on the ridge at its most furious.

However, at this juncture, the French Hotchkiss on the ridge realized they were just barely in range of the Westminsters, and let lose several barrages into the Westminsters flank.

Gunned down and then routed, and the Gurkas not yet close enough to offer support, and the French reinforcing company almost close enough, the British assault seemed in danger of collapsing and perhaps turning victory into defeat. The remaining British limber had swung a field gun all the way across the field to the left of Copse Hill, and the Kings Royal Rifles and the remaining company of regulars had moved up behind Copse Hill.  In an attempt to put a squeeze on the French, both Maxim units dropped down off Copse Hill, putting them in range of the French infantry sheltered in the woods, and opened fire.

The Maxims open up!

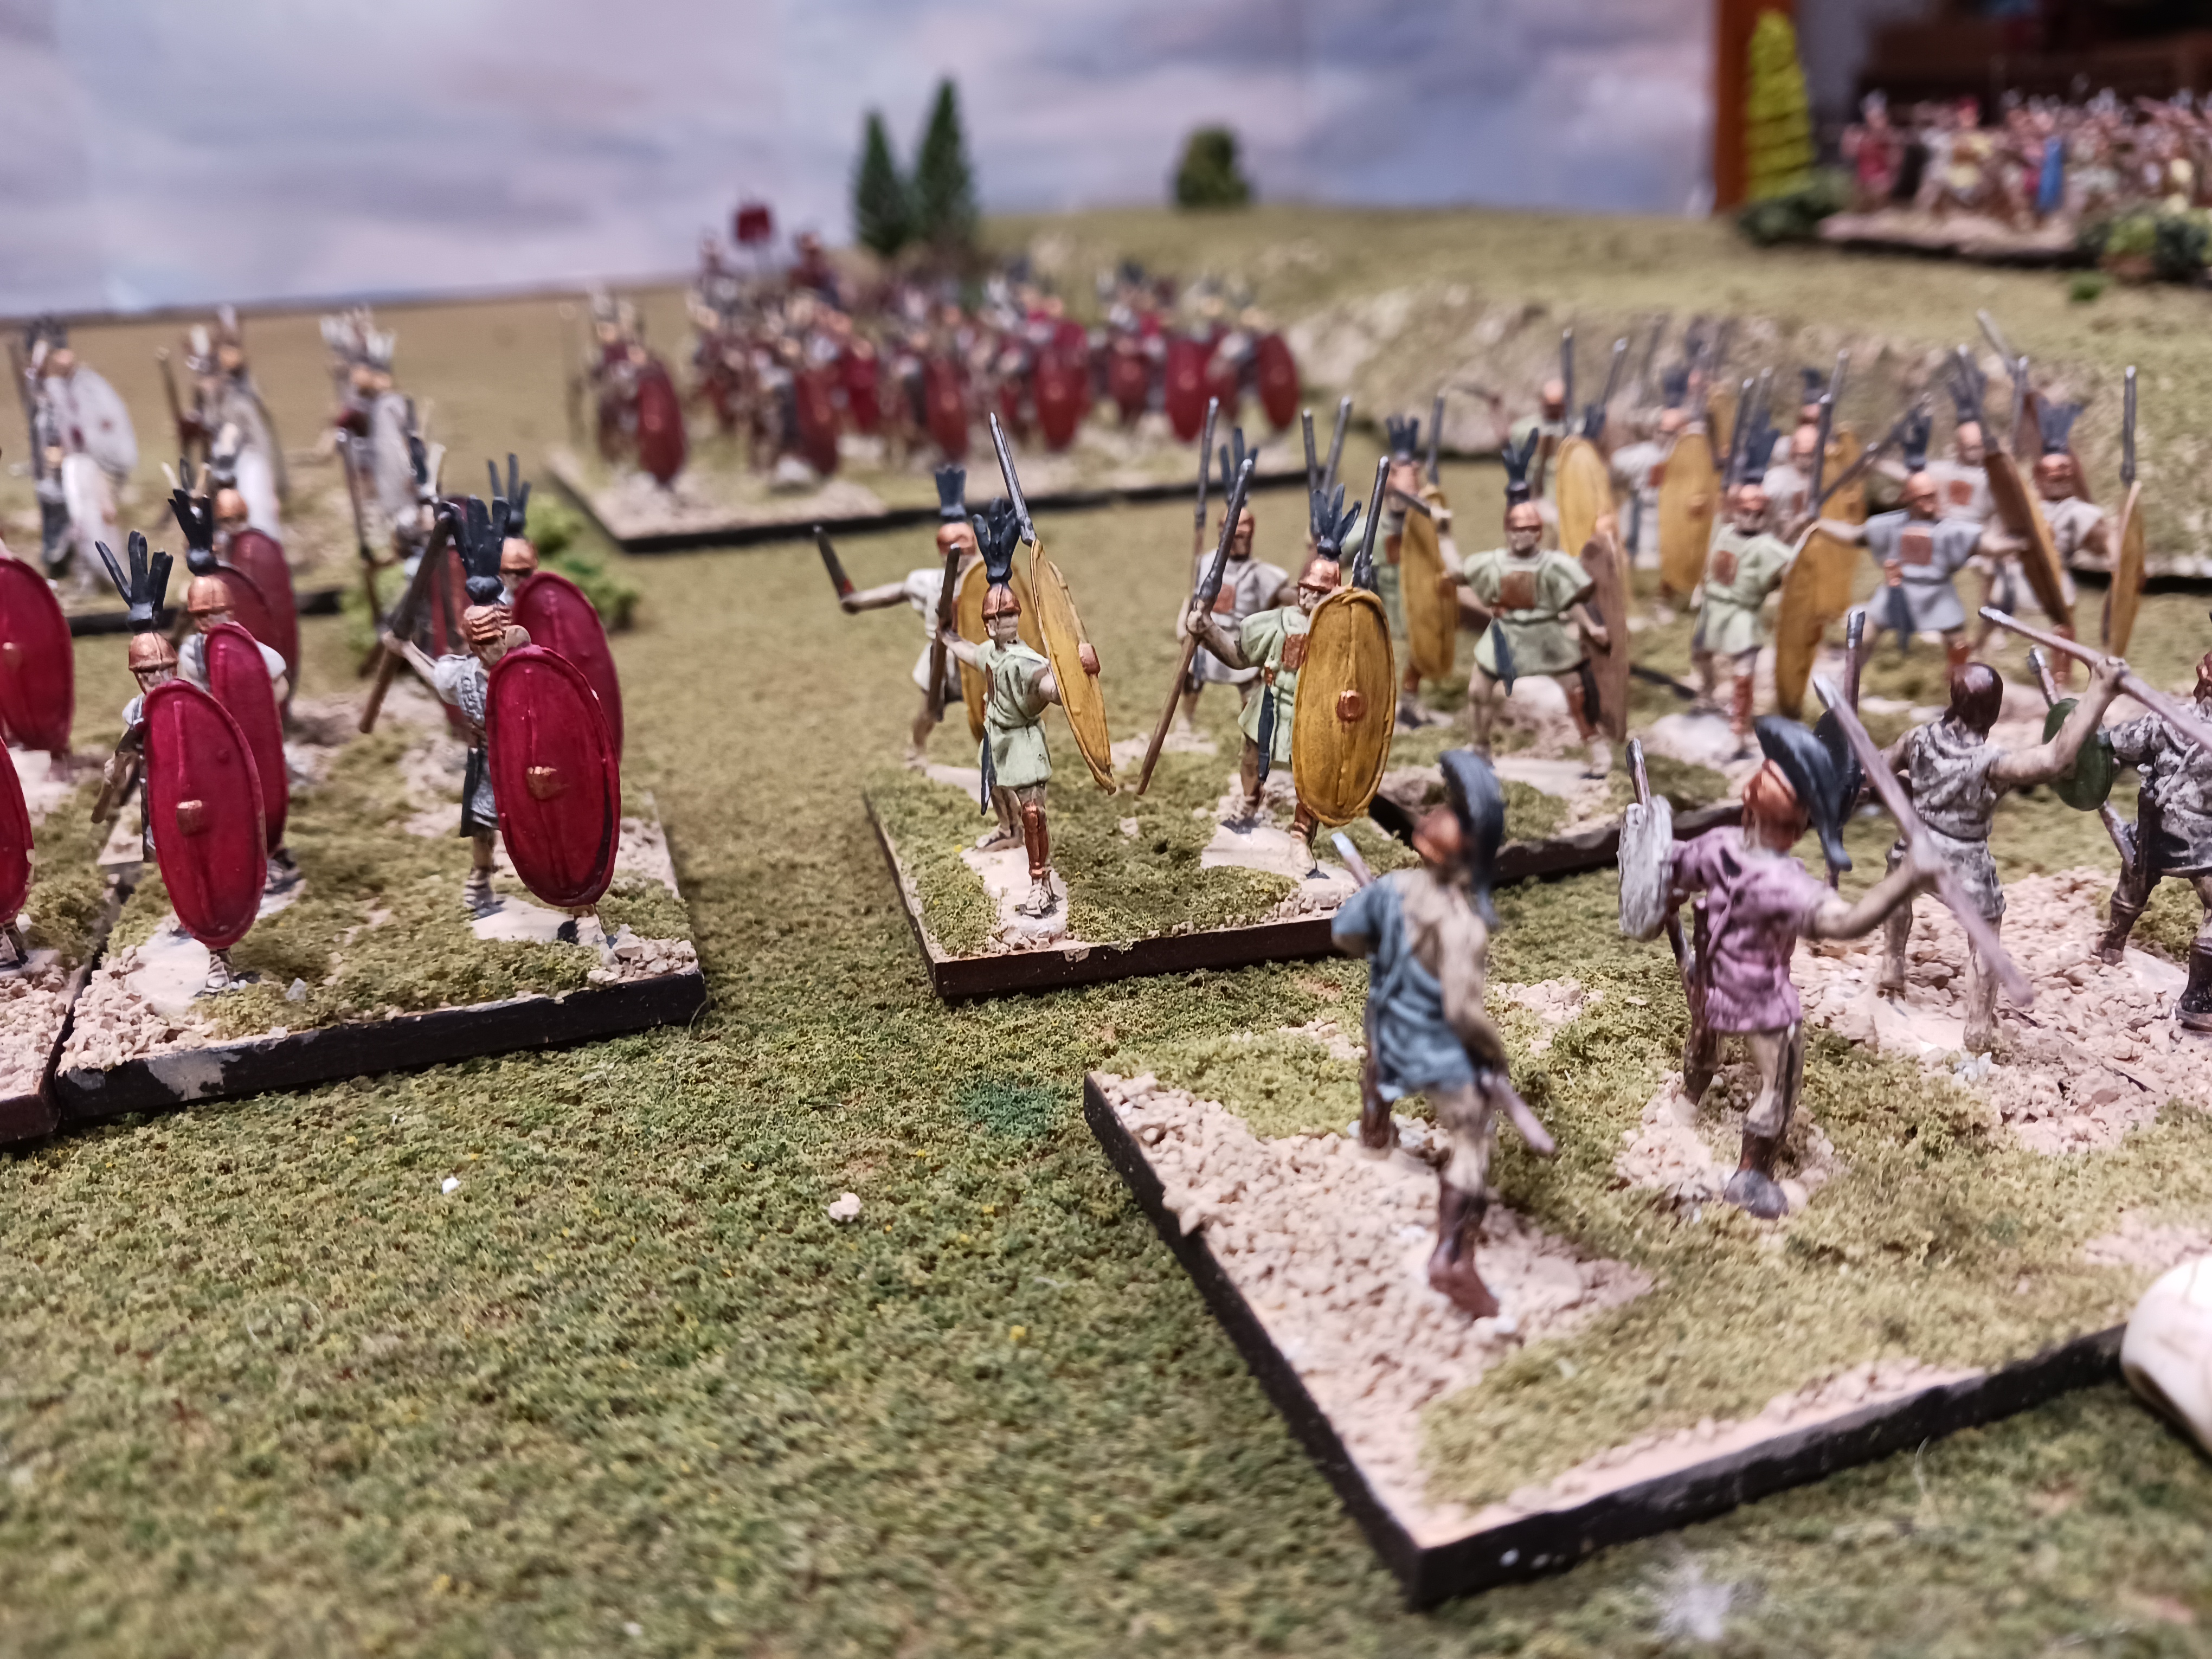
This was enough to push the French past their exhaustion point but did the British have the strength to drop them to 50% losses and win the game outright? At first it seemed possible as two regular companies sandwiched a French company in close combat and routed it.

A French company is routed between an attack from two directions.

But although the could no longer advance towards the enemy, they were able to pour fire onto the weary units that had been attacking the ridge.

The regulars are routed under heavy fire.

Both sides were now exhausted. The British fired into the woodline some more, but the French fell back instead of losing SP, so that front ceased to be the source of possible victory.


British at the base of the ridgeline, but the French have fallen back.

At this point, no infantry was in range of enemy infantry whatsover.  The British artillery also had no targets.

The French Hotchkiss gun that stalled the British attack.

The French guns could still target a sole maxim gun before Copse Hill.  But the British simply moved that unit over a square, and that was it.  With both sides exhausted and unable to advance, and with no targets left for shooting, the game to a close as a draw.

French HQ at the end of the battle.

British command at the end of battle.

Something you may not realize from the above report: this game was an exhausting 24 turns long!  This is mainly because both sides kept the majority of their forces in reserve, and either in cover or out of range, for most if not all of the game.  Indirect and direct artillery fire was the main action turn after turn after turn. Long range rifle fire was mostly absent, with deliberate commitment of troops to close combat at specific areas (Red Farm, the the lower ridge) being the main role for infantry.  The whole thing felt more like the battle of Sedan as described in The Debacle rather than a quasi-Napoleonic linear affair. 24 turns was a bit long for my tastes but this was otherwise a very satisfying game! 

I am not sure what is up next. I want to add engineers, cavalry (that will fight as mounted infantry, basically), and signal corps that can direct artillery fire from a distance, to the mix, but that will take time. I also have a copy of Featherstone's Advanced Wargames on delivery soon and perhaps a map in there will jump out and inspire me.