Wednesday, September 11, 2019

Battle of Celidon Forest (c. 493)

Continuing to play our way through the scenarios presented in the old (and quite excellent) Warhammer Ancient Battles' Age of Arthur supplement, we played the battle of Celidon Forest (Arthur's seventh battle). Joining the units on the table were Jamie's two freshly painted units of Picts and my two freshly painted units of late Roman Legionnaires. Based on prior games' experience, I tweaked several of the unit profiles and special rules.
  • Shieldwall went from -1 for enemy's to hit target unit on shooting and melee to just a +1 armor – the -1s were making shieldwalls to powerful. I also added that a unit with the Shieldwall rule simple made a Courage test every time it was the target of a melee or shooting attack. If it passed the check the shieldwall was formed or "held", but it if failed it either broke in the face of the oncoming assault or failed to "form up" for whatever reason. All usual modifiers (cumulative casualties, leader with 12", other special rules) still applied to the Courage check, which gave some nice nuance, with units becoming more and more likely to not "hold the line" as their morale was worn down with casualties.
  • The Gregarious rule (based on the "Warband 1 and 2" rules from WAB) was also dialed down a notch. Previously, at the end of a melee, a Gregarious unit received +1 to the resulting Courage check for every strength point by which it outnumbered or vice versa, so if the Saxons had 10 figures and the Britons 6, the Saxons would receive a +4. This is supposed to reflect a troop type who's confidence soars when they are doing well but crumbles when things don't look so good. In prior games this plus/minus was too "swingy", so it was reduced to a simple +1 if the Gregarious unit outnumbered its opponent, with an additional +1 if the Gregarious unit was still generating 12 melee dice and the enemy was only generating 6 (with a negative mod if situation reversed), so the max modifier was +2 or -2.
  • The Impetuous Charge rule (also based on the "Warband 1 and 2" rules from WAB) is now only checked if the unit is within 6" of an enemy unit. On a "1" on a roll of a d6, the unit charges. Otherwise you may activate as normal. This eliminated units trying to charge from 48" away!
  • Removed javelins from Irish ceithern units. Their base morale was also lowered by 1, added a rule where they received a +2 to courage checks if within 6" of their leaders' unit, reflecting the dependence of Irish ceithern to be inspired by a heroic leader.
  • Picts are Fleet Footed and Hard to Target, but like the Irish had the "Ferocious Charge" rule wherein they reroll all misses in the first (and only the first) melee in which they are involved in the game.
The late Roman legion units were profiled as regular miletes but with the Drilled rule, reflecting Briton or Romano-British troops who has been trained by a continental veteran or former Roman commander who had trained them in the Roman manner. Drilled allowed them to reroll a failed Courage check, either both dice or the lower of the two (including on Shieldwall checks).

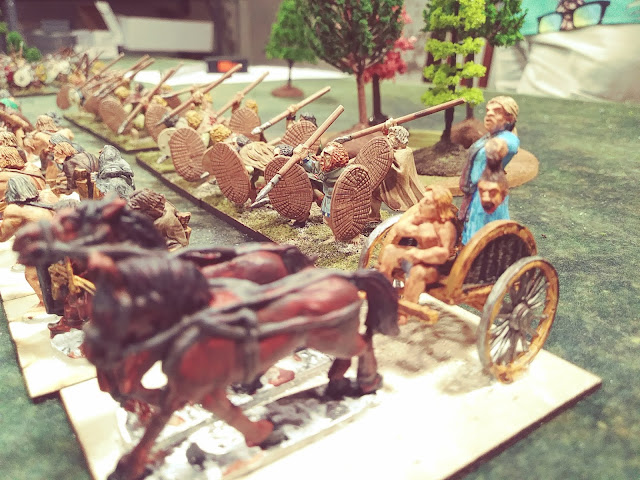
The Celidon scenario had the Romano-British army (played by yours truly) retreating from a failed raid through the woods, who are then set upon by the Saxons and their Irish and Pictish allies/mercenaries (Jamie played these). The Britons needed to get three units, or two if one included the "army general" leader unit, off the opposite table edge. For a strategy I decided to shift my entire force to the left and try and run up the table edge, hoping the opposite Saxon flank would fail to come across in time to make a difference.

(Above: starting positions, Romano-British/Britons on the left)

(Above: Romano-British milites)

(Above: Jamie's Pictish chief)

This strategy immediately ran into trouble because the entire Saxon force moved forward quite quickly while the Britons were still trying to maneuver to the left, so that the net result was the Britons had not advanced forward hardly at all by the time the lines started to hit eachother – the opposite side of the table suddenly seemed very distant!

(Above: Romano-British suddenly find a large number of Saxons directly in front of them!)

(Above: Saxons prepare to attack a Romano-British shieldwall)

Second mistake was the Britons held their cavalry back instead of just having those two units sprint to escape. My thinking was I wanted the leader attached to one of the cavalry units to hang around and lend his +1 to Courage checks. The other reason was that the cavalry might be able to help break up some Saxon units and allow infantry to escape.

(Above: late Roman Legionaries posing as more Romano-British milites trained "in the Roman manner")

(Above: Romano-British foot trying to move to the left even as Saxons swoop in)

However, by about halfway through (our game "clock" would stop when both sides had combined to lose 8 units), it looked like the Britons' plan was going well – a few Saxon attacks had been repulsed by sturdy Shieldwalls and two or three Saxon army units had already broken or were on verge of breaking. Then came a key moment – a Saxon unit attacked a drilled Briton milites unit, and Britons did not hold their Shieldwall (even with their reroll from Drilled!)! The unit was shattered.

(Above: Picts advancing on Romano-British right)

(Above: things towards the end - Romano-British pedyt archers not doing well...)
 
The Saxons pushed the attack, destroying another foot milites and a mounted milites unit, while loosing just as many in exchange – but the Saxons could afford to lose units in order to both delay the Romano-British advance and to "stop the clock". And sure enough, in the end the eighth unit was removed and not a single Romano-British unit was within even 30" of the opposite table edge. Arthur was heard to shriek:

"Now I know how the Romans felt at Teutoburg Forest!"

Wednesday, August 21, 2019

Stratton (1643)

I got a new foam-cutting hot knife, so I carved a nice big hill out of old insulation foam I took from a recycling bin. The hill was specifically for a scenario I had in mind based on the battle of Stratton from the English Civil War. Stratton is a good wargaming scenario as it involves roughly equally sized forces (mainly infantry), with the Royalists under Sir Ralph Hopton trying to take Parliament's (under coming of Lord Stamford) positions, which provides a good victory condition. I've been focusing my recent painting efforts on increasing the size of my ECW collection a bit to give me more flexibility in scenario design, and this game featured the first table action for four new units of musketeers.

This game used the same modified set of unit profiles as my Braddock Down game – the Royalist foot was divided up into four brigades of a unit of Cornish pike, a "Seasoned Regiment" shotte unit, and a falconet or demi-culverin, and included a brigade of three Harquebusier units at the center rear. Facing the eight Royalist infantry units were ten Parliament units in two lines atop Stamford Hill (two pike and eight shotte, evenly split between Seasoned and Trained Band regiments), four demi-culverins, and two '42-'43 Harquebusier squadrons (Trotters from the Pikeman's Lament book) at the rear.

(Above: starting positions)


The game was to be played until the cumulative lost units for both sides was greater than half (12 units), not counting ordnance, at which point, if Parliament had even one non-artillery unit still on the hill top, it would receive 4 victory points. The Royalists would receive 1 victory point for each unit on the hilltop. Victory Points were awarded per the rulebook for winning duels or as an appropriate result to rolling double 1s or 6s. I played Hopton and Pete played Stamford.

(Above: initial movements)

The Royalists attempted an ineffective opening artillery barrage, and then advanced to just out of musketry range of the Parliament lines, with the exception of the Royalist left which lagged behind (referred to hereafter as "Godolphin's company," after the historical commander at the battle.. Parliament responded by fanning its second line of infantry out to each flank, lengthening its lines and allowing more units a clear shot. The Parliament also headed towards Godolphin's stalled advance, while the Royalist horse moved to support the Royalist right, so a cavalry engagement seemed unlikely.

(Above: Grenville and Hopton's assault)

(Above: Grenville and Hopton's assault)

(Above: Cornish pike gain the hilltop)

After all this maneuvering, the two rightmost Royalist brigades (under Grenville and Sir Ralph hisself) commenced their assault on the corner of Stamford Hill (defended by Parliament officer Chudleigh), succeeding on all movement activations and quickly bringing two pikes, two shotte, and two horse units into close range at the base of the hill. The Parliament shotte units which had fanned out to lengthen the line on that flank provided ineffective fire, and were pushed back, and a company of Cornish pike became the first to top the hill.

 (Above: Hopton hisself!)

On the other flank, the Parliament shotte advanced from their hilltop positions and poured fire into Godolphin's company, routing his muskets, and his gun was captured by the Parliament harquebusiers. The remainder of the Royalist center (referred to hereafter as "Slanning's company") moved to support Grenville and Hopton's assault, while Godoplin's pikes and a unit of Slanning's shot backpedaled and kept the Parliament right from encircling Grenville and Hopton. Around this point I rolled double-sixes on an activation and received the boon of +1 victory point, which meant that the Royalists only need 4 units instead of 5 on the hill to win the game.

(Above: Parliament counterattack clears out Hopton, Grenville and Slanning's troops mass for another try)

(Above: Godolphin's pesky pikes are in the blue jackets in the center)

(Above: Grenville and Slanning's horse and Cornwall pike gain the hilltop)

MEANWHILE! Grenville's harquebusiers had finally positioned themselves at the base of the hill and charged. I worked hard to preserve the "Compulsory Follow-up" marker for both of these squadrons (one-use only), and they were able to further push back Chudleigh's defenders. Although things were going well, the superior numbers of Parliament were beginning to tell as fresh units of shotte, having successfully decimated Godlophin, returned to the hill to fight alongside Chudleigh's men. So, I took a calculated risk, and Godolphin challenged the captain of the Parliament horse to a duel! My theory was that if I won, I would gain another victory point and only need a mere three units on the hill to win the game – if I lost I would merely be back to where I started. Pete rolled his three dice and… three hits. I rolled my mine: 1 hit. Oh well.

(Above: getting close to endgame - two Royalist units on the hill, several more lingering around at the base and capable of gaining the hill)

Things then became very dicey, with both sides pushing hard. In the end, the Royalist assault came up short, with two or three units on the hilltop, but all the necessary units for the three remaining (and game winning) points just at the base of the hill.

(Above: endgame or close to it.)

Takeaways from this game:
  • The unit profiles I used in this and the Braddock Down game work very nicely. I did however tweak the artillery ranges a bit (more on that below). As previously note the profiles are pretty much straight from the Pikeman's Lament rulebook, but with teeny tiny changes to things like morale or attack activations and not to "to hit" target numbers, like Cornish Pike have a morale of 3+ instead of 4+.
  • About the artillery. This game led me to do the best online research I could, and I think I am going to try adding an "artillery barrage" phase takes place before a game starts. Source materials seem to heavily point to guns just not moving at all during a battle – they were set up and stayed put in that initial place. Perhaps roll 1d6+3 for each gun for available ammunition, then during barrage phase, the player can decide how much ammunition to expend at the start and save the rest for the actual game. During the barrage no activation rolls are made, just resolve shooting attacks by the artillery. "To Hit" values remain the same, but even if the best I can do is one casualty, I'd rather have five consecutive attempts and see if I can maybe weaken a unit or two at the start. The way things are now, the line of sight for shots narrows very quickly once your own troops move forward, and I don't like the guns creeping around 3" or 6" at a time like they currently do.


Thursday, July 18, 2019

Battle at Bassa's Ford (c. 493)

Continuing our way through the twelve battles of Arthur/Artos, we enjoyed another quick game of Lion Rampant (modified for games set in Arthurian/Late Roman England or the Barbarian West) using the Bassa's Ford scenario from the WAB Age of Arthur book.

The Britons were defending and began the game in a long battle line to the "south".  The Saxons (with their usual Irish allies/mercenaries) were coming on the board from the "north".  The Saxons would score victory conditions by trying to get as many units as possible across either the ford (some sand on the river near the center of the table) or the bridge located to the "east".

(Above: starting positions)

(Above: starting positions)

The rest of the Saxon army (played by me) was able to come on board fairly quickly.  The Britons (Jamie again) advanced their lines and formed up on one bank of the river. The Saxons also formed a line and advanced forward cautiously.  I initially considered attempting a general forward advance by the entire Saxon line, getting in range where my javelins could perhaps create a weak point that I could exploit, and I formed the Saxon battle line with this in mind.  However, at the last second I lost confidence and just blundered about half of the Saxon forces at each of the crossings. 

(Crossing at the ford is attempted)


I screwed up by not wanting to move at half-rate across the river, and instead tried to funnel Saxon infantry across the ford.  The Briton shieldwall of course held so an immediate bottleneck was created.  I should also have sent both Irish units at the ford since they are classed as fleet footed so could have dashed across the river created some chaos with their ferocious charge one-time melee bonus (reroll all misses).

(Above: Briton cavalry counterattacking the ford)

Instead I sort of muddled around the crossing, and the Britons used archery and some cavalry counter-attacks to chase off the assault.

(Above: Saxon right in disarray, nowhere near the ford.  At top, Saxon assault n the bridge has gone nowhere with massive casualties)
With the effort on the right flank a complete go-nowhere, the fresh units on the Saxon left attempted to force the bridge.  This was met with even less success as the Briton shieldwall held and Briton cavalry and archers again dispersed other attempts to cross the river itself.
While this game and the prior two have been pretty one-sided defeats for the Saxons, they were still fun games and had their touch-and-go moments.  The obvious fixes needed is that Briton archery is too strong, range might need to be reduced to 12" instead of 18", and the Shieldwall rule should probably be +1 Armor vs. shooting and melee rather than -1 To Hit, which probability-wise make the Shieldwall practically invincible.  The armor rating for the majority of infantry might also need to be upgraded to 3 instead of 2 in order to get a little more of a back-and-forth in melee, preferably taking a few rounds before one side breaks.  As currently written, units are loosing 4-6 casualties right off the bat, which is fast but perhaps too extreme.
Jamie had so much fun he went out and bought a Pictish army from Old Glory, in response to which I have started painting my late legionaries to bulk up the Britons some more.  More games in the Barbarian West forthcoming, no doubt!


Monday, July 1, 2019

Battle on the River Dubglas (c. 493)

We played another very fast game of Lion Rampant using some Arthurian/Late Roman variations based on the excellent WAB Age of Arthur supplement.  The set up was from the 'Battle on the River Dubglas' scenario in the back of Age of Arthur, with the River Dubglas on one flank.  We diced for position and the Britons (Jamie) chose to deploy to the 'north' at the base of some hills, leaving the Saxons (me) with Irish allies/mercenaries to deploy in low grounds alongside a marsh.

To start the game off there was a challenge between champions fight per the scenario.  We suited this to Lion Rampant by resolving a duel between invisible champions.  The Briton won and recieved the boon of a single automatic pass of a morale check once in the game (which he then forgot to use).  Victory was a simple rubric of first side to lose four units (out of seven) loses the game.

(Above: early moves, the Briton cavalry advancing at upper right)

Opening moves consisted of the Briton cavalry moving up aggressively on the Briton left while the infantry arranged itself on the right.  The Saxon left (three units) shifted hard to the left to try and dogpile on Briton archers anchoring the flank.  This went poorly, with the Saxons taking many casualties from the archers, then fairing poorly in a melee, followed by the leader's unit routing, throwing the entire command into disorder.  Further casualties and poor morale checks resulted in the loss of two of the three units in that division.

(Above: Saxon gedriht infantry)


Meanwhile, on the opposite flank, the Briton cavalry came to grips with the two Irish units, who had a "ferocious clash" rule wherein they could reroll all misses on the first melee of the game, which they each used to severely damage one cavalry and destroy another.  The remaining two cavalry units suddenly found themselves positioned in front of three Saxon and Irish units at under 6", allowing the invaders to rain javelins upon them, with the end result of all three cavalry units routing or being destroyed!

(Above: Irish infantry)

(Above: set-up for final showdown)

So, with each side having a flank thoroughly repulsed, we were left with four unit of infantry per side.  The Britons formed up and the Saxons surged forward.  Despite a strong attack by the elite Saxon gedriht, they were repulsed by a strong melee performance by the  archers, deciding the game in favor of the Britons.

(Above: Saxon gedriht prepare to charge Briton infantry)

Overall, as I expected, the Saxons performed much better in an open-ground battle than they previously did in the River Glein scenario, where they could not concentrate javelin fire upon the Britons.  Otherwise, the Saxon "gregarious" rule (at the end of a melee, this unit will receive a +1 bonus to any courage check resulting from that melee for every additional Strength Point it outnumbers its opponent by) seems rather redundant.  However, dicing for Impetuous Charge (on a 1) only if within 6" of an enemy had a nice intended feel to it.  Archers are also perhaps a little too tough in melee (defending on 4+!)

Thursday, May 30, 2019

Ravenna (1512)


I decided to run Ravenna at Enfilade because I thought it presented a unique scenario opportunity. Occurring on Easter Day, 1512, the Spanish had dug a defensive ditch, clearly hoping for a poorly considered French frontal assault on said ditch, as had happened at Cerignola a few years earlier. Instead, the French bombarded the Spanish lines with cannon fire for several hours ("the most violent cannonade between armies in the field that the world had yet seen"), until the Spanish infantry fell back into the low ground behind the earthwork, which presented an opportunity for the French to attack. Additionally, the French were able to present flanking fire from across the Ronco River into the Spanish heavy cavalry, who decided they would rather charge the enemy than stand around being shot upon. I thought this to be a perfect scenario, a "defend a position" game, but where the defenders don't start on the target position.

So, the set-up was both sides arrayed roughly equal distance from the earthwork, with some of the Spanish men at arms in a more forward position relative to the rest of the Spanish forces. The French moved first. Play would continue until both sides have suffered cumulative combined losses of 18 units – artillery pieces do not count towards this total. When the casualty mark is hit, the current side in play may complete its turn. Points would then be awarded as follows:


(Above: the initial set-up, perhaps after the conclusion of the first French moves. The French are on the right and the Spanish on the left.  Both sides' light cavalry are closest. The Spanish men-at-arms who started in a forward position can be seen at the very top center.)

1. For each of the three sections of the earthworks, the side with more units on the “platform” will score 3 points (a unit counts as on the platform if half its figures are on the platform). Artillery pieces do not count.
2. On each flank, draw an imaginary line continuing out from the front of the platform to the edge of the table, and another line running back from the edge of the platform to the “rear” table edge. The side with more units in this zone will score 3 points (see below).\
3. The side which destroyed/routed the most units scores 3 bonus points.
4. Each side receives one bonus point for each enemy leader destroyed or routed or slain in a duel.

The earthwork counted as slowing movement to half-speed, but not as rough ground (and thus affecting shooting or melee). Units could not target units on the opposite side of the earthwork terrain piece unless the shooting unit was on the piece. Units on the earthwork's platform gained a +1 stamina bonus if being attacked from the "French" side of the earthwork.

(Above: another move or two into the game.  The Spanish are manning their defensive works, and the French are beginning their assaults on the same.)

There were several custom Lion Rampant rules (or perhaps "streamlined" rules is a better way of putting it) in play:

1. Pikes were always considered to be in close order, unless they fell below half casualties or were disordered.
2. Landskneckt and Spanish infantry units (of any type – pikes, bucklermen, arquebusiers) had the "Tough" rule - When this unit fails a Morale/Courage test, the player must reroll one or both of the dice. The new results stands, even if it is of worse result than the initial roll. This rule is intended keep units on the table longer – and it works!
3. When any Landsknecht units fight another Landsknecht unit, "Bad War" ensues, and both sides will reroll all missed melee to-hit rolls.
4. Skirmishing cavalry (ginettes and stradiots) could move a full move instead of a half move when skirmishing, and neither suffered a -1 to hit on that ranged attack (both had javelins at 6" range). Both could evade but without a skirmish action, with that evasion being at the full move distance and not half.
5. Spanish Pike is classed as "Terrible" and can reroll missed Attack To Hit dice once. French Gendarmes are also Terrible but not Spanish men-at-arms.
6. All 'Wild Charge' rules were removed.
7.  If a unit failed its activation roll, and its leader was within 12", it could reroll that activation. Can only be used once per turn.

In history, the French were able to take the Spanish flanks, and then dogpile on the fierce Spanish infantry in the center to eventually win the day. In my game, the Spanish left (the men-at-arms) lingered around, bloodying the French Gendarmes to the point where they were reluctant to make a final assault on the flank. On the Spanish right, the Ginette light cavalry, having dispatched the stradiots, was not faring well against the French mounted crossbows and bowmen. At that moment, the Ginette commander decided to challenge the French mounted crossbow leader to duel, which the Spaniard won 2 hits to 1. In the following courage checks many of the French units fell back, and out of the flank zone!

(Above: a big beautiful hot mess of infantry combat! I hink the unit of French landsknechts have just successfully pushed back some Spanish defenders in the center...)

Meanwhile, the battle on the earthwork was a hot mess of miniature melees, with Spanish forces being pushed off the terrain piece, then counterattacking and pushing the French back out. At one point the French player controlling a small reserve of Gendarmes under the French commander Gaston de Foix himself, charged and poured up and over the earthwork itself! They in turn were repulsed by Spanish infantry. The French, however, were getting the better of the Spanish, and when the 18-units-lost mark was hit, the French easily scored the +3 bonus points for destroying/routing more units.

I then tallied the scores, doubled-checked them, and read them out loud. The French scored points for most casualties caused (3 points), barely winning the light-cavalry side zone (3 points), and four Spanish leaders slain/routed (4 points), for a total of 10 victory points. The Spanish scored 3 points apiece for the opposite flank zone and two earthwork zones (9 points) and two points for slain/routed French leaders (2 points), for a total of 11 points! It was pretty easy to realize that the duel won by the Spanish was a critical bonus point! Additionally, the game could have easily gone to the French, either by securing one more zone or by simply winning the duel they lost!

As an observer and non-player I thought this game was pretty exciting to watch. I would run it again except that it doesn't fit on my home table and I'm reluctant to haul all the miniatures elsewhere to play it!

I did not take many photos, but here are some that other people took...

(Photo by Dean Motoyama

(Photo by Kevin Smyth)

Wednesday, May 29, 2019

Enfilade 2019

Last weekend I again attended Enfilade!, the annual NHMGS convention, in Olympia, Washington. Like last year I ran two games in the two sessions on Friday and participated as a player the rest of the weekend.

My first game was the rigorously playtested Isola della Scala (for six players). While the first playtest, while not completed, resulted in a fairly balanced result, and the second result (run at Ambuscade!) saw a Venetian victory due to some spectacular dice-rolling, the Enfilade-version of this scenario saw the French absolutely steamroll the Venetians, destroying many, many Venetian units and burning many, many tents! Fortunately (?), the reason for this was evident to everyone involved (including the Venetian players, who, if they were feeling put out by the table results, did a great job of concealing it): some bad dice rolling (the Venetian center did not wake up quickly enough) and some extraordinarily bad dice rolls on the Venetian right (which needed to make a stout defense of the camp). As such, the game was over in just barely 2 hours. This really put a cloud over the rest of the weekend for me, because when you host a game you want it to be competitive for both sides.

(Above: things underway in the Isola della Scala game)

(Above: things underway in the Isola della Scala game)

(Above: the French close in on the Venetian camp)

(Above: participants participating)

(Above: three tents set afire)


(Above: my, that's a lot of tents on fire!)


(Above: someone else's pod-racer game)

My second game was the Battle of Ravenna (for eight players), which I had only done a playtest-by-proxy for using the Barletta scenario. This game was much more satisfactory, with interesting and compelling actions on the flanks between the French and Spanish cavalry, and an real slugfest between masses of infantry over the Spanish earthworks in the middle. While the Spanish took more casualties, they were also able to secure more victory conditions, including winning the game's one and only duel between officers (each officer killed/destroyed/routed was a +1 bonus point) which was effectively the tie-breaker as the Spanish won the game 11 points to 10!


(Above: Ravenna game underway)
 
(Song of Drums and Tomahawks game

(Above: Ravenna game)

(Above: Ravenna game, the first French troops are assaulting the earthwork)

(Above: Dave Sullivan's Irish rebellion game)

Saturday I played in Dean's Black Power 2 game, Sven's Deus Vult game, and Doug's Hussars Rampant game. Hussars Rampant is a variant of the Lion Rampant Doug has cooked up that is for nothing but Napoleonic cavalry, and I found it very enjoyable.

(Above: Dean's Black Power 2 game)

(Above: diorama from Dean's Black Power 2 game)

(Above: diorama from Dean's Black Power 2 game)

(Above: diorama from Dean's Black Power 2 game)

(Above: artillery and crew from Dean's Black Power 2 game)

(Above: these three units of American militia in Pete's Rebels & Patriots game were painted by me!)

(Above: Sven's Deus Vult game)

(Above: Sven's Deus Vult game)

(Above: Doug's Hussars Rampant game)

(Above: Doug's Hussars Rampant game)

(Above: Doug's Hussars Rampant game)

(Above: Doug's Hussars Rampant game)

(Above: Doug's Hussars Rampant game)

Sunday I played in Bill's Men Who Would Be Kings game set during the Boxer Rebellion (sorry, no pics).

I sold some old Dark Ages plastic figures at the Bring & Buy, and managed to pick up these 122 Swiss Renaissance figures at a great price. I don't really need them (wish they would have been at the B&B last year!), but you can never have big enough armies, amiright?